![MenuMetric_500_130.png]](https://support.menumetric.com/hs-fs/hubfs/MenuMetric_500_130.png?height=50&name=MenuMetric_500_130.png)
MultiUnit deals are available in the MenuMetric system. You can use just one menu to present your products for a multiple-unit sale. By using this tool you will make your sales process more efficient and less overwhelming for your customer. In this article, we will bring you through the MultiUnit Deal process step by step. We want to help you use our system with ease! Let's get started!
Step 1. Import your deal or manually create your deal.
If you are unsure how to import your deal, read this article for instructions. Importing a deal from your DMS.
If you are making the deal manually, follow the steps below.
- Select the
 button on the Menus Page.
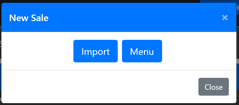
 - After you have selected the +New Sale button, a pop-up will appear. In that Pop-up select the blue Menu button.
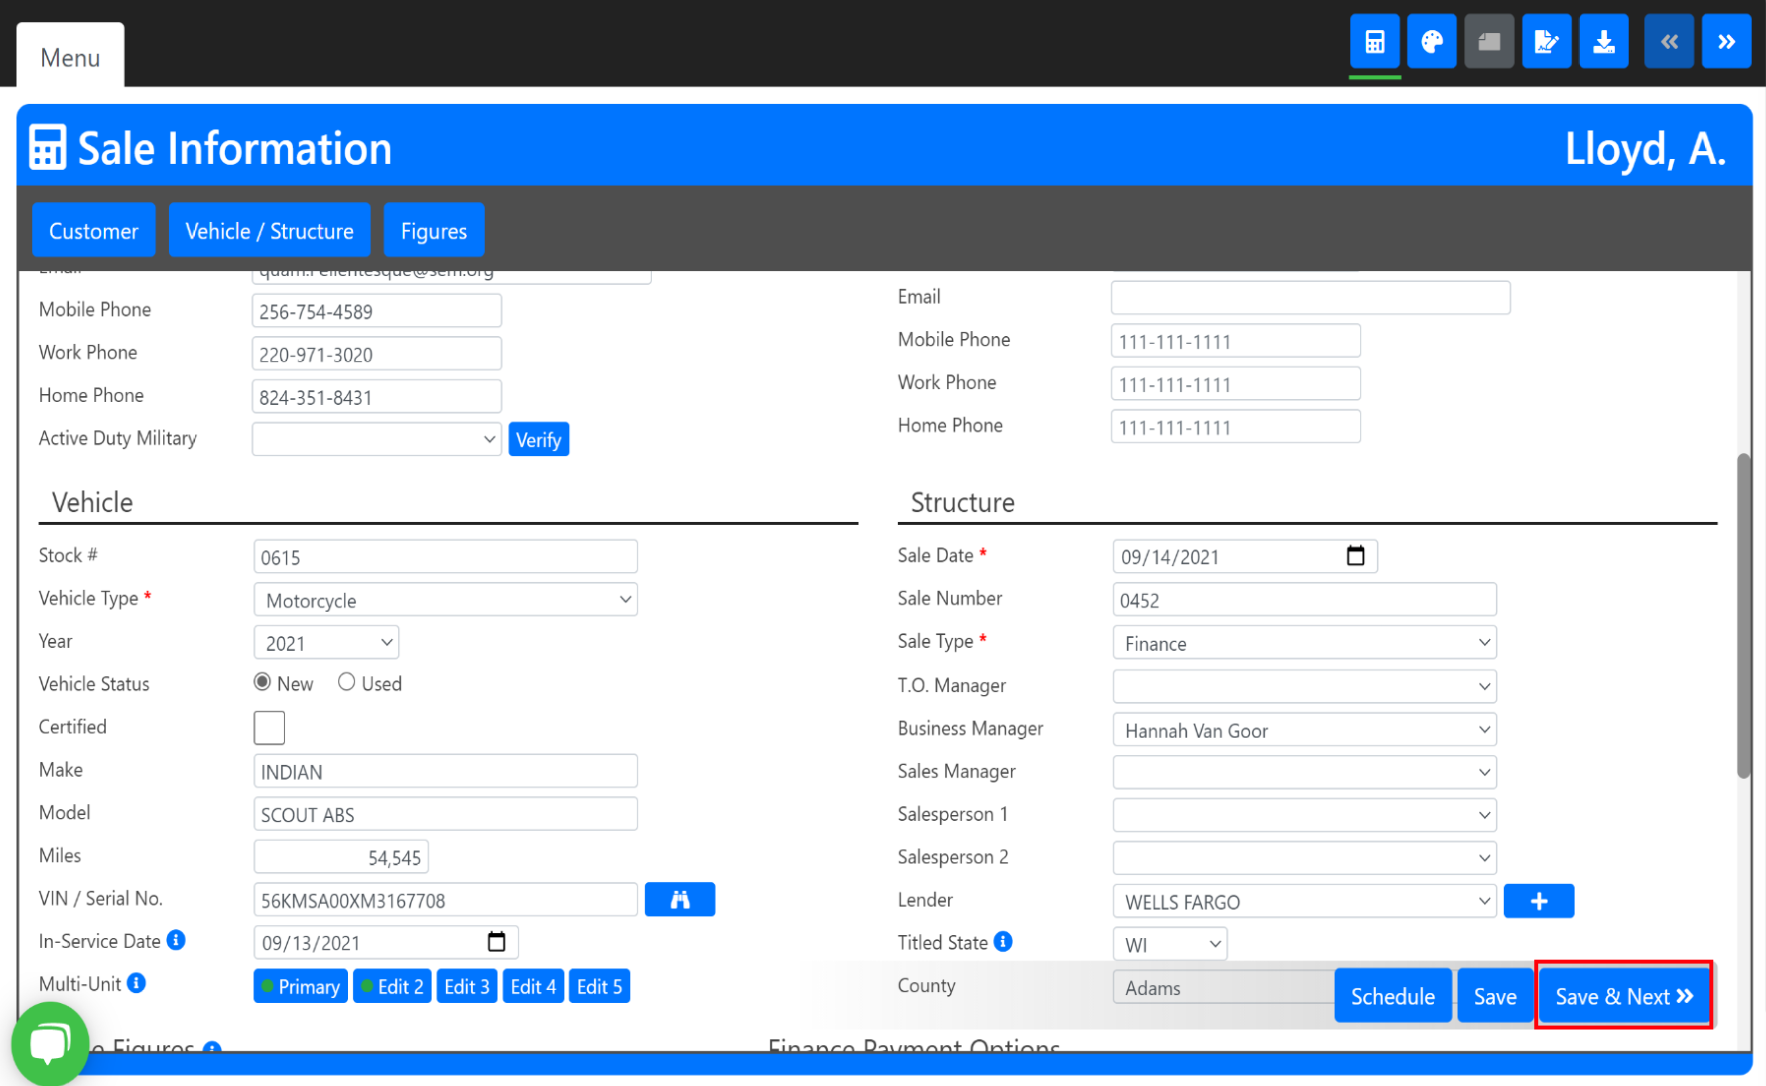
- You should now be on the Sale Information Page.
Step 2. Check your Vehicle Information.
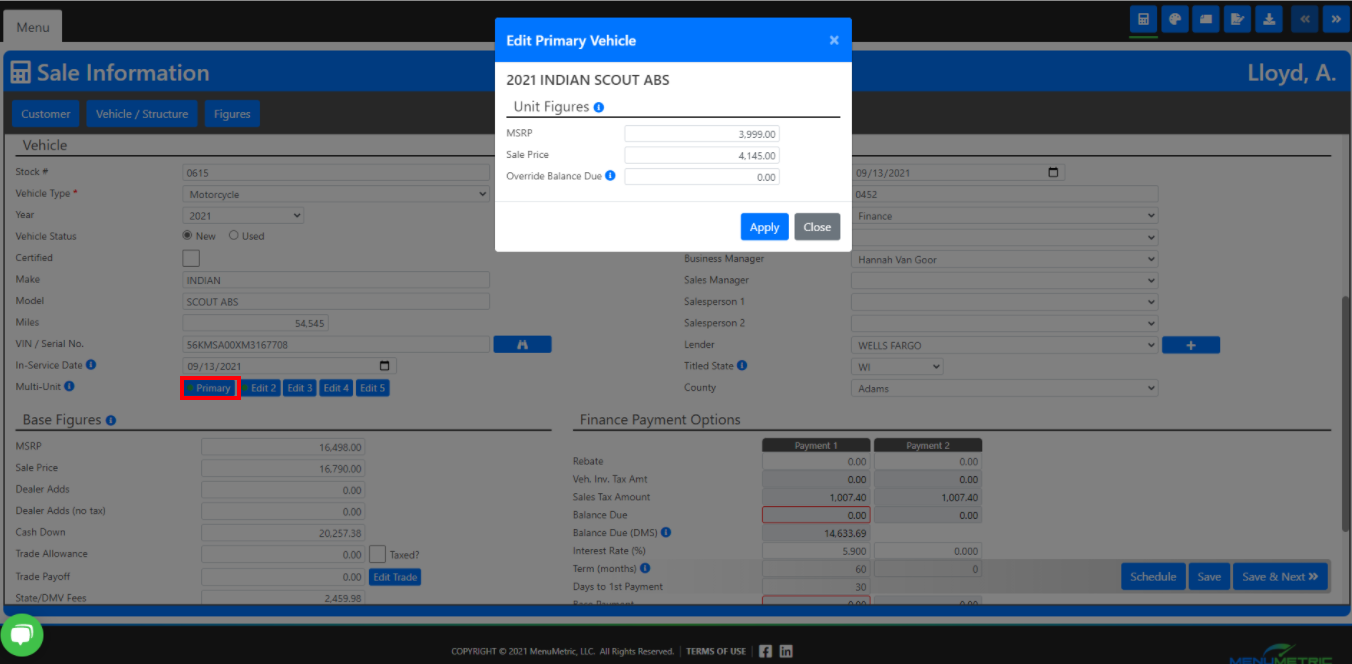
When you enter the Sale Information Page, you will see the Primary Vehicle Information under the Vehicle heading, as you would see on a single deal. You can access the Primary Vehicle's Unit Figures by clicking the blue Primary button located underneath the In-Service Date field.
Step 3. Adding Units
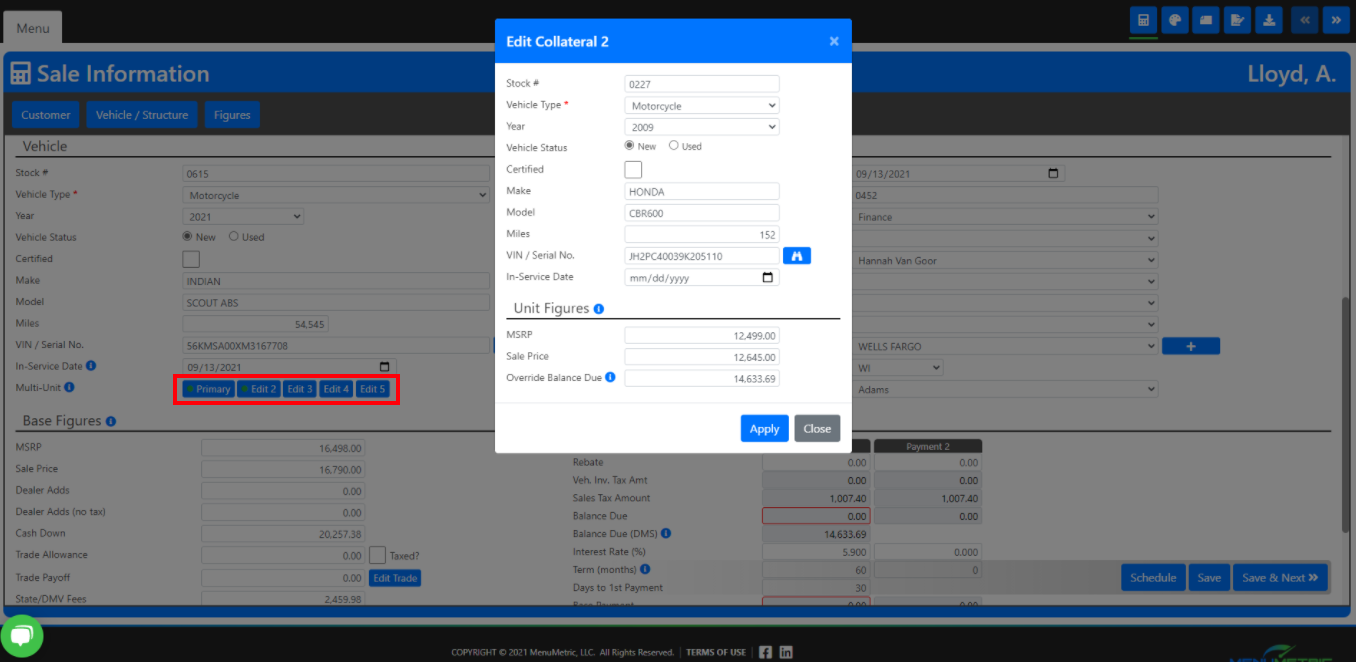
- Clicking the blue Edit 2 button will bring up the second unit's information, including its Unit Figures. The green circle on the Edit 2 button shows that there is information entered for a second vehicle.

- Clicking the Edit 3 button will show the third unit's information, and so on.
Note: You can make deals up to a total of 5 units!
Step 4. Transition from the Sale Information Page to the Layout Page
After you have all of the information entered for all units in the deal, click the blue Save & Next >> button to go to the Layout Page where you will create your menu. 
Step 5. Build Your Menu
You can build your menu by individually selecting products in each row's drop-down or you can save time by using pre-set templates.
Learn more about building templates.
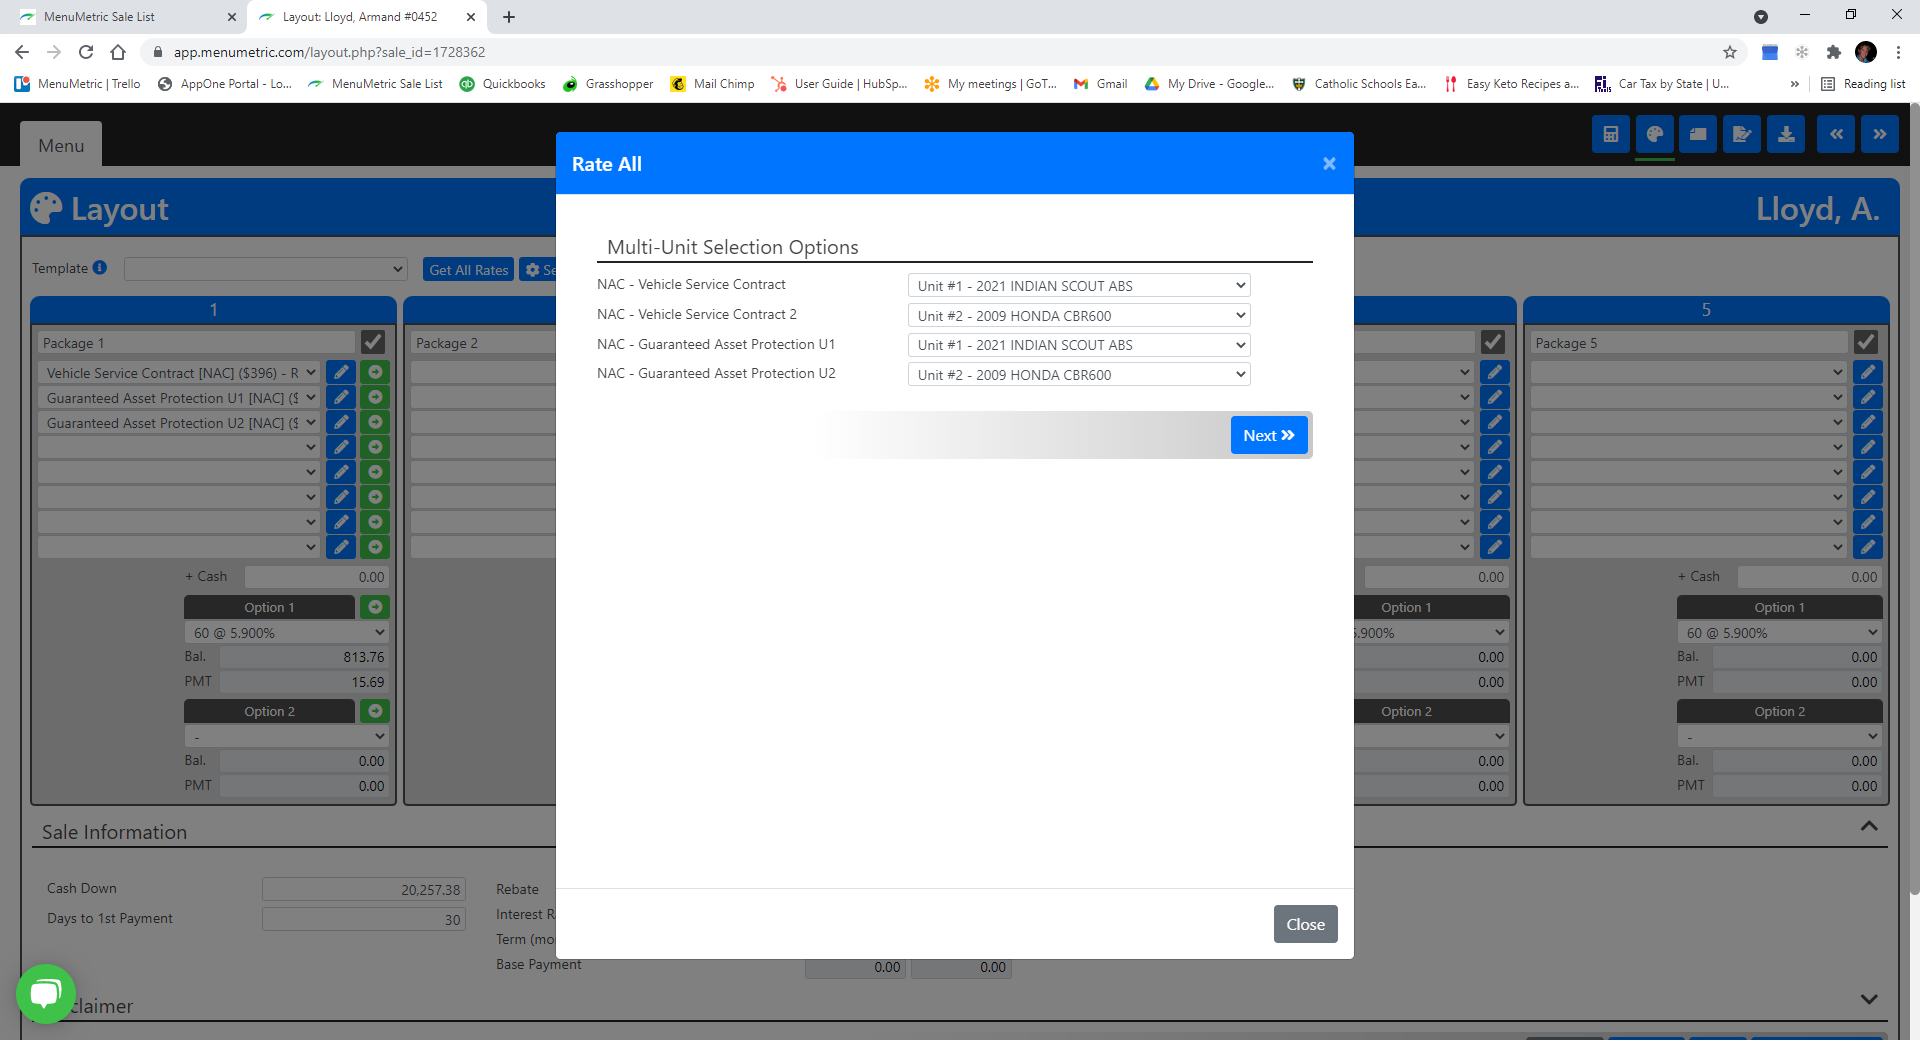
Step 6. Get All Rates
Clicking the Rate All button will bring up all products that are available in the account. Each product will have a dropdown next to it, where you can select the unit that you wish to pull rates for. All units entered on the Sale Information Page will show up in this dropdown for you to choose from.
- Select the correct unit for each product and click the blue Next >> button to pull the corresponding rates.

Note: Unconnected products will not appear in the Rate All pop-up to assign the Unit. You can assign your unconnected products to a unit from the Logging Page for reporting.
See the Unconnected Products section at the bottom of the article to learn how.
- Continue through the rating process as you normally would.
Step 7. Select Coverages
- Select the desired coverage for each product.
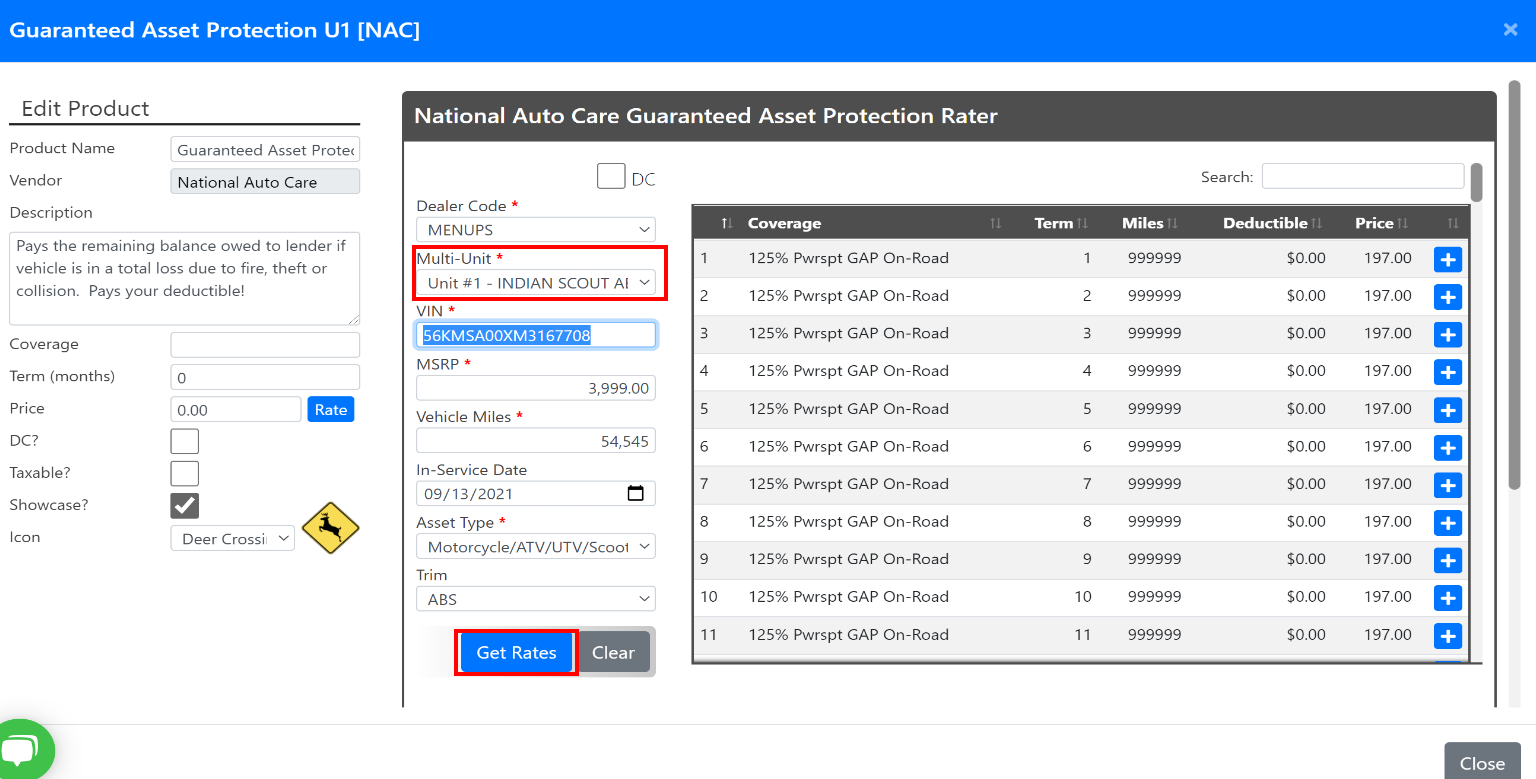
- Open the product you wish to select coverage for by selecting the blue pencil button in the product row.
 A pop-up for that product will appear. In the pop-up select the blue Rate button.
- The pop-up will transform to look like the image below. You can select your desired coverage by pressing the blue + button.

- Open the product you wish to select coverage for by selecting the blue pencil button in the product row.
Note: You can change which unit you want coverage for by changing the Multi-Unit drop down and selecting Get Rates for rating that unit.
Step 8. Present!
- Once you have built everything to your liking, on the Layout Page, select the Save & Next>> button to proceed to your menu.
- Present your menu.
- After you have presented your menu you can proceed to the eFroms Page by selecting the blue Next >> button.

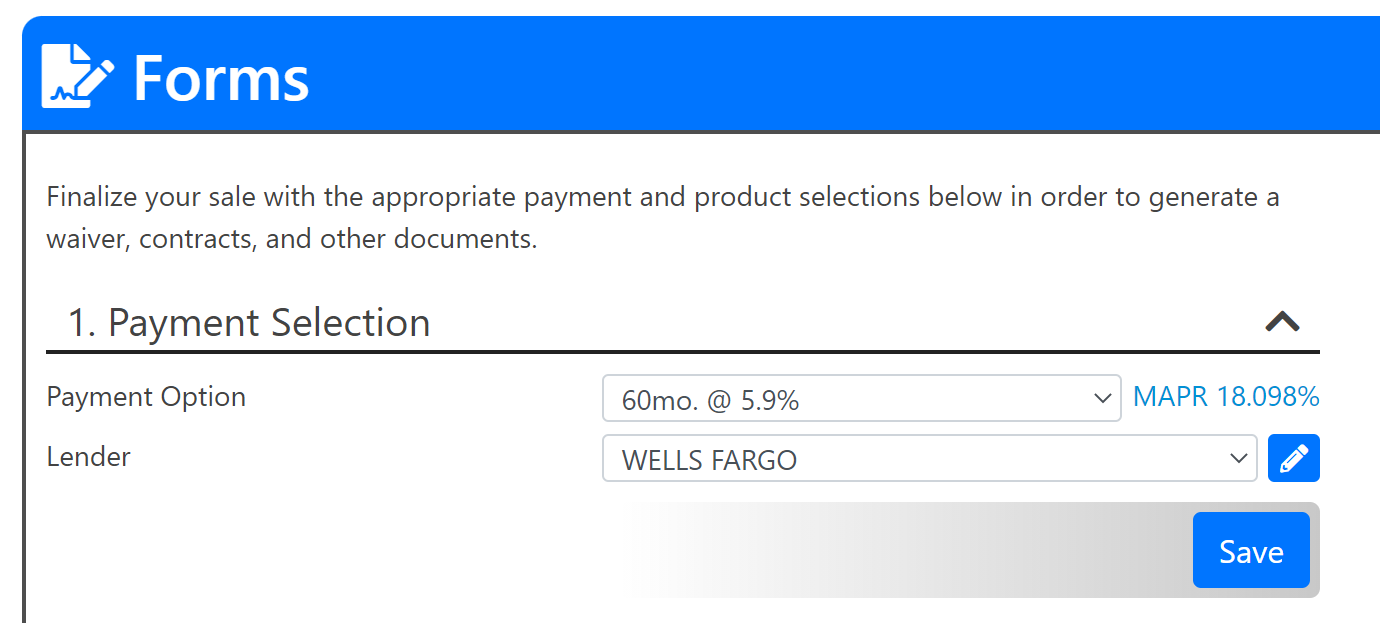
Step 9. Contracting
- In 1. Payment Selection select a lender in the dropdown.
- Select the blue save button.

- Select the blue save button.
- 2. Product Contracting will open up. Here you can process your products.
If you need to show the amount financed per unit, (for example, if you have sold two or more GAP products on two or more units) you will need to override the Financed Amount for each GAP product PRIOR to generating those contracts.
-
- To do this, simply check the Override Pmt Calc check-box and change the Financed Amount to match the amount financed for that unit.
- Click the blue Contract button next to the product you would like to generate a contract for.
- Click the blue Generate button in the bottom right-hand corner. This will generate your contract.
- Do this for each product corresponding to that unit. Then change the Amount Financed to reflect the amount financed for the second unit.

-
- At this point, you can use the blue Generate All button to generate contracts for all remaining products that are marked sold.

- At this point, you can use the blue Generate All button to generate contracts for all remaining products that are marked sold.
- Print your contracts as you normally would.
Step 10. Logging
- Go from the Forms page to the Logging page by pressing the blue Next >> button in the bottom right corner.

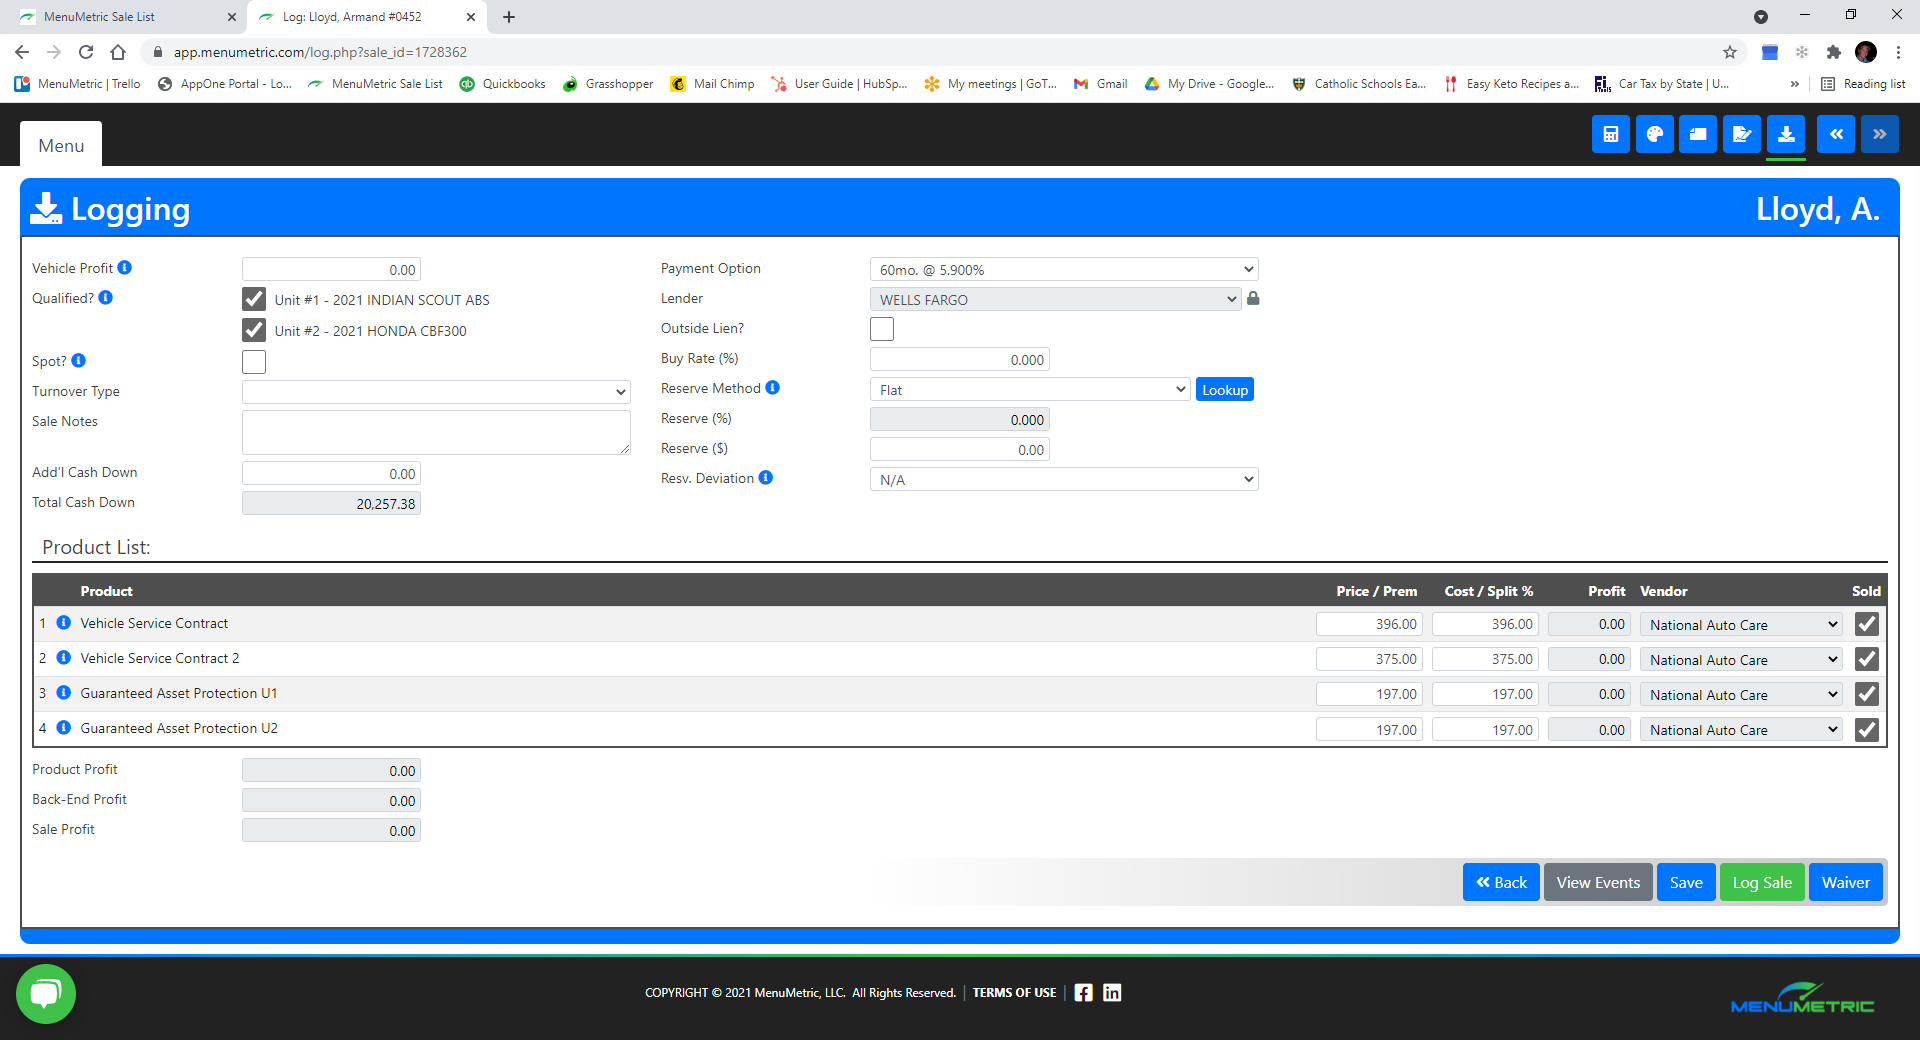
- Your final step is to log (finalize) your deal for record-keeping and reporting purposes. On the Logging Page select which vehicles are qualified by checking or unchecking the qualified box next to the vehicle. These boxes are defaulted to be checked.
- After you have completed any last information or notes about the deal, click the green Log Sale button on the bottom right.

- Congratulations you have finished a Multi-Unit Deal!
Unconnected Products
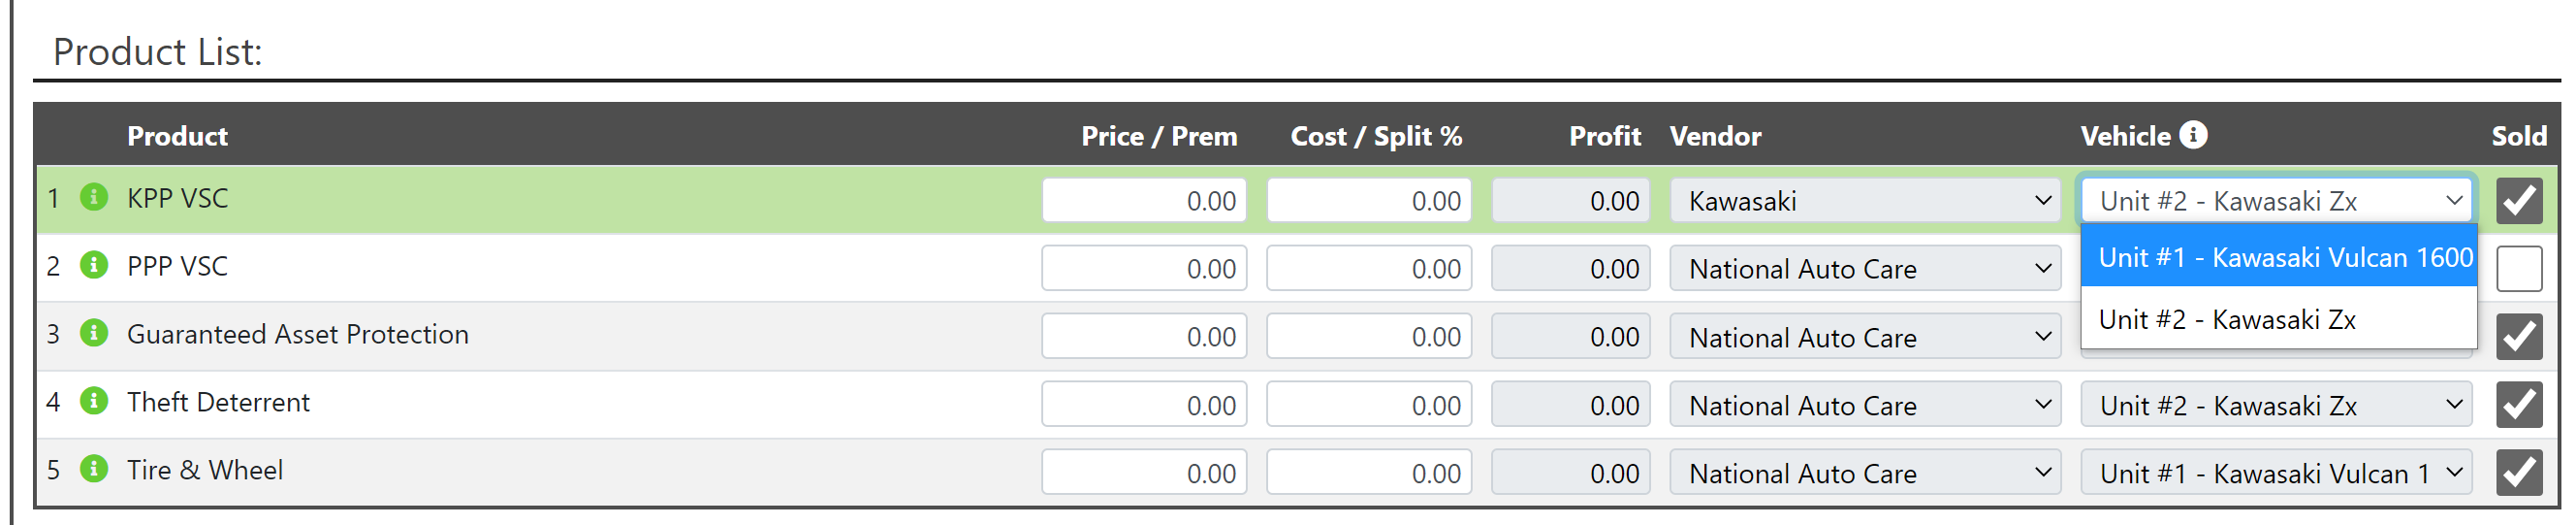
- To assign a unit to a sold unconnected product use the Vehicle drop-down in the Product List on the Logging Page.
- Select the corresponding unit to the unconnected product.
- Save your changes to ensure they can be seen on reports.