
How to process a CNA Lifetime Warranty and Wrap
Tip: The first thing to remember about CNA Lifetime Wrap and CNA Lifetime Warranty is that they must be connected to each other. You cannot sell CNA Wrap without CNA Lifetime Warranty.
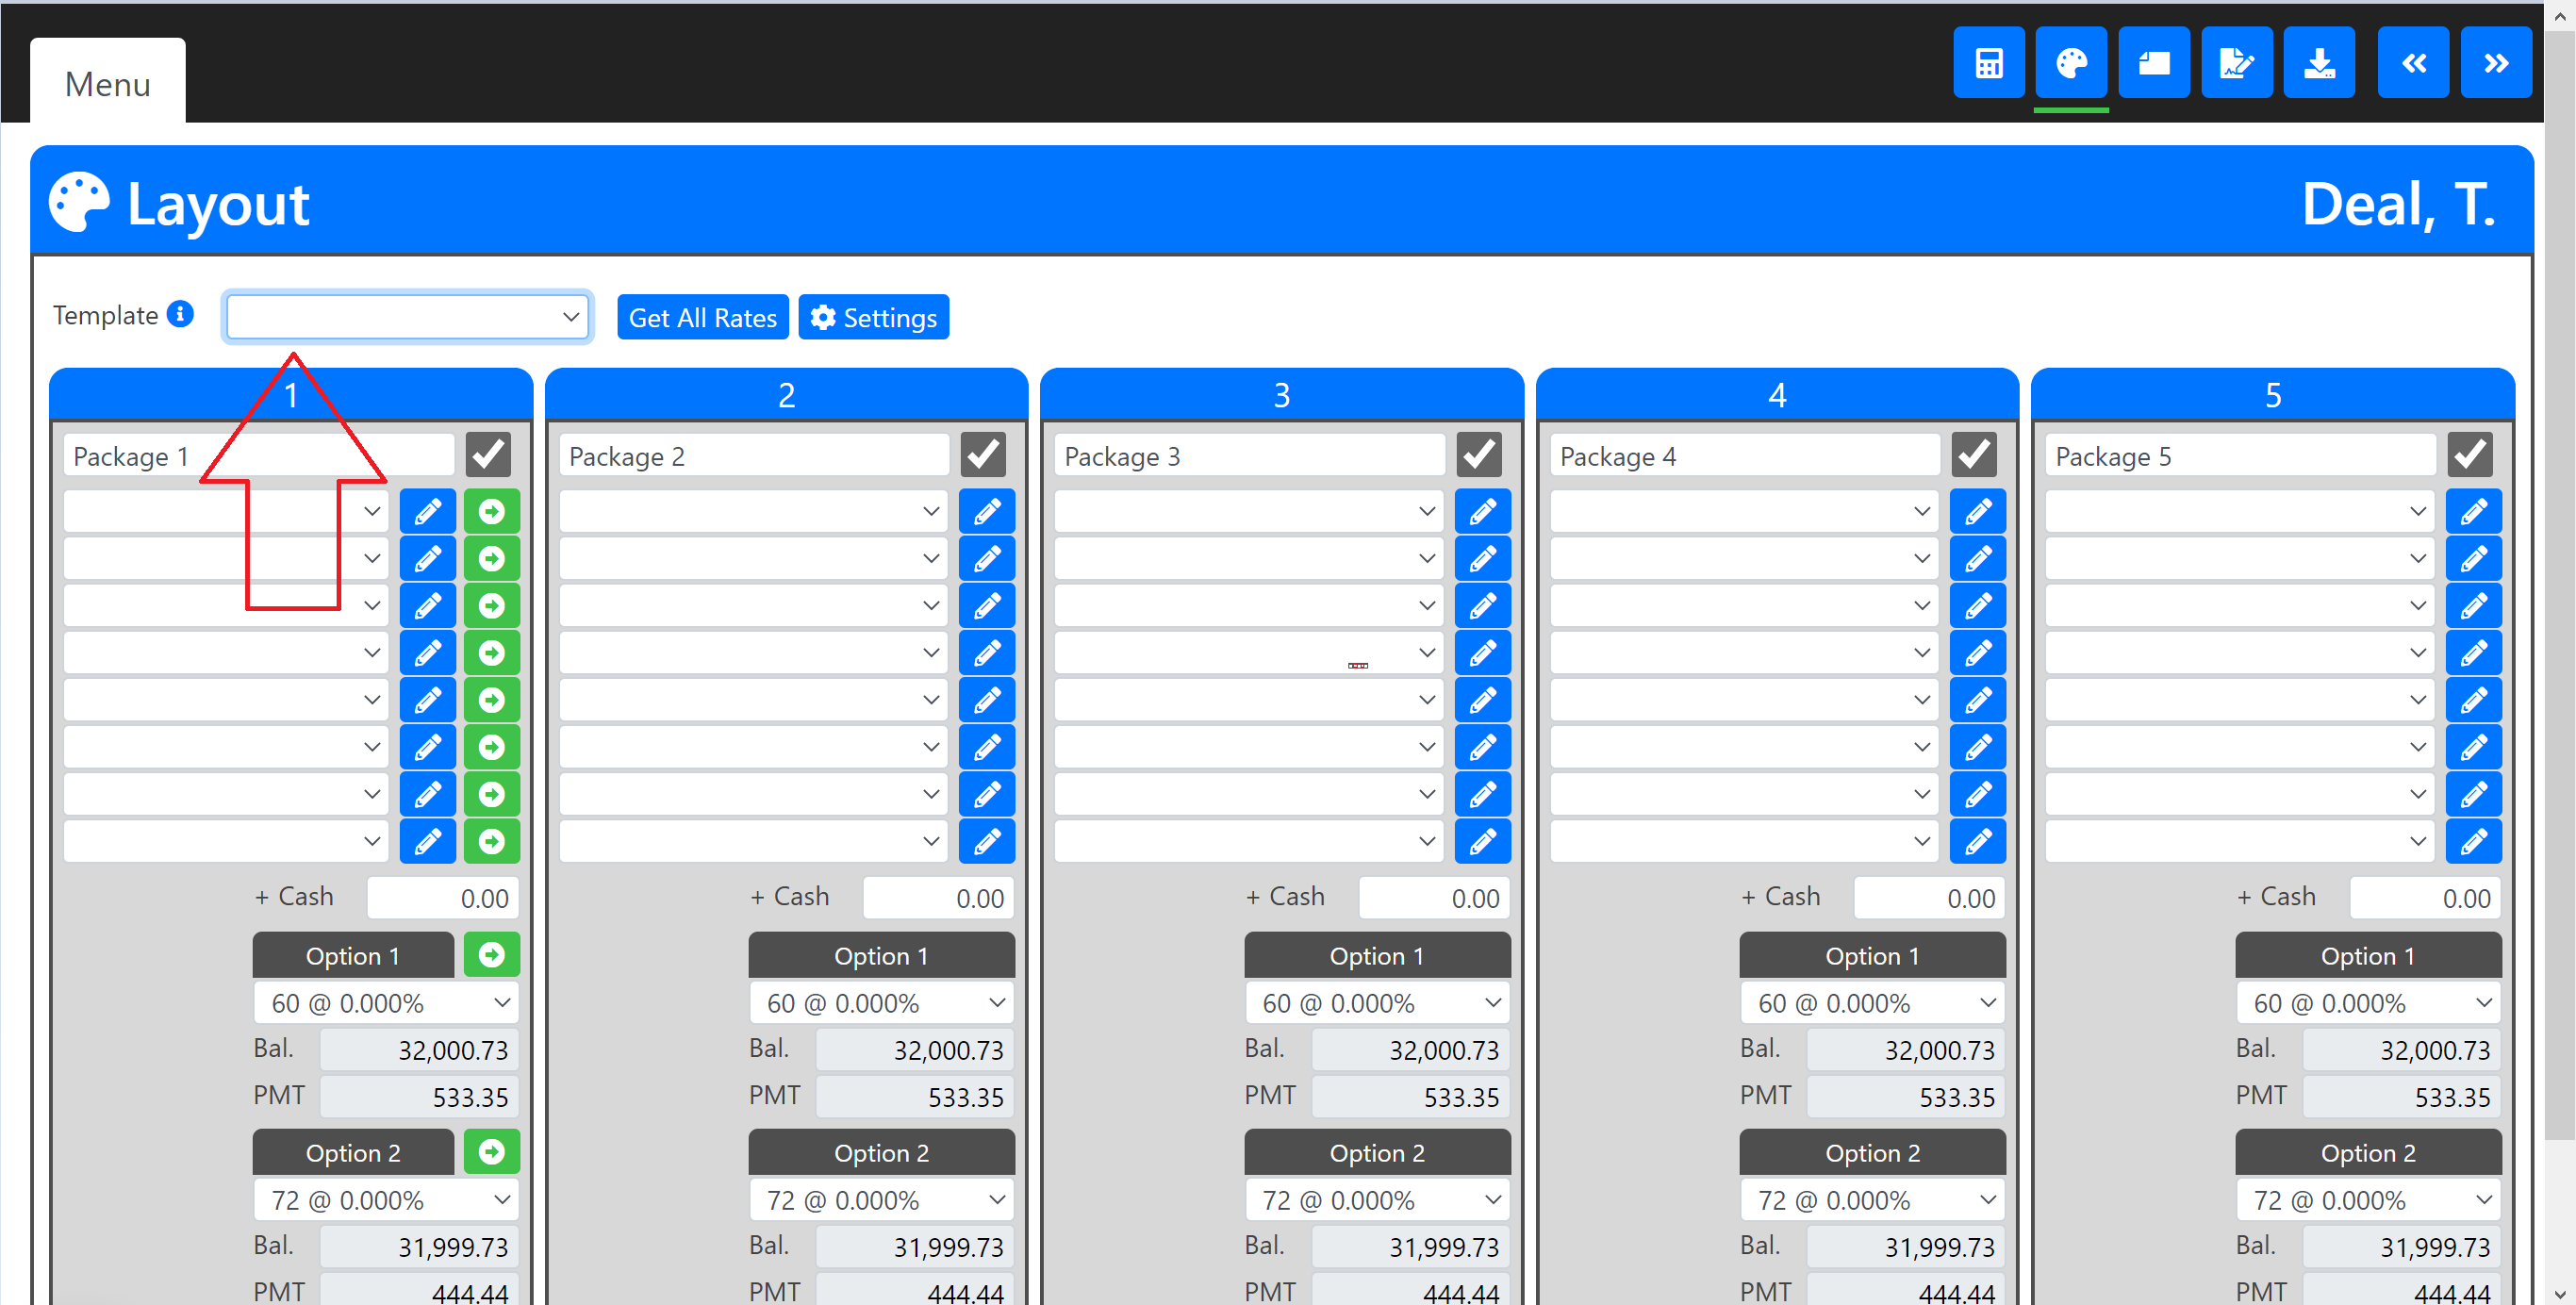
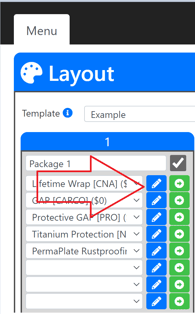
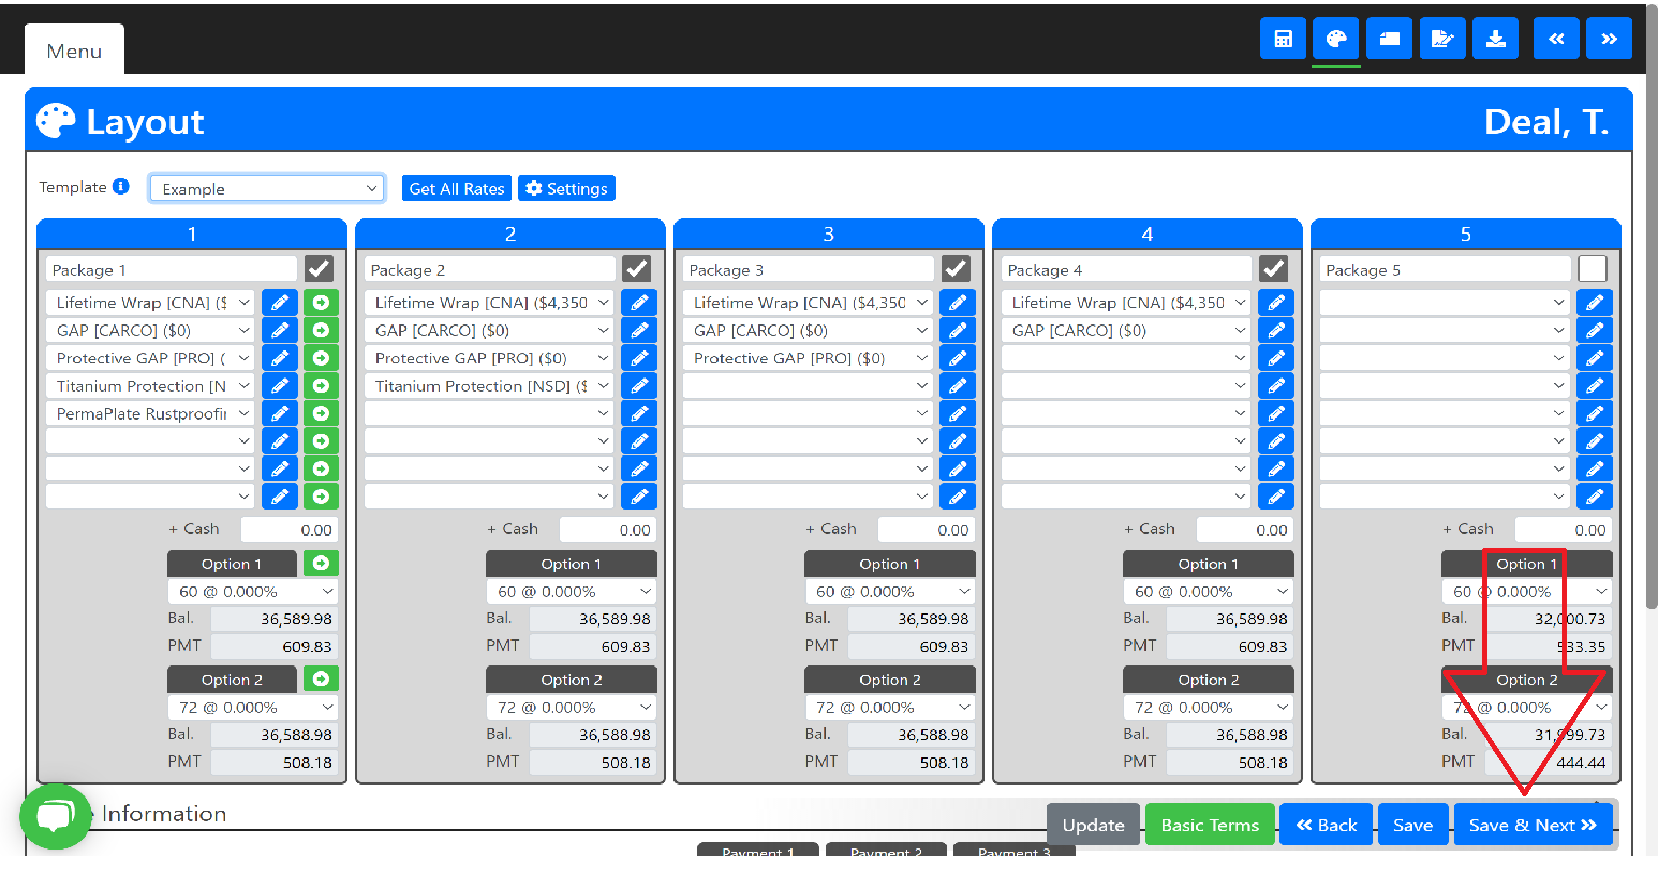
Step 1. Build out your Menu. You can build the menu with individual products, but we recommend using a template. Be sure to include your CNA Lifetime Wrap.
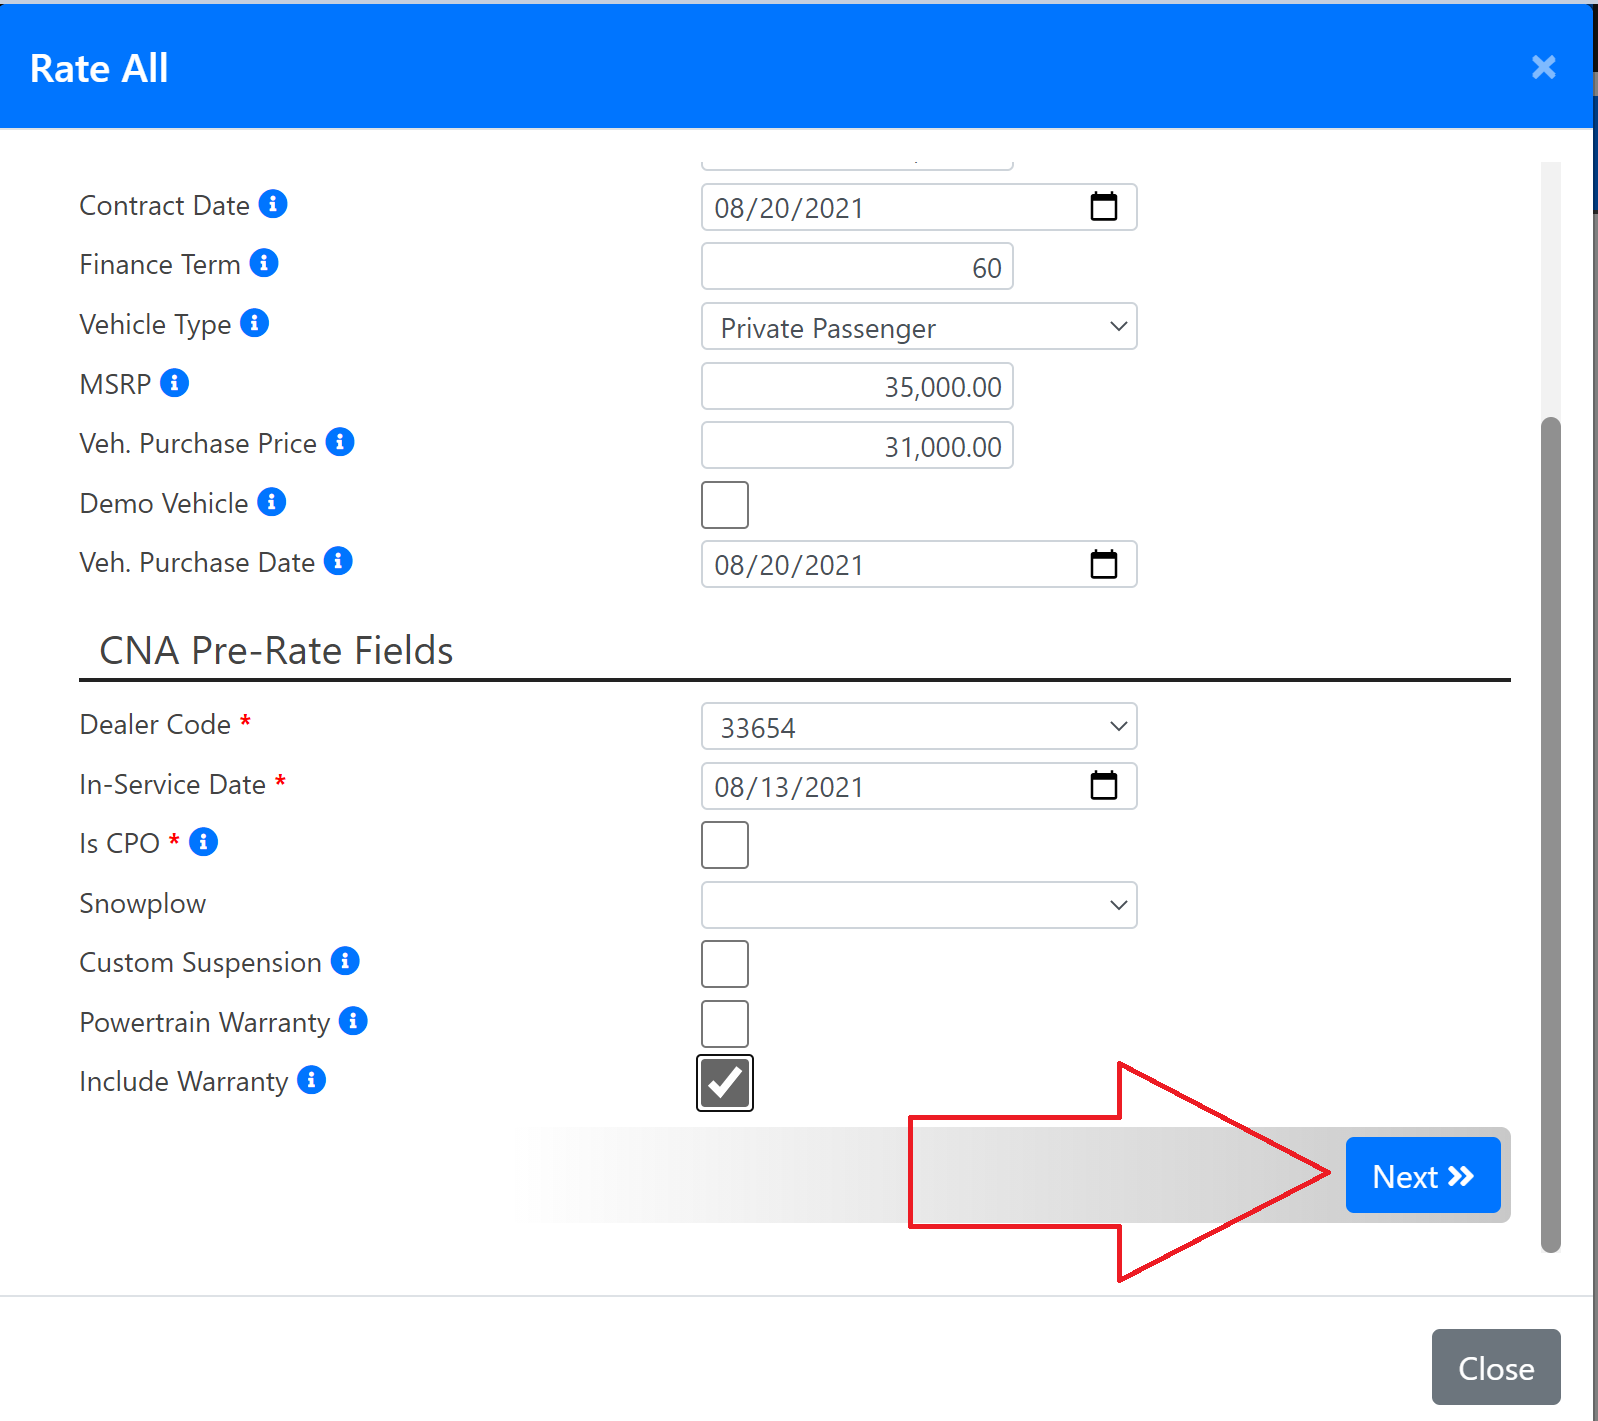
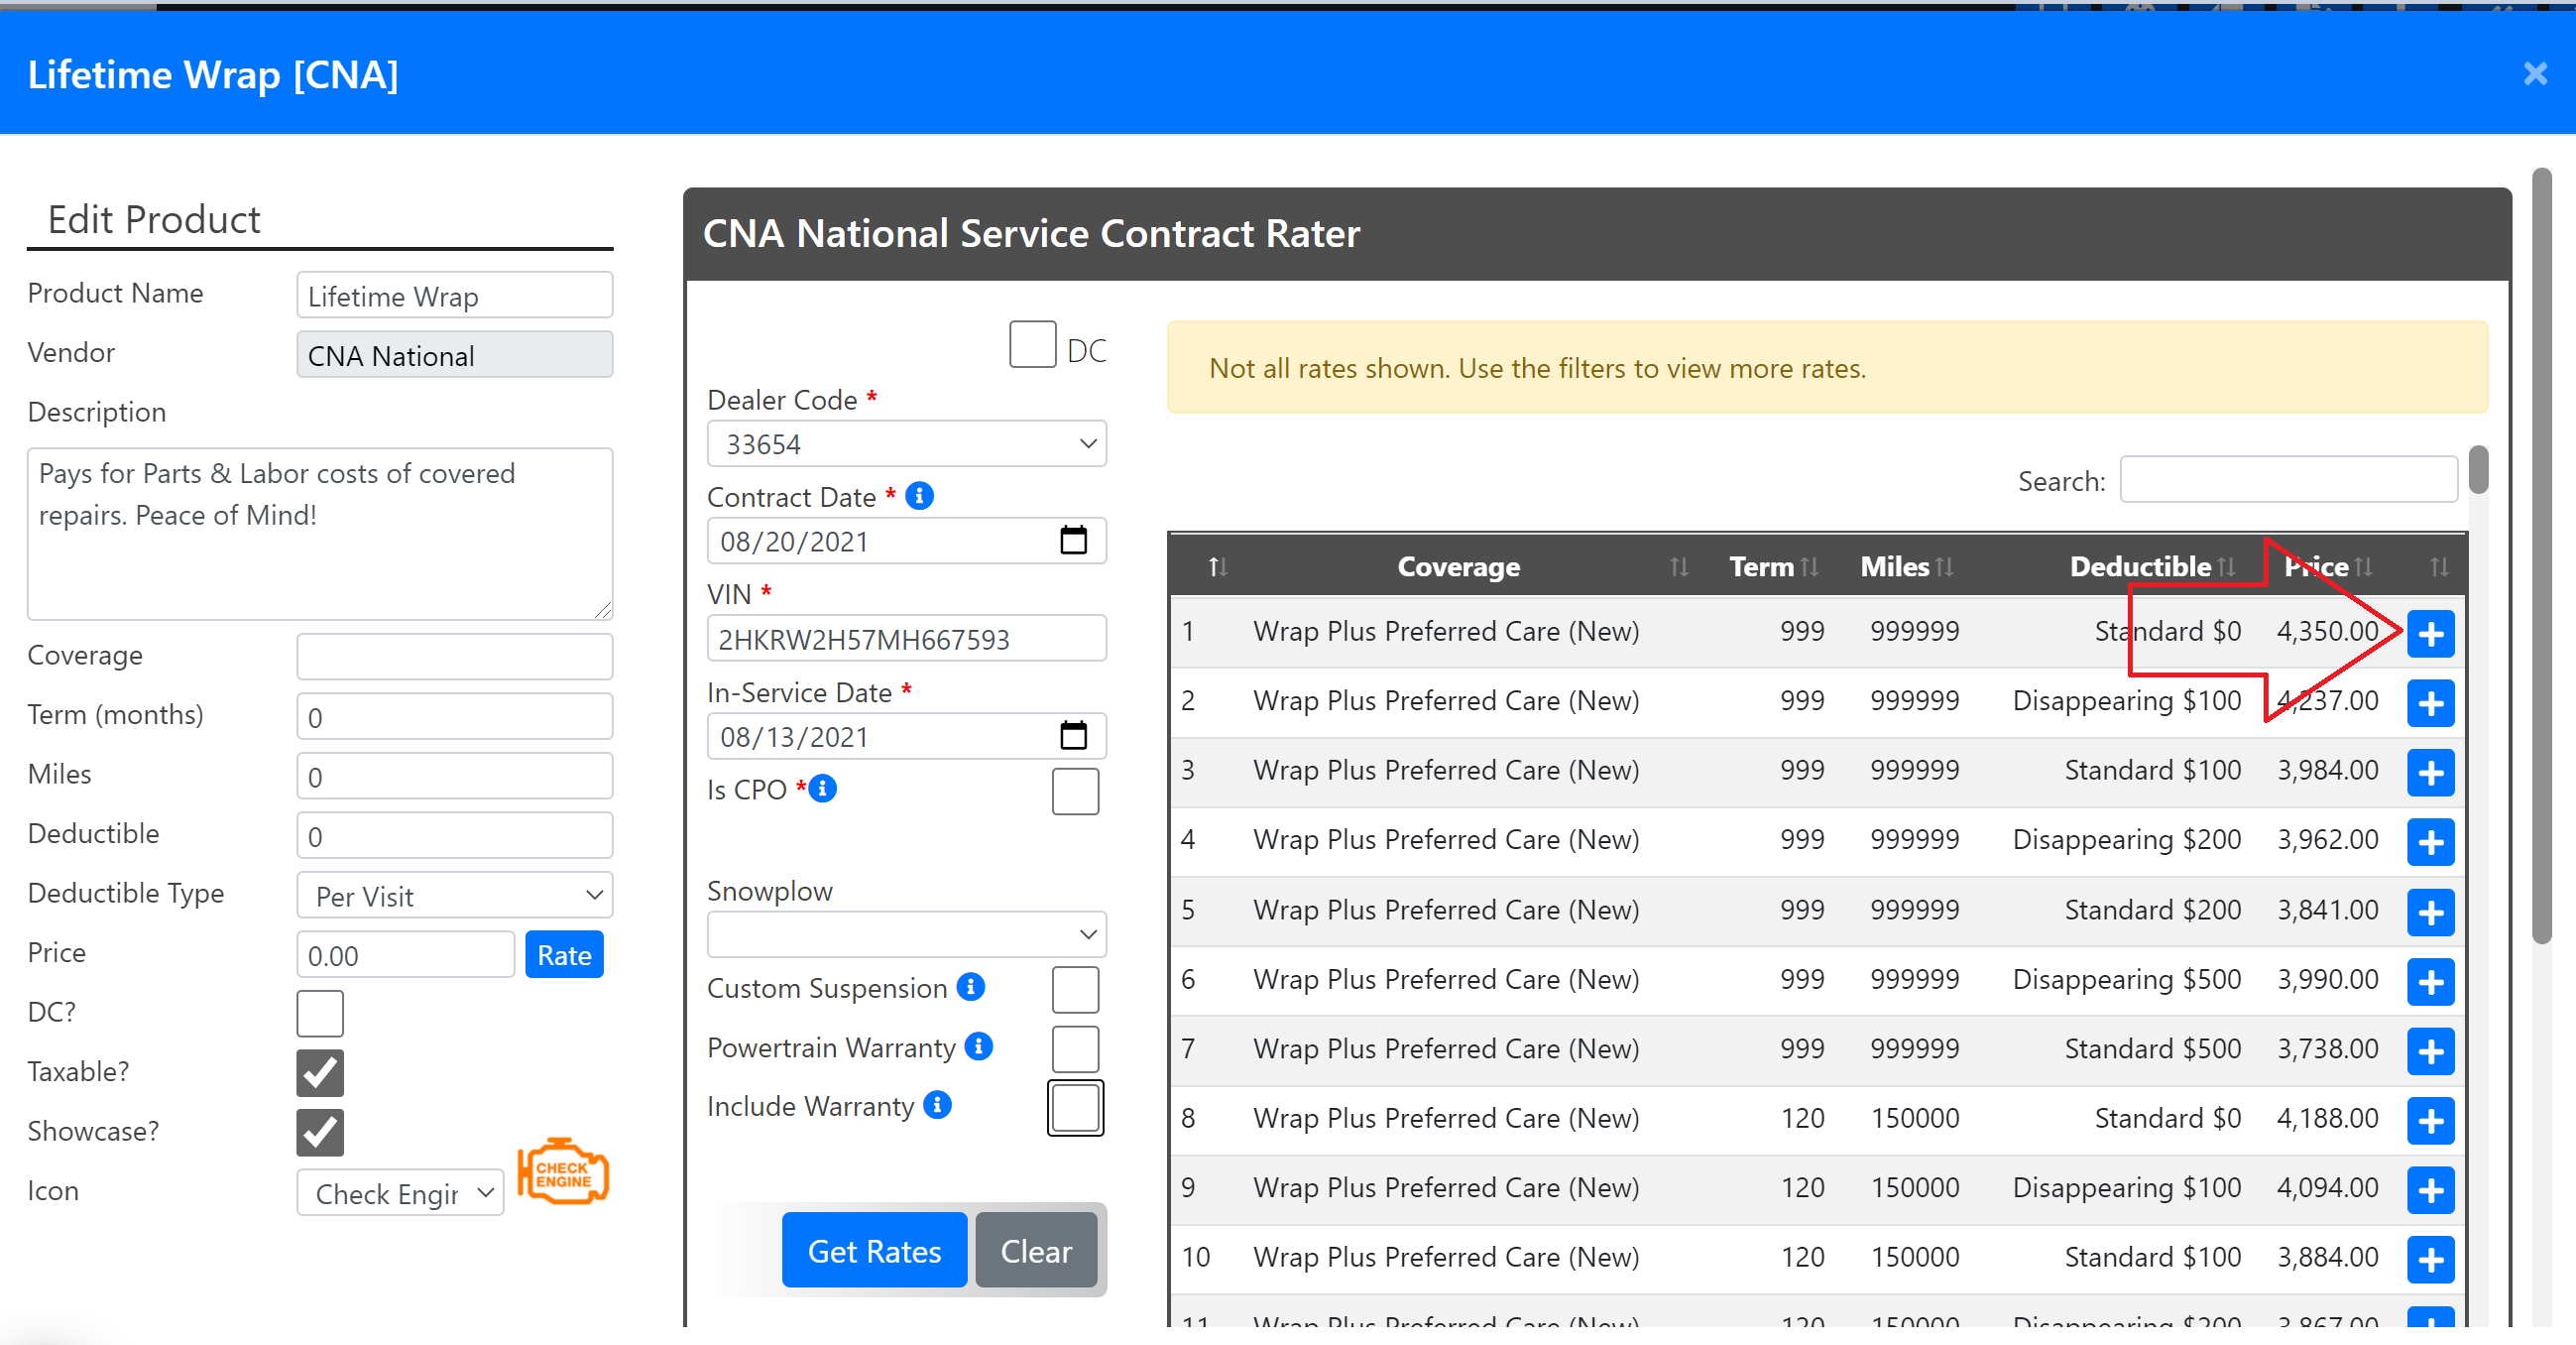
Step 2. Select the blue Get All Rates button. A spinner will appear and then a pop-up for your Pre-Rate Fields.

Step 3. Go to the bottom of your CNA Pre-Rate Fields and select the Include Warranty box.
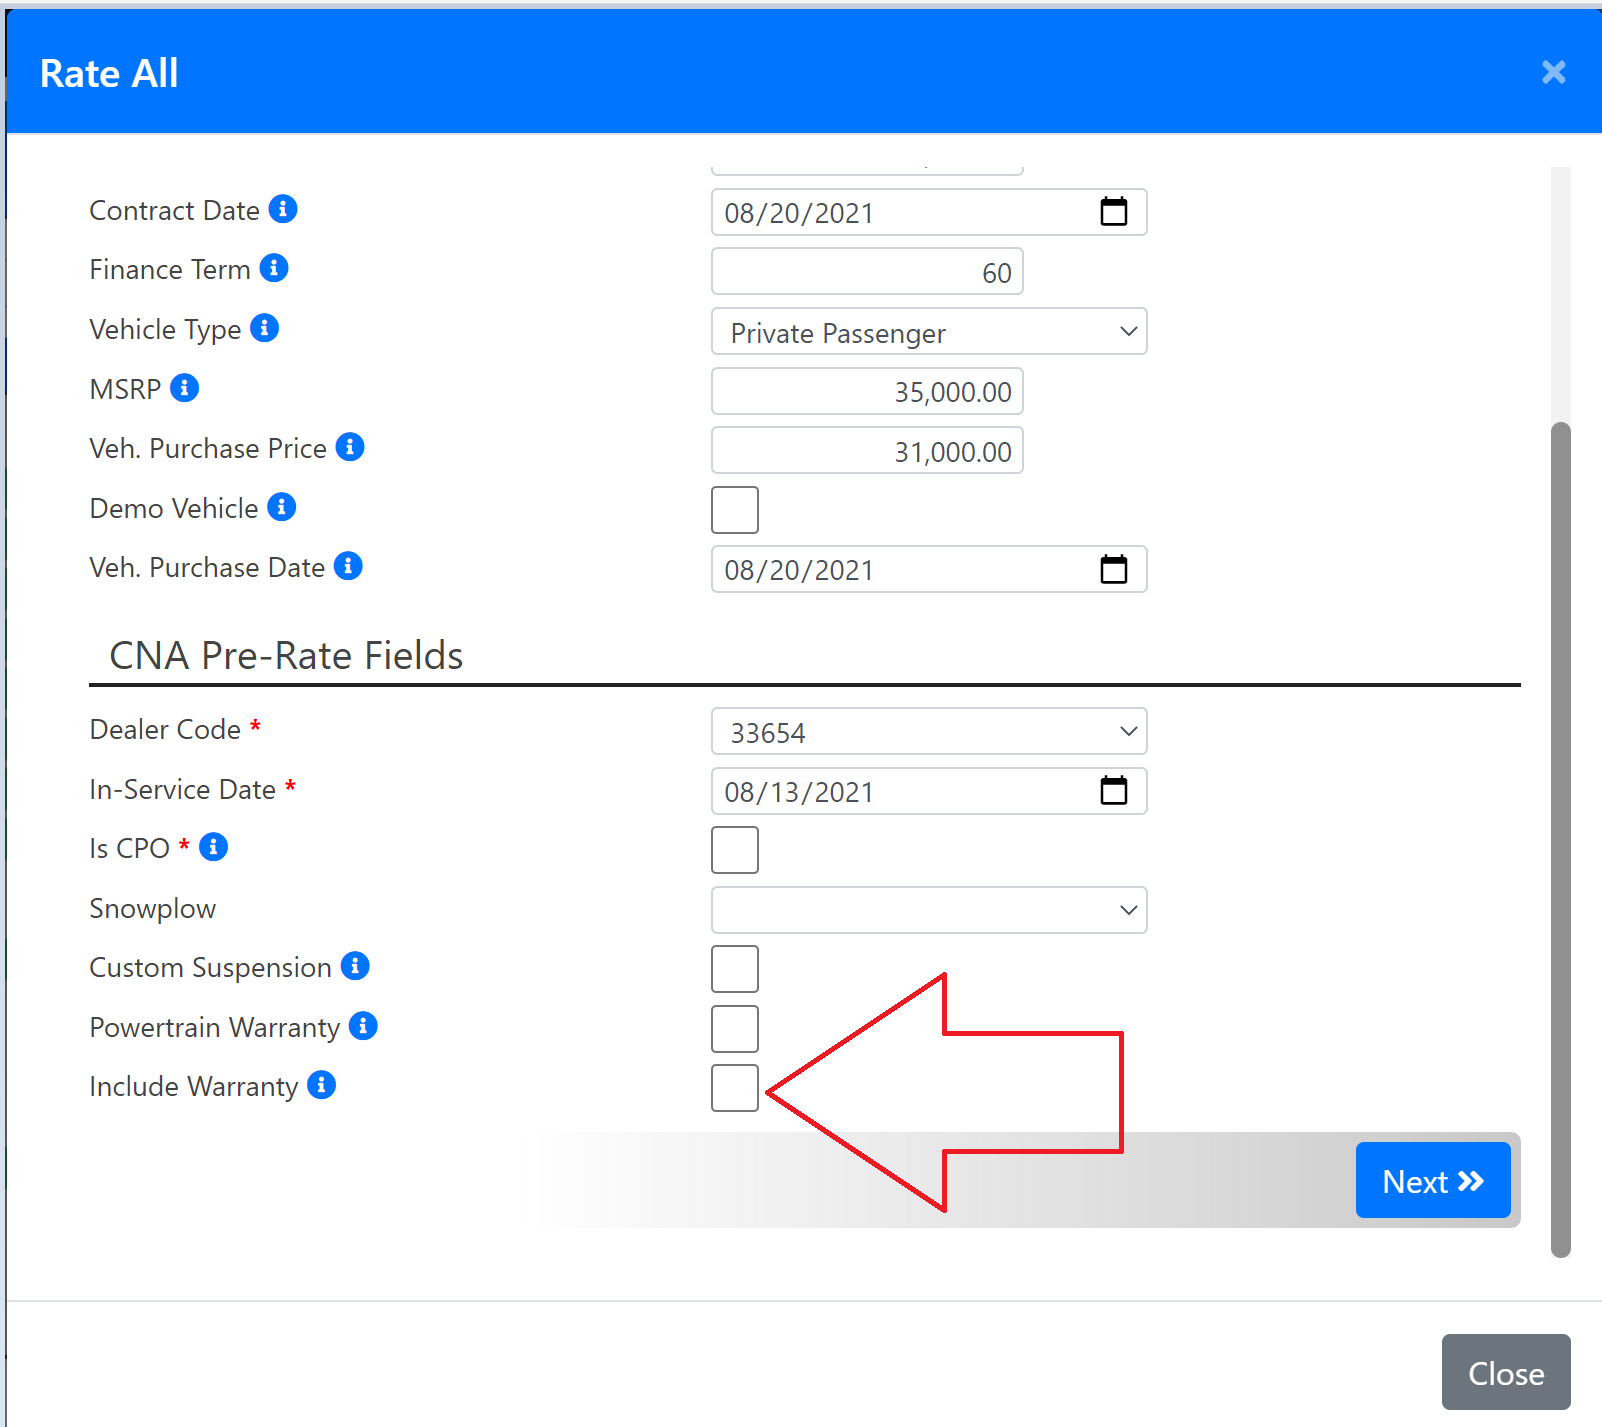
This step is extremely important in order to get the correct rates back. By selecting this box you are tying the Warranty and Wrap together.
Note: Do this step at importing if you use the Pre-rating there.
Step 4. Select the blue Next button.
Once your rates have returned (See below image.), you can Close the pop-up.

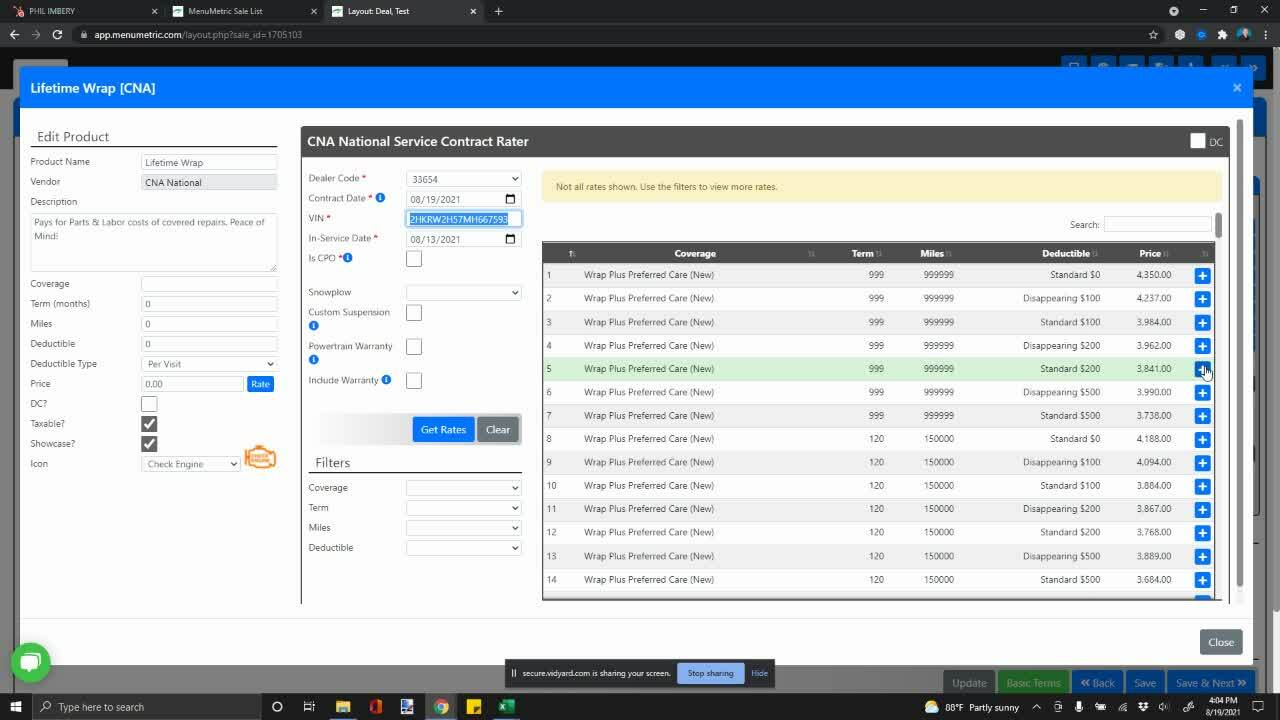
Step 5. Select your coverages for each product.
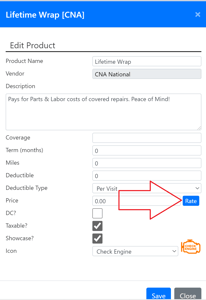
- Select the blue pencil button to the right of your product.
- Click the blue Rate button.
- Select your desired coverage by clicking the Blue + button.
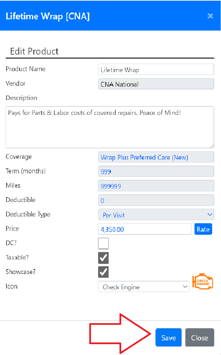
- Click the flashing green/blue Save button.
Step 6. After you have selected all of your preferred coverages for each product, select the blue Save and Next>> button.
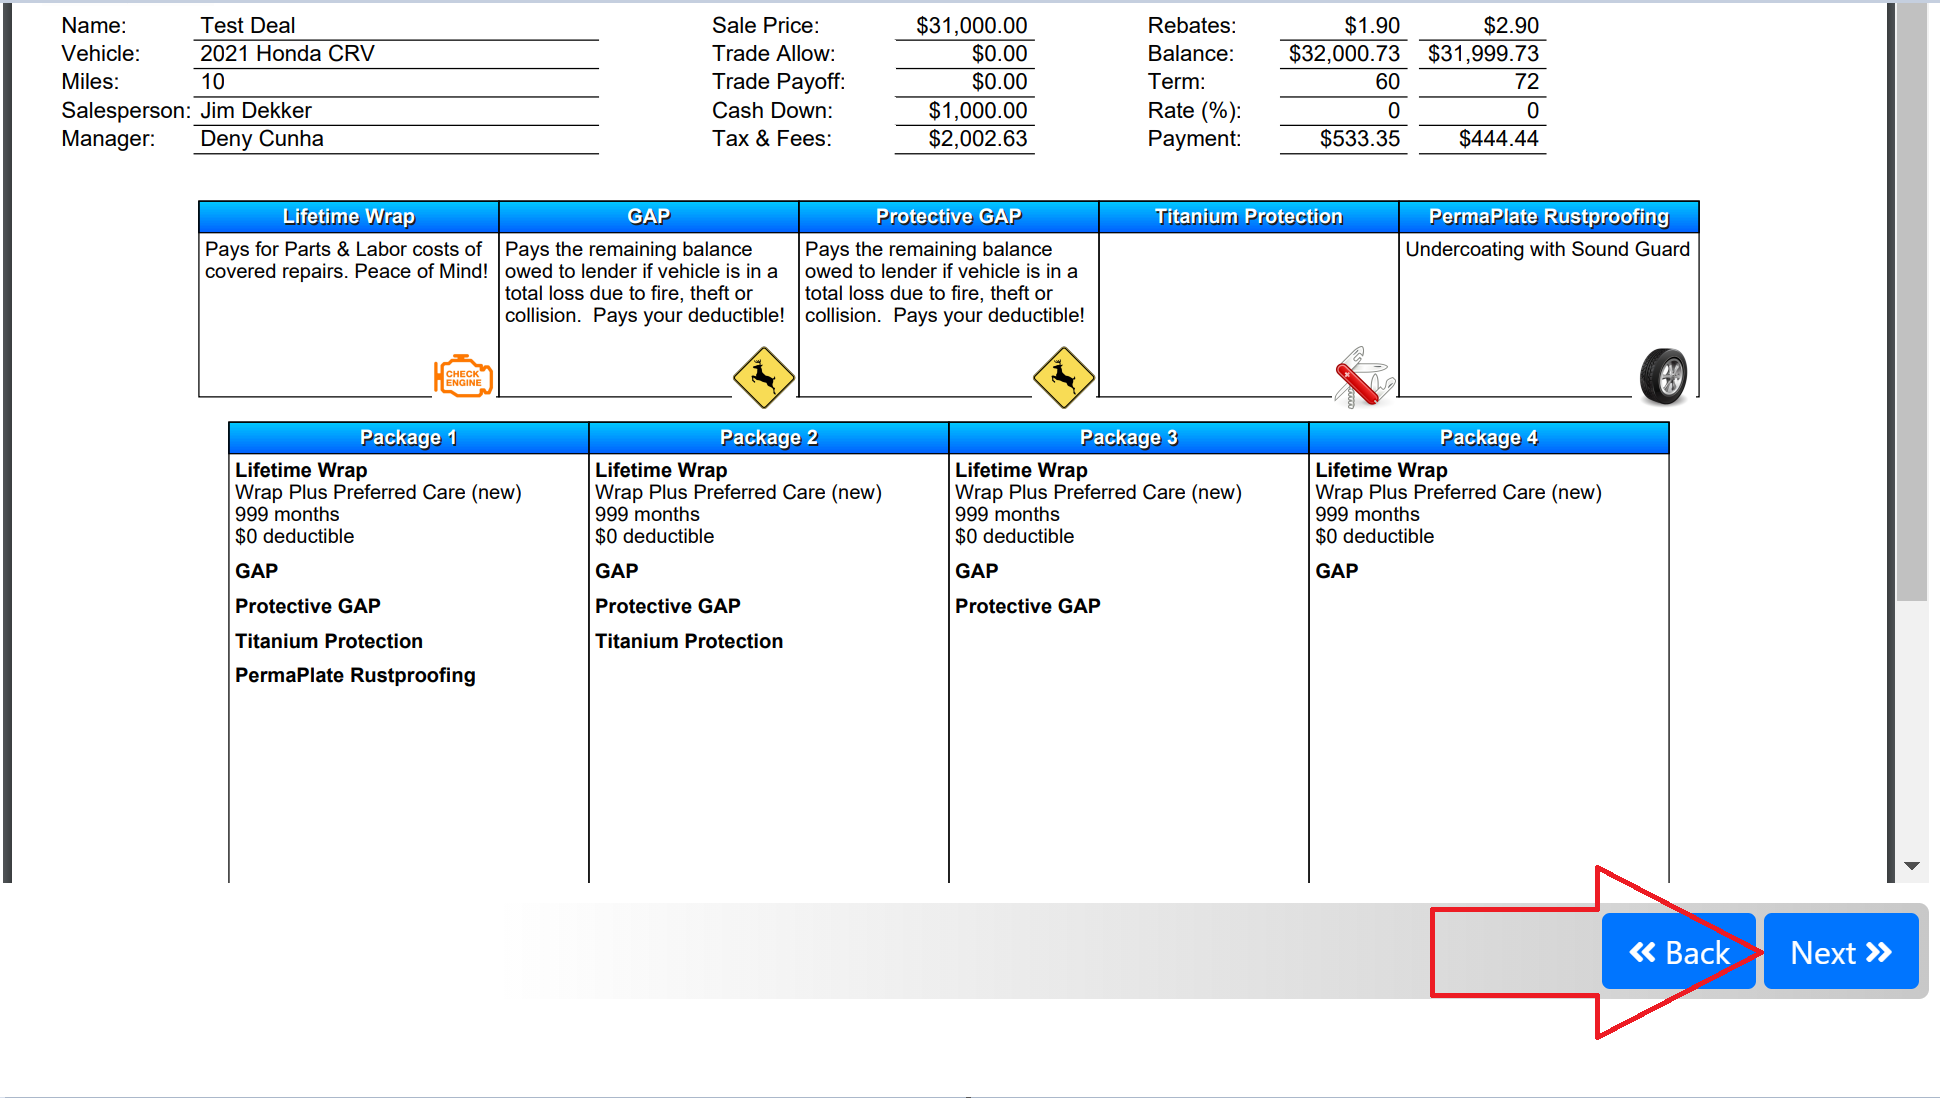
Step 7. Present your menu.
Step 8. Select the blue Next>> button.
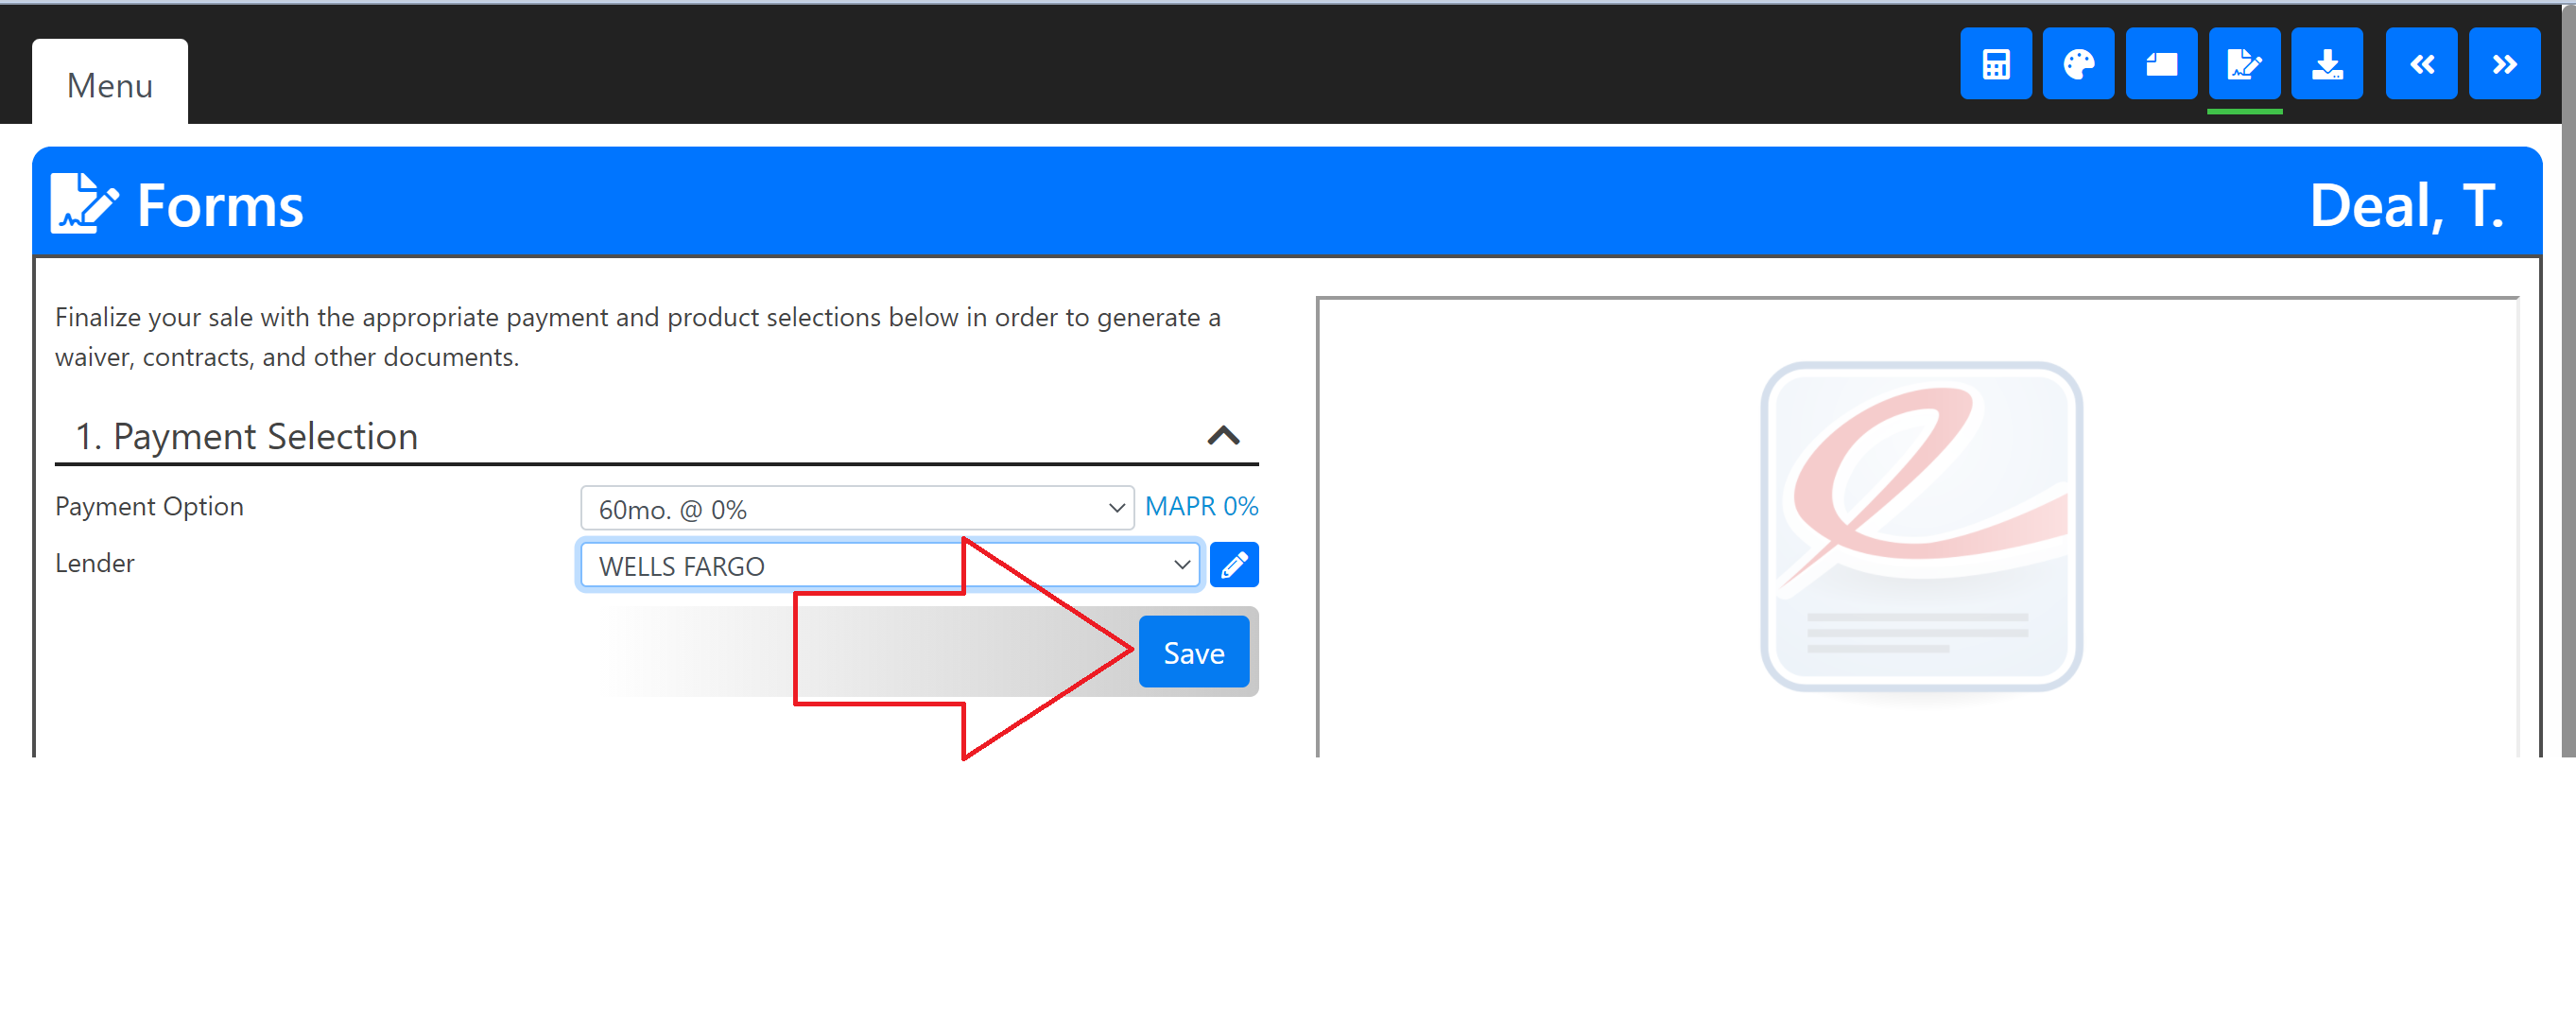
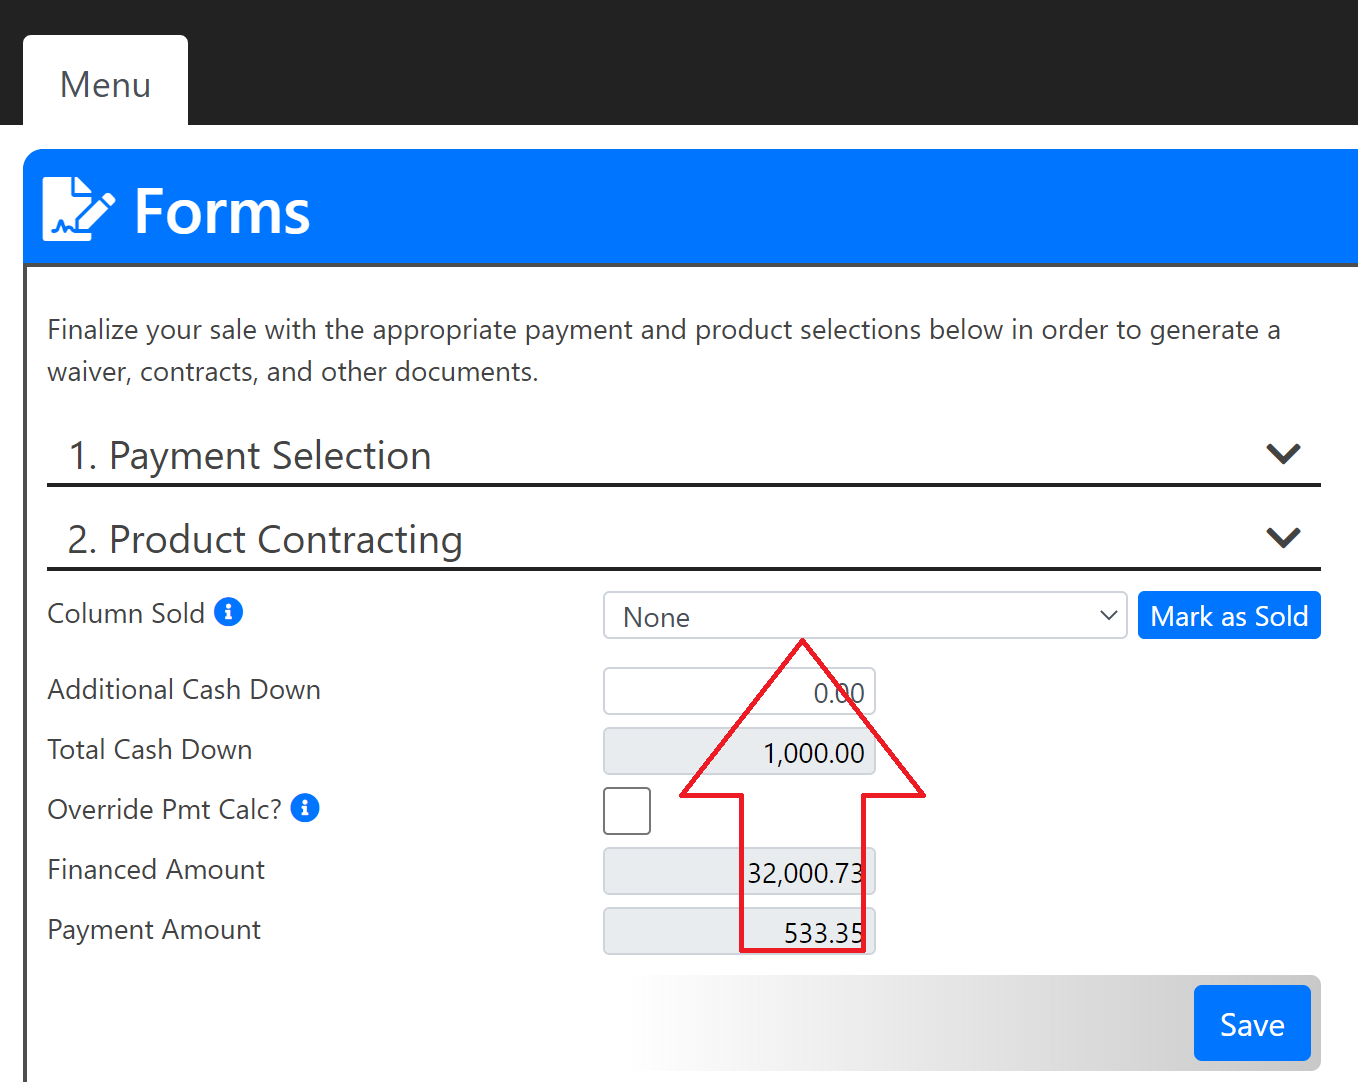
Step 9. You are now on the Forms page. In 1. Payment Selection, if you haven't already, select your lender.
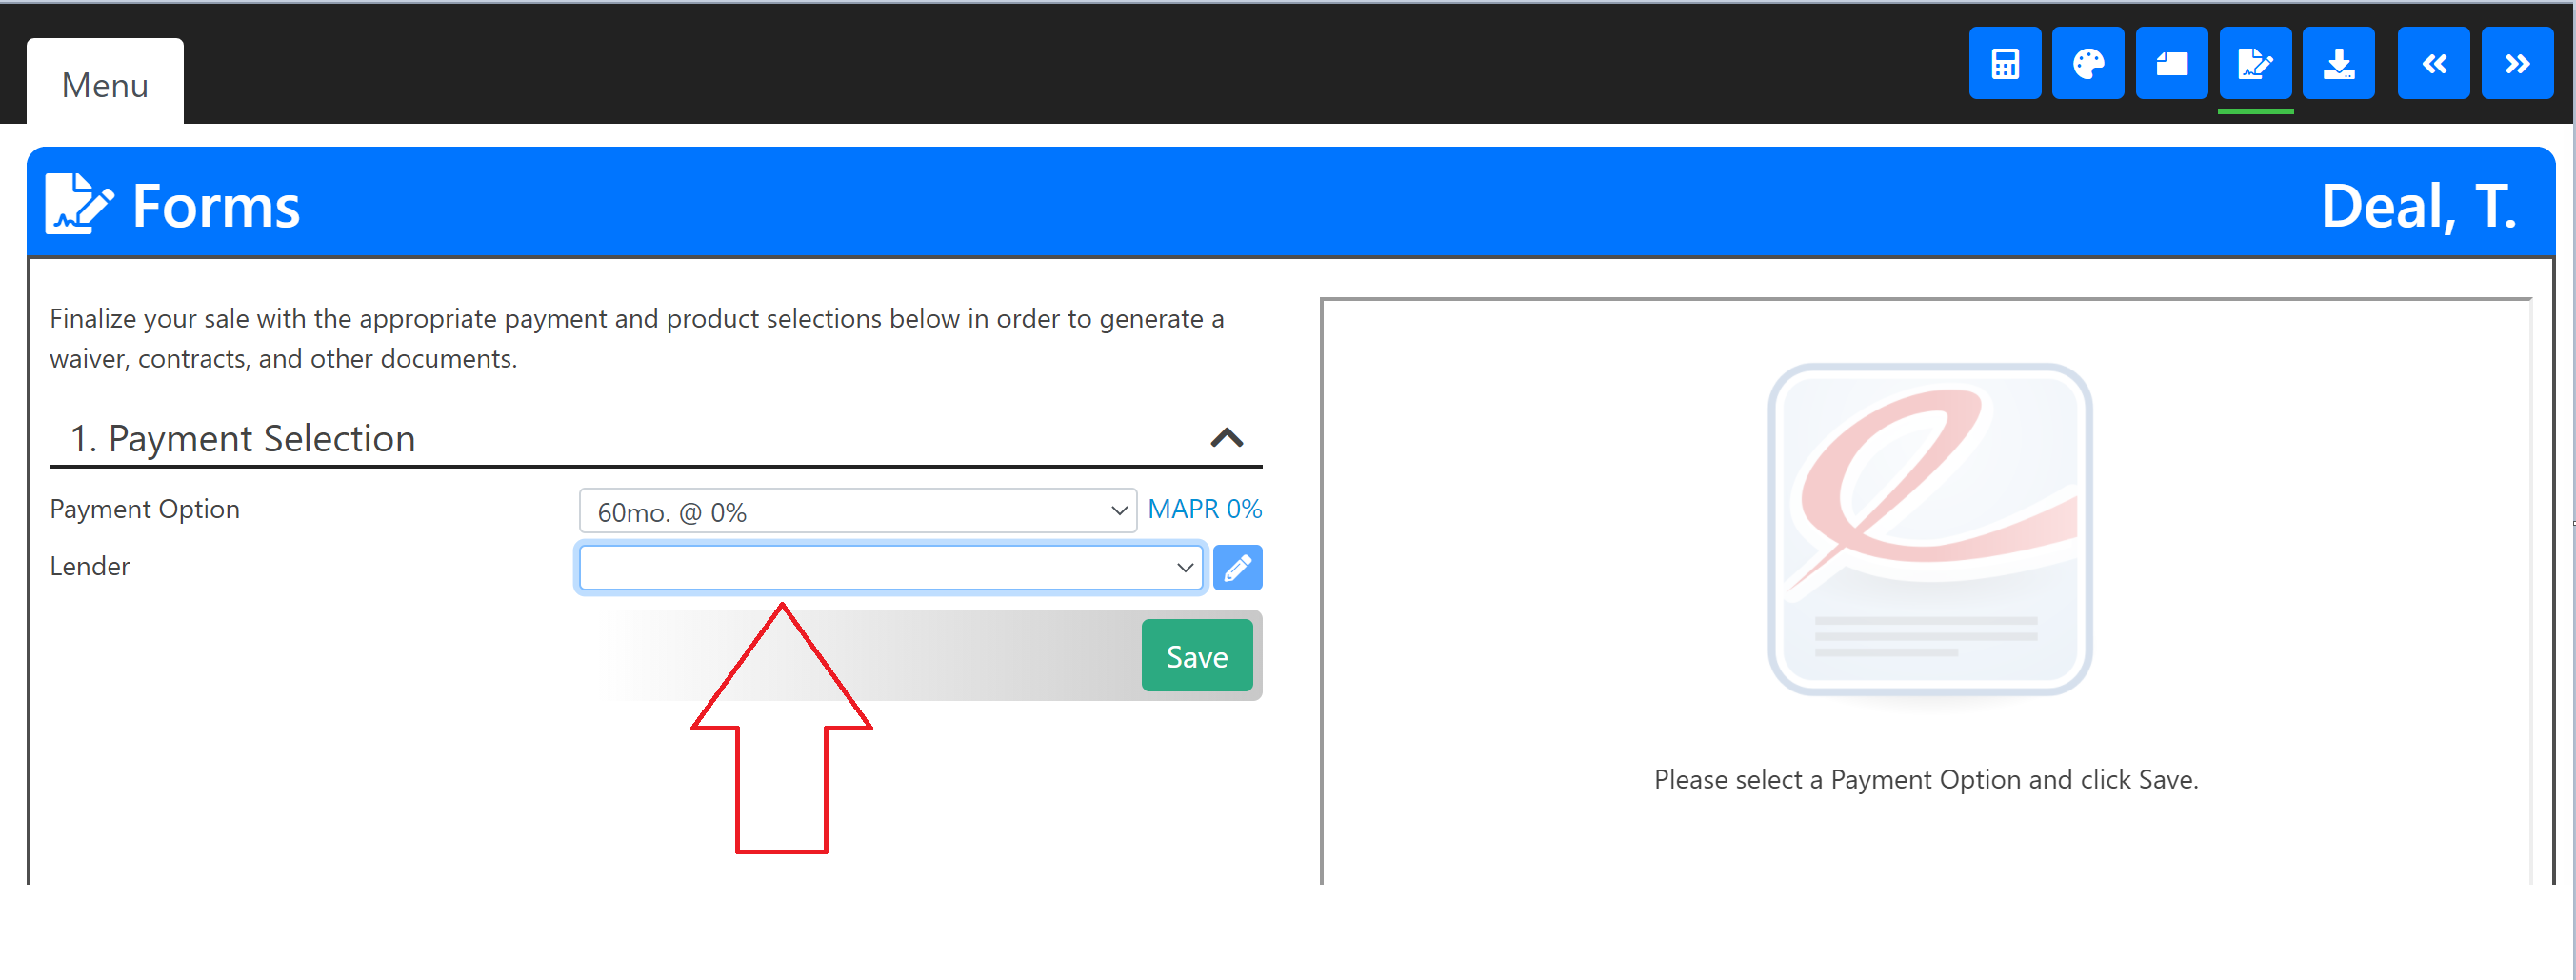
- Click the flashing green/blue Save button. 2. Product Contracting will open up.
Step 10. Select which column from the menu you sold, then press the blue Mark as Sold button.
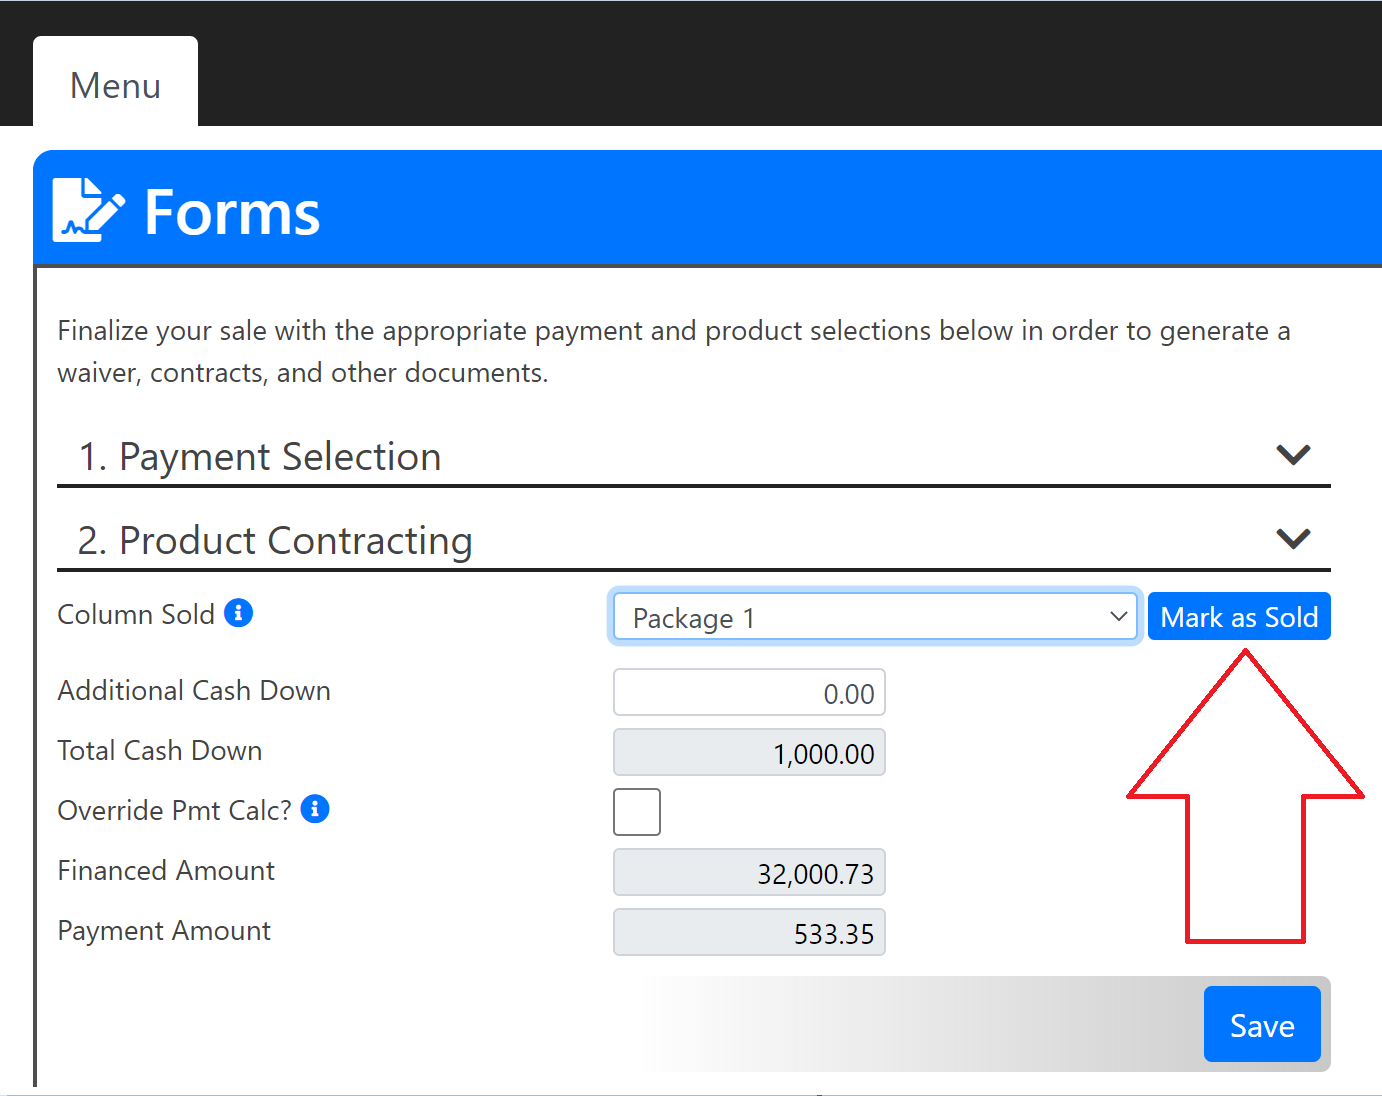
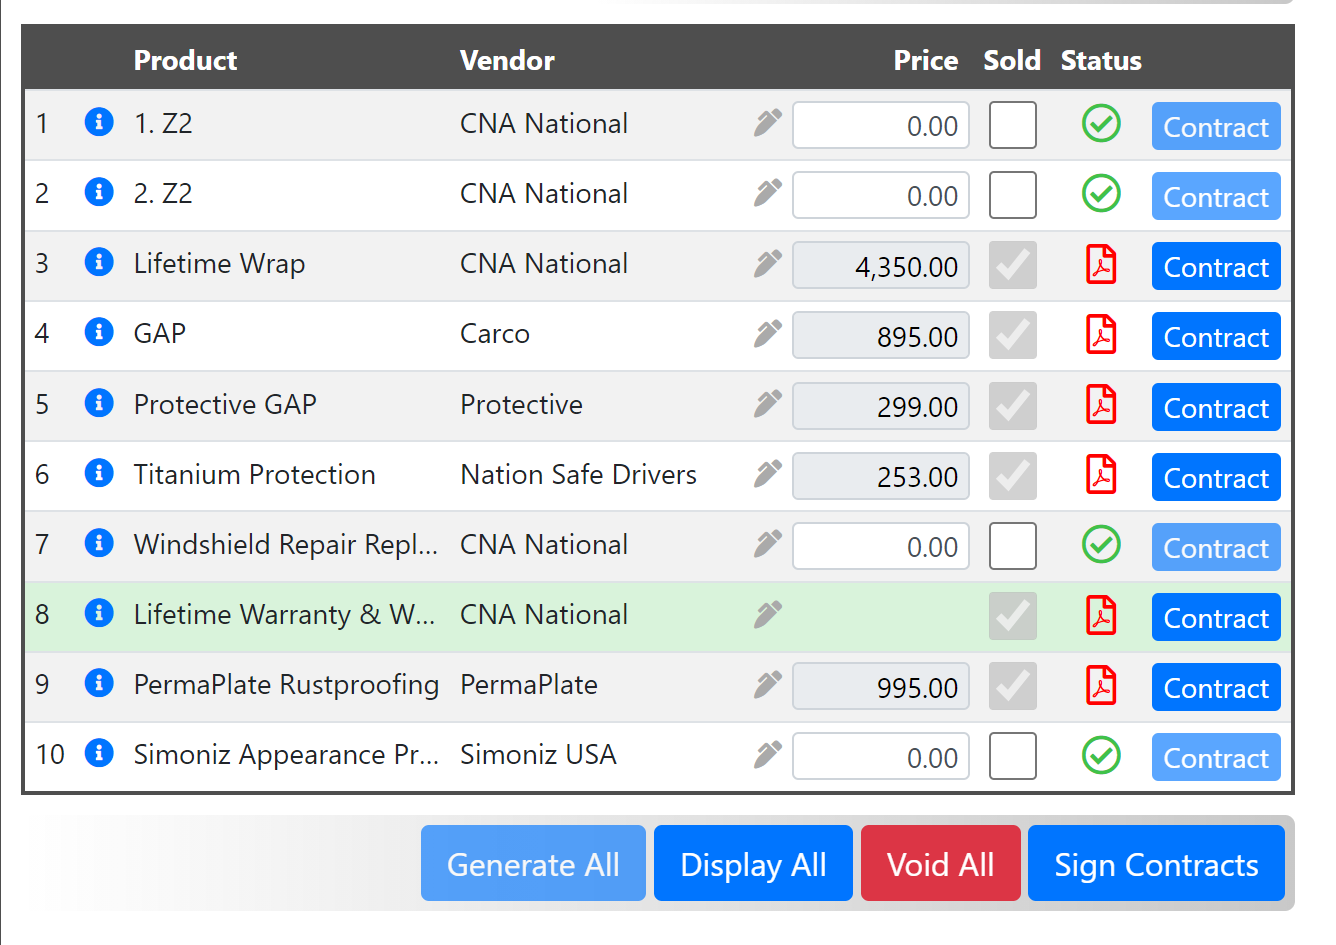
Step 11. Make sure both Lifetime Wrap and Lifetime Warranty & Wrap from CNA are marked as sold.
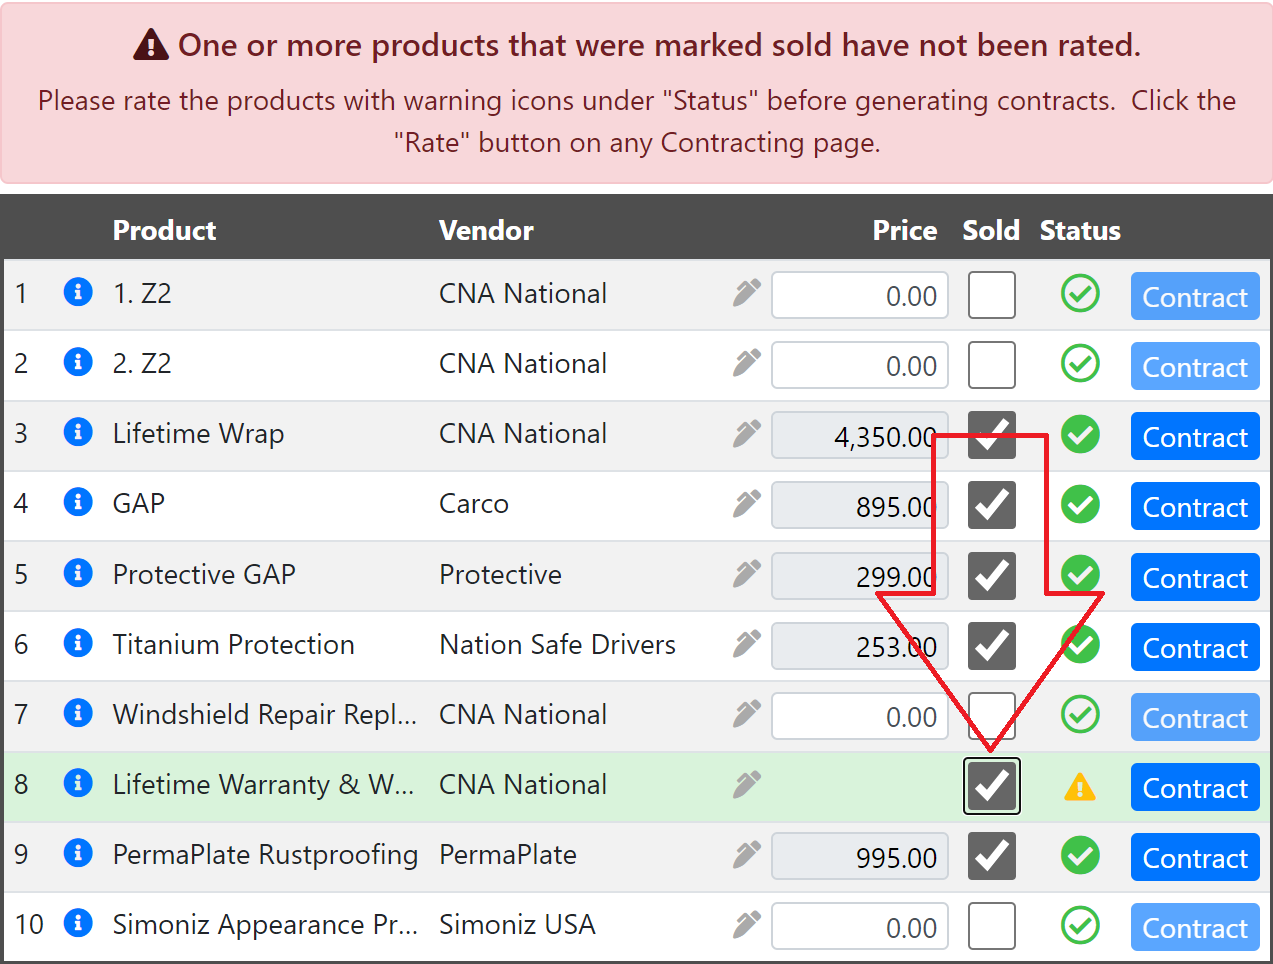
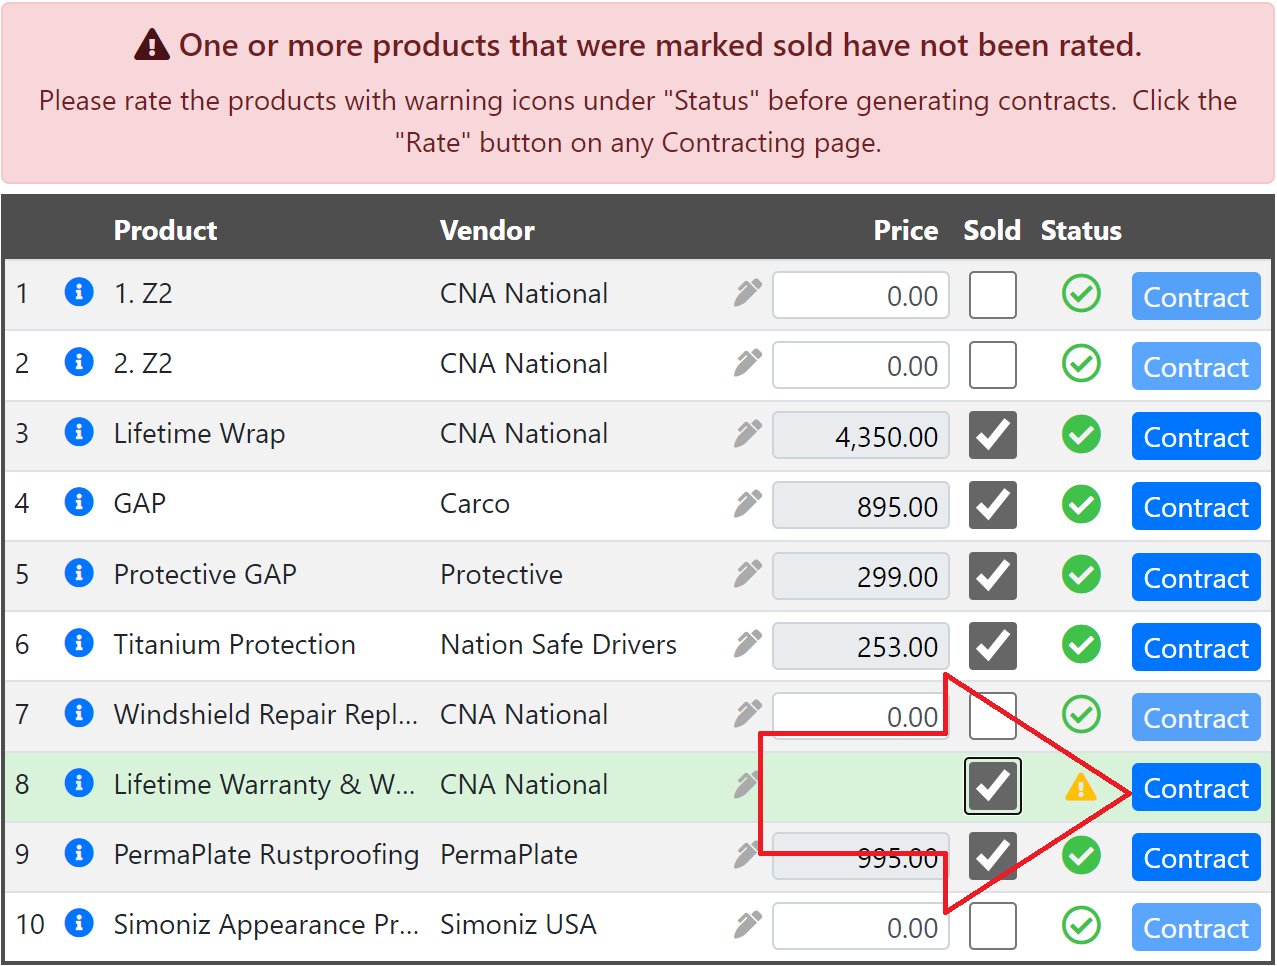
Step 12. Select the blue Contract button in the Lifetime Warranty & Wrap row. On the right half of the screen, product editing fields will appear.
Step 13. Select the blue Rate button.
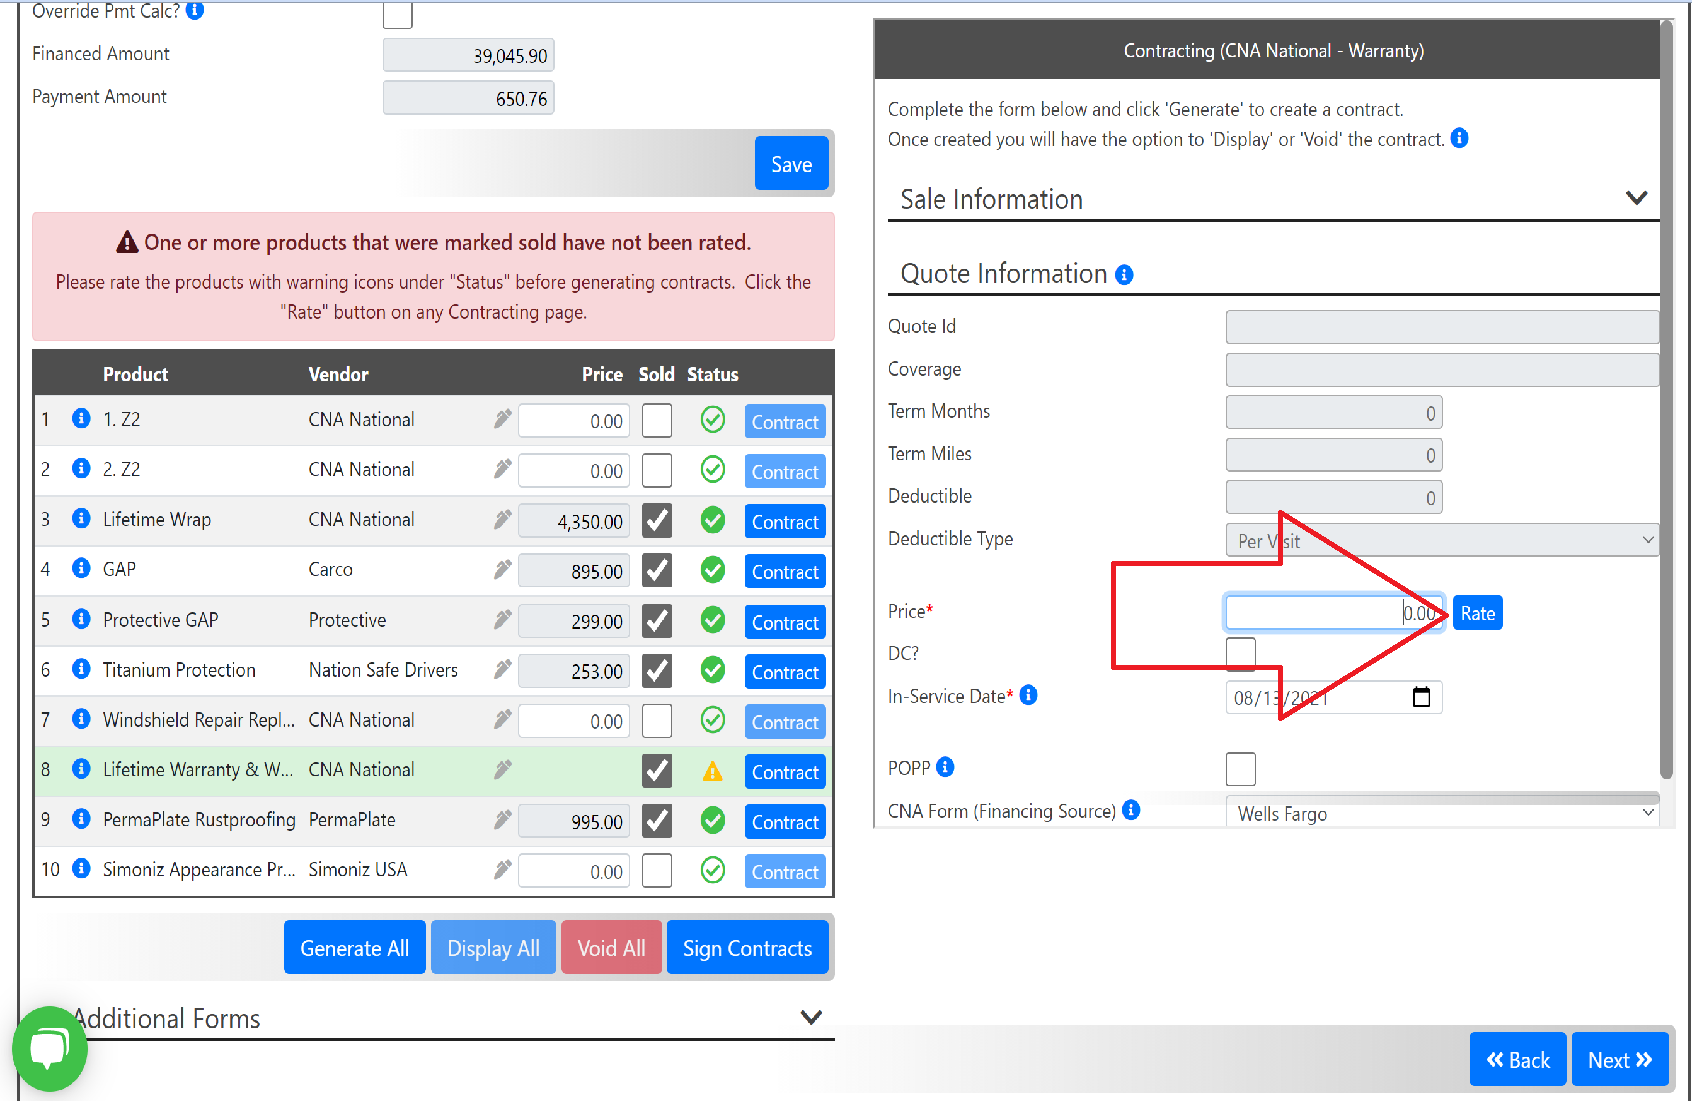
Step 14. Choose the coverage that appears by pressing the blue + button.
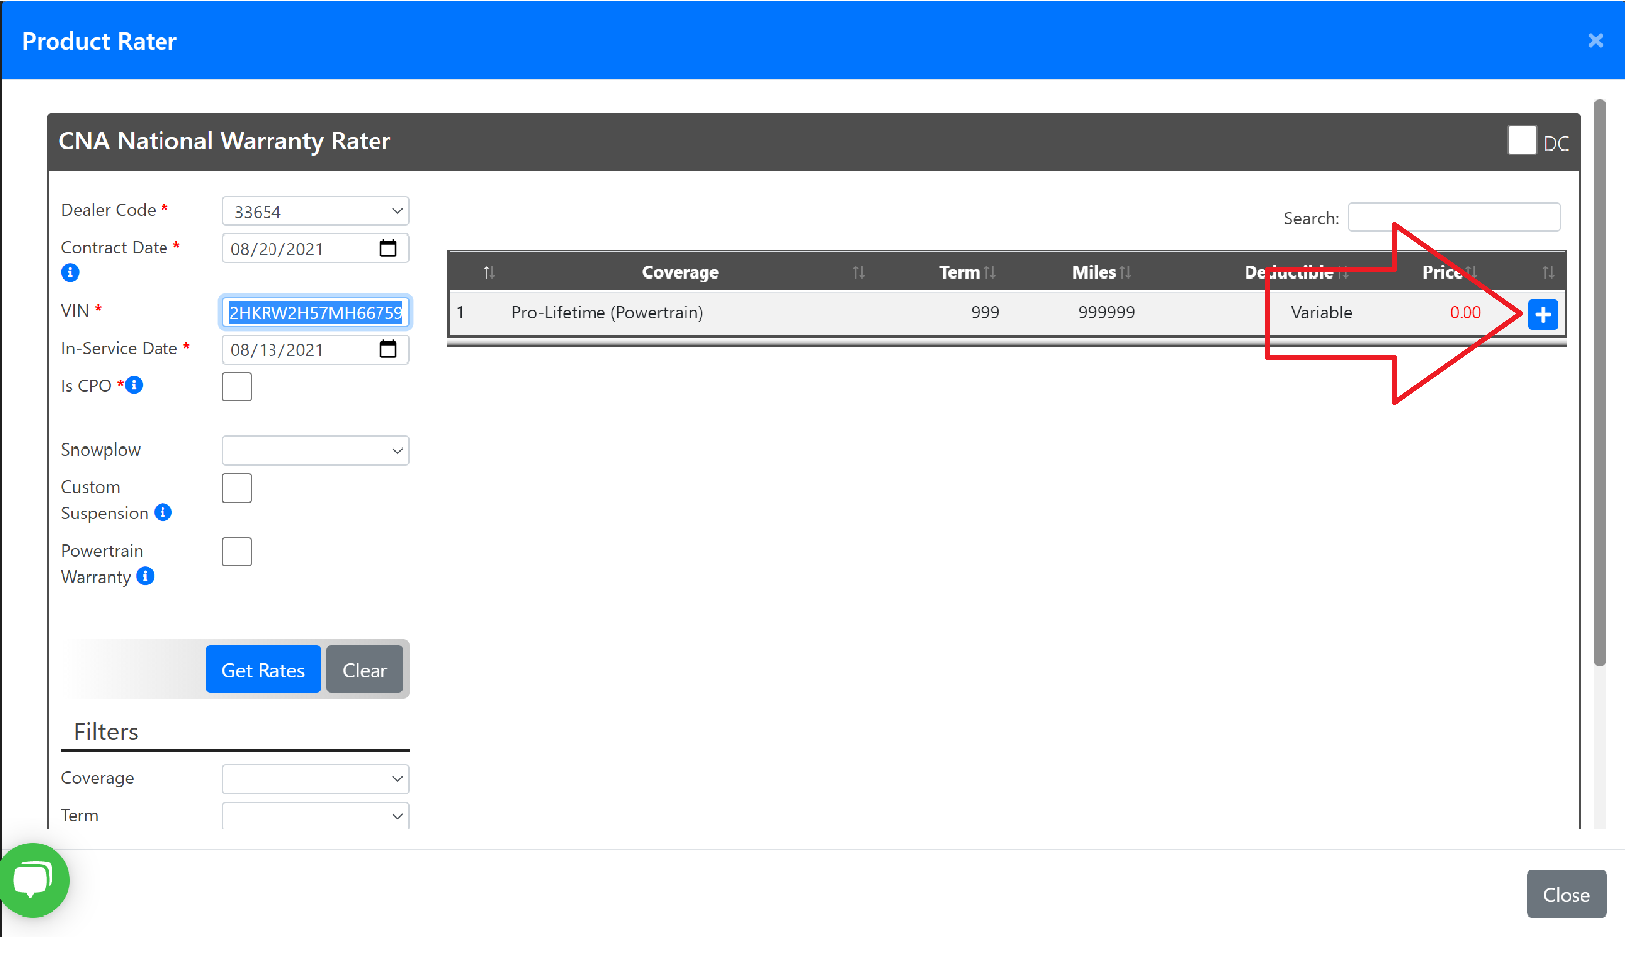
Even though there is only one coverage to select, it is important that it is selected. This helps the system know what to connect to when tying the Lifetime Wrap and the Lifetime Warranty & Wrap at contracting.
Step 15. Check the Status of both the Lifetime Wrap and the Lifetime Warranty. If both have filled in green circles, this means you have correctly selected coverages for both products. If you do not have both green circles, review the steps above.
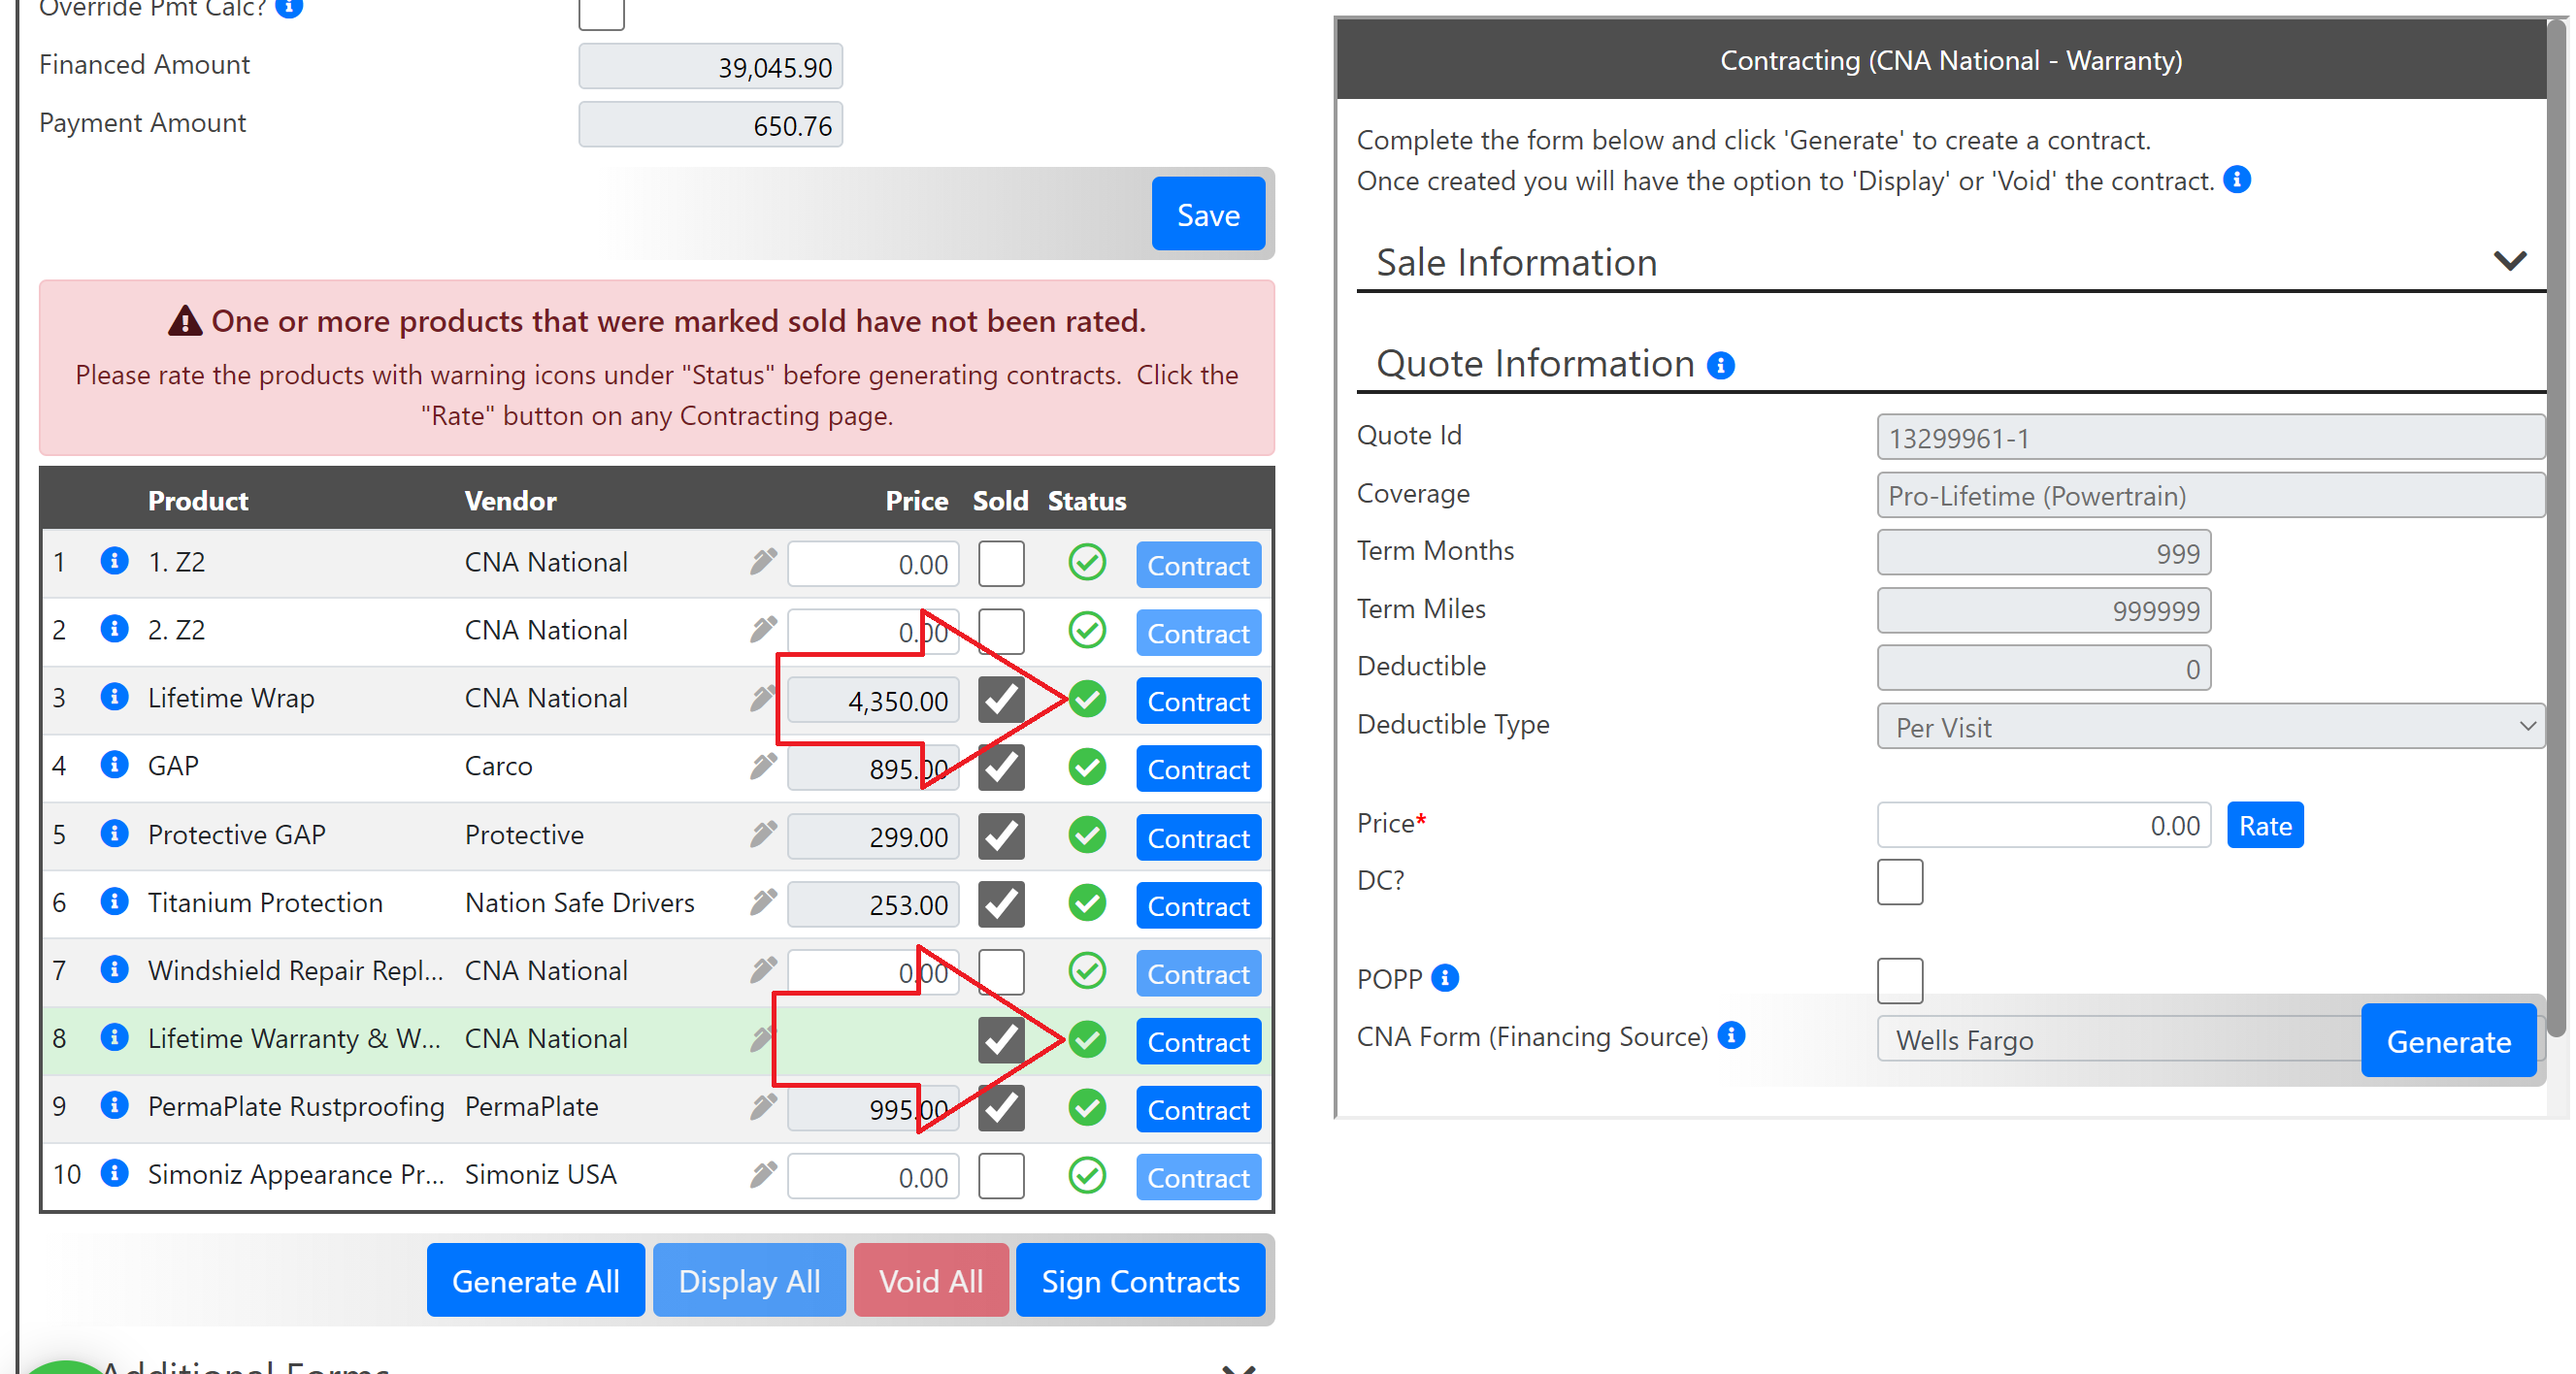
Step 16. Select the blue Generate All button.
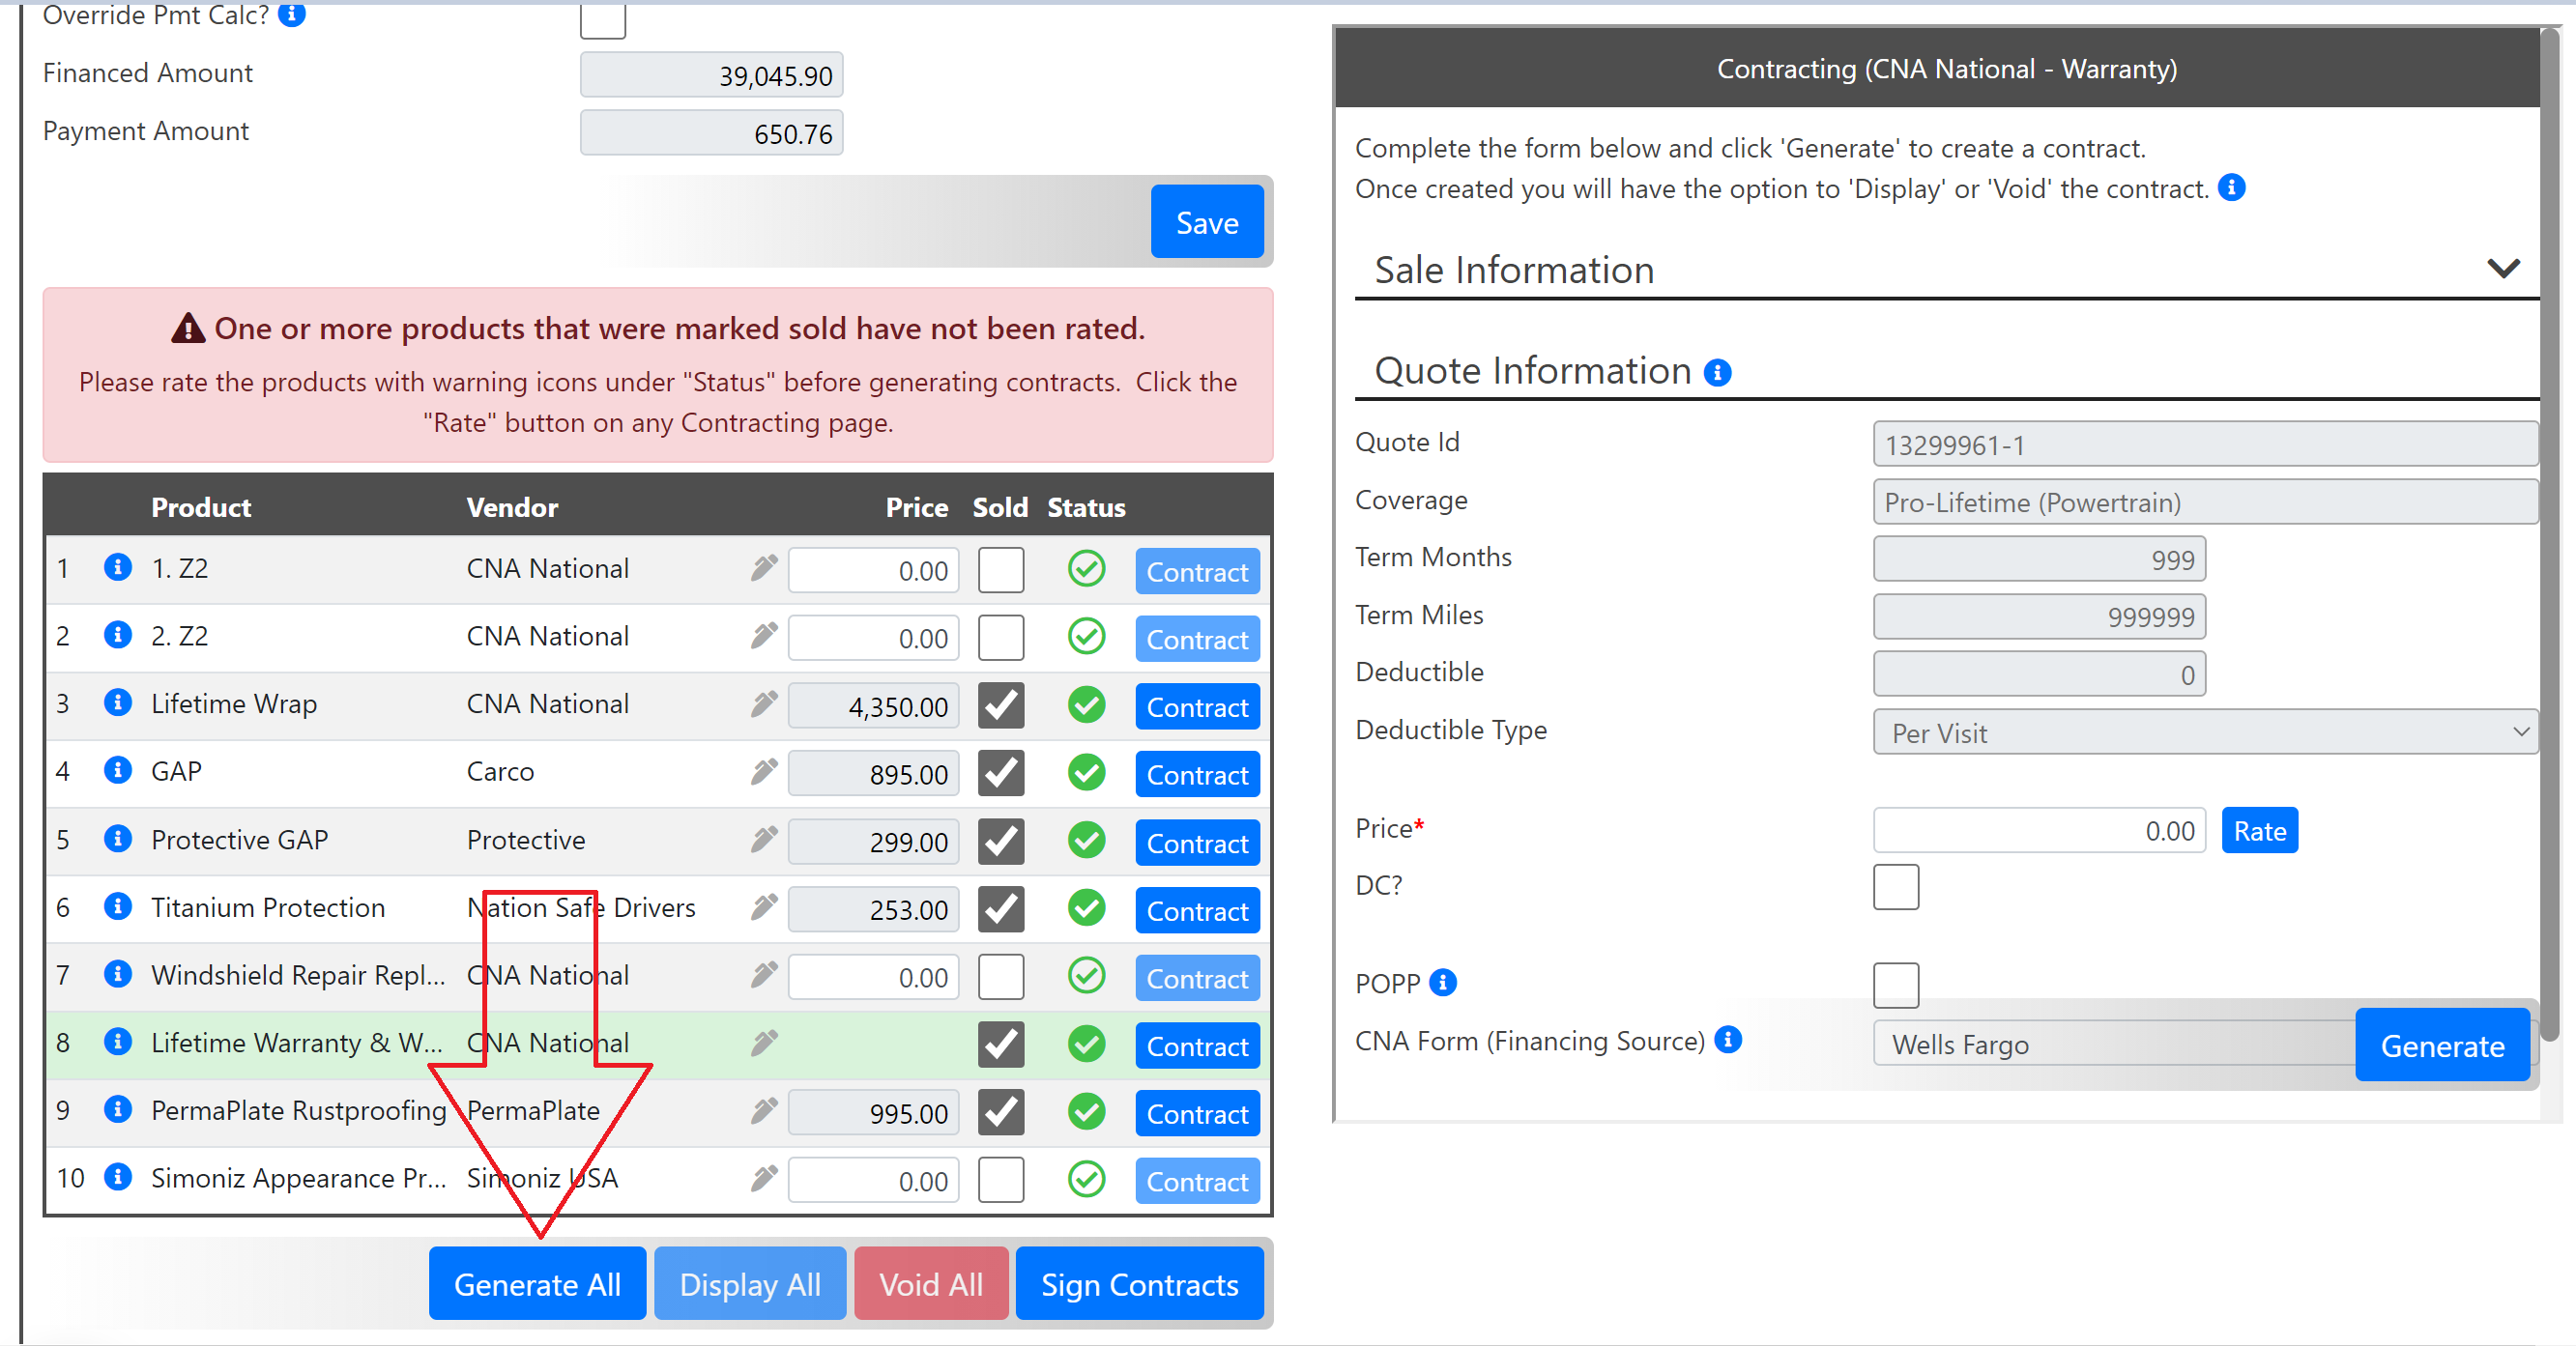
It is imperative that the contracts be generated at the same time using the Generate All. Since these products are co-dependent, the systems have to be able to communicate them together as a "package". If you contact them individually, they will not be "tied" together and therefore you will get contracting errors.
TIP: After a certain amount of time, your rates can expire. Expired rates will not contract. The error will appear in the Status column of the products when you hover your mouse over the red circle. If this happens, go back to the Layout Page and rerate. Reference Steps 3-6.
This is what it should look like once your contracts have been generated.
You are now ready to get the contracts signed and your deal logged!