![MenuMetric_500_130.png]](https://support.menumetric.com/hs-fs/hubfs/MenuMetric_500_130.png?height=50&name=MenuMetric_500_130.png)
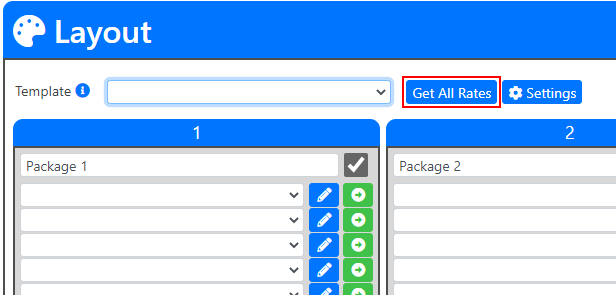
When connected for eRating in MenuMetric you will have the option to rate all of your products at once from the Layout page.
Step 1. Get started
To start, click "Get All Rates". A pop-up will appear.
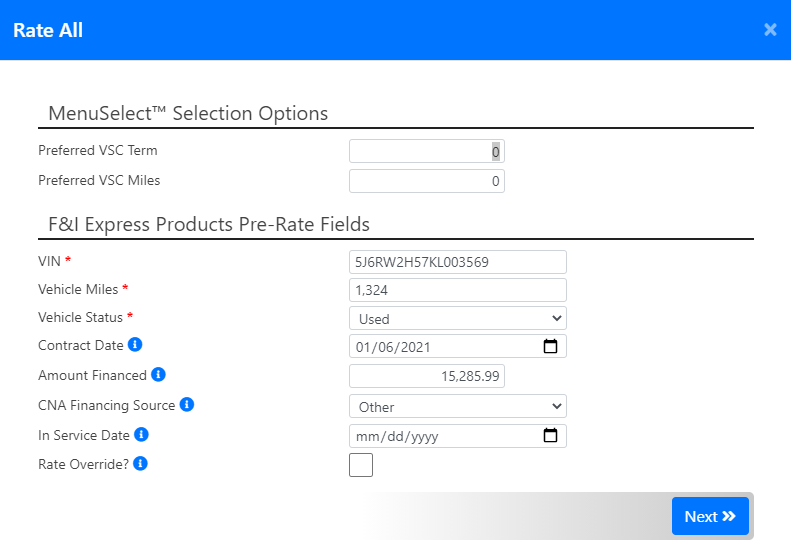
Step 2. Fill out Rating Information
If you are signed up for MenuSelect, the first section on this page will be the MenuSelect Selection Options. Click here to learn more about MenuSelect.
For Auto dealers, you may see "F&I Express" or "PEN" Products Pre-Rate Fields. These fields are all of the information that your product vendors need in order to return the appropriate rate options for each product. This gives you a chance to update this information or fill in any missing information prior to sending the rate request.
RV Dealers: Click here for RV rating specifics
Powersports & Marine dealers: Click here for Powersports & Marine rating specifics
When all fields are filled out appropriately, click "Next" to send out the information.
You will see the Rating Progress for each product. The Status will show a spinner until each Vendor returns rates for each product. During this process, MenuMetric has sent a request to each of your vendors with the information that you provided and their systems will return the appropriate rates. It is important to remember that MenuMetric does not house any of these rates. All terms, coverages, deductibles, and costs are sent to MenuMetric from your Vendor for each individual deal, meaning MenuMetric will always have the correct rates!

As each vendor responds you will see either a "Success" message as shown below or an error message from your Vendor. If you get an error you will have an opportunity to update information and rerate from the Layout page as needed.
Note: If you see a "N/A" this simply means that the product is not electronically connected to receive rates.
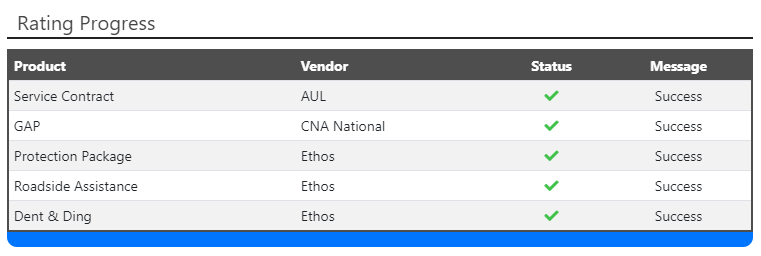
When the rating is complete click "Close" to return to the Layout page.
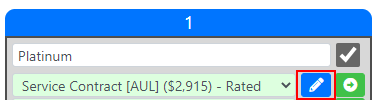
Step 3. Select Your Coverage
If MenuSelect is enabled for your dealer, you will now see your products highlighted in Green and can hover your mouse over the product to see what was automatically selected. Click here to learn more about MenuSelect.
You can manually select or edit your desired coverage by following the steps below.
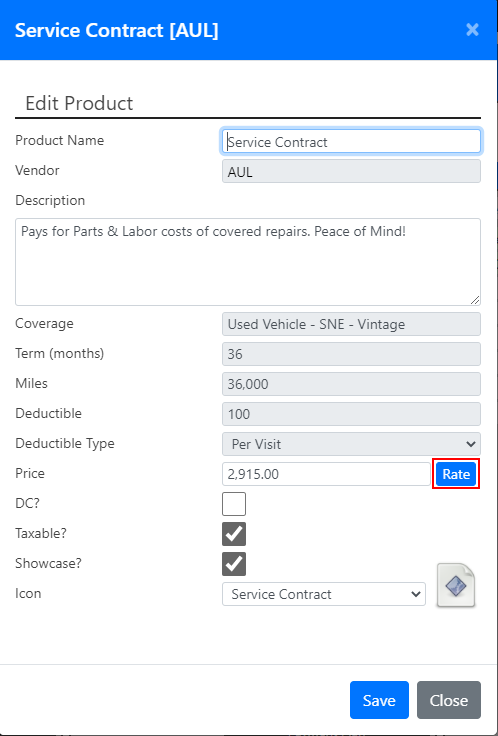
- Click the blue Pencil icon within the product row you wish to edit. A pop-up will appear.
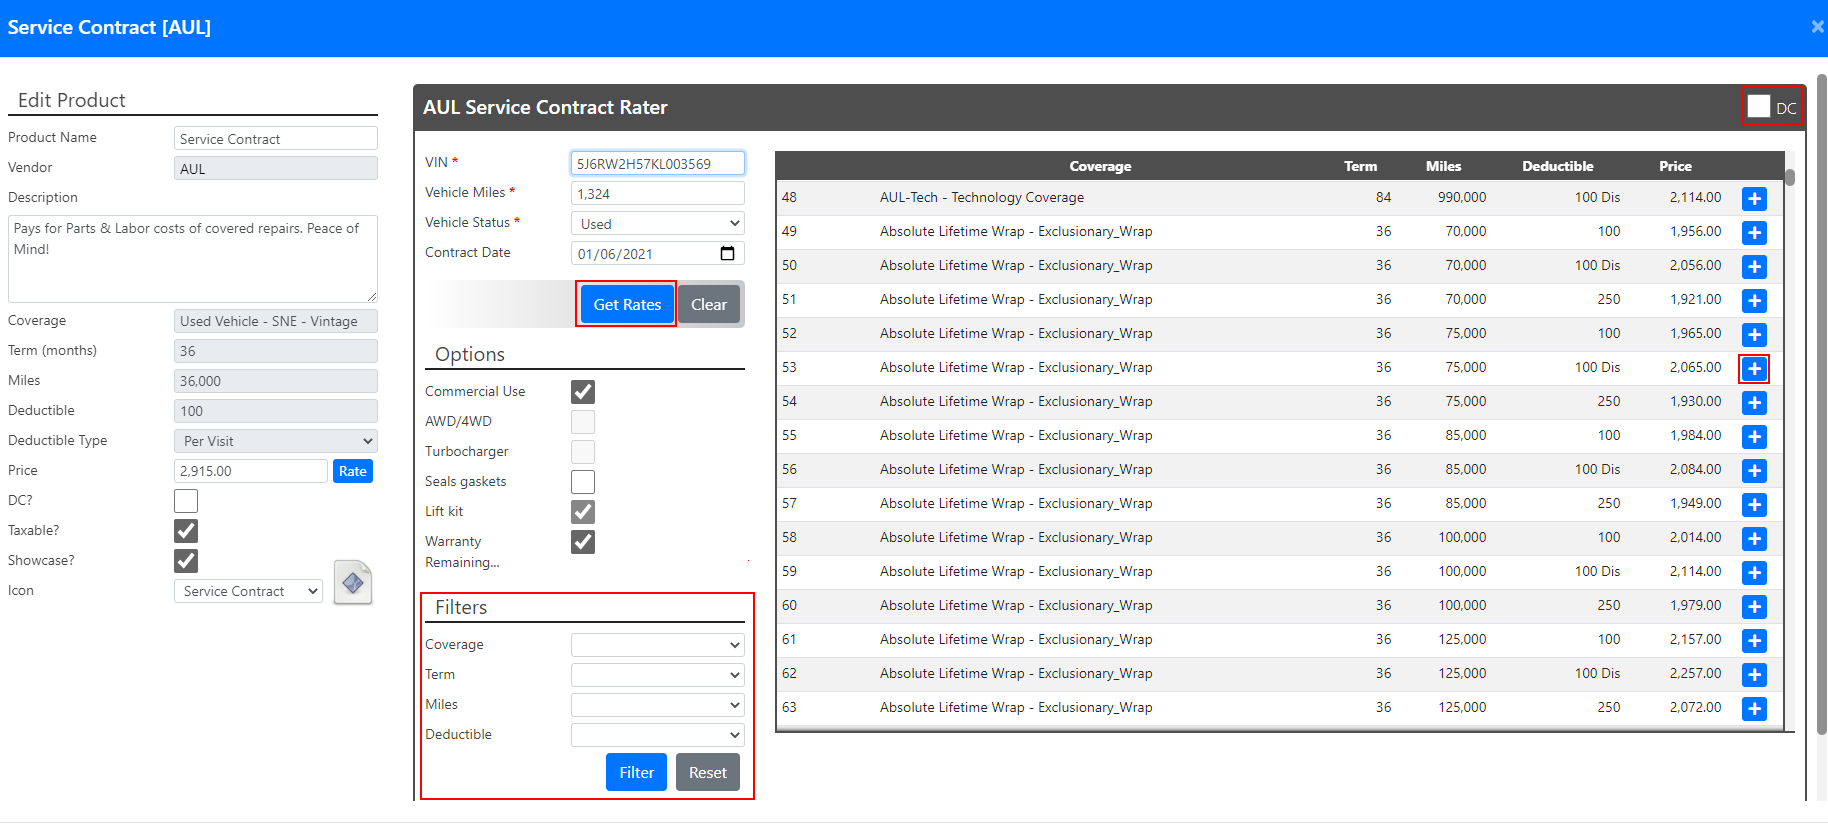
- On the product Edit page, click the small blue "Rate" to view all available rate options. The pop-up will transform to the Rater Page which will show every available option for the product.
- If the information at the top left is not correct, simply make the changes needed and click "Get Rates" to rerate the product. If everything looks good, you can filter the product list using the Filters at the bottom left.
- Finally, once you have found the option that you want to show this customer, click the blue "+" icon to select the product.
Tip: Select the "DC" checkbox at the top right to display your "Dealer Cost" for all of the options. It is defaulted to be unchecked so costs are not showing in case your customer can see your screen.
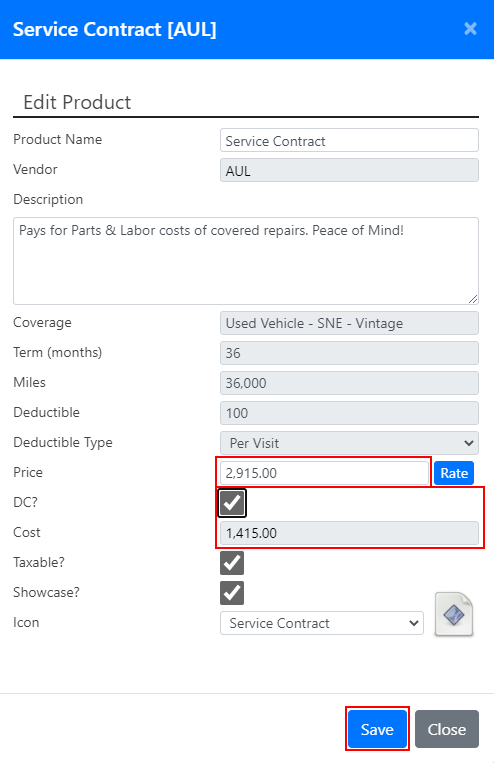
- After selecting the appropriate coverage, the window will shrink again and show just the "Edit Product" section. This is where you can update the retail price that will be used on your menu as well as view your Dealer Cost.
- Once everything is edited as needed, click "Save" to save this product to your Menu
- Repeat this process for each product as needed.
Once you have selected the right coverage for each product you are ready to present your menu!
Learn more about our MenuStyles to find out what kind of presentations work best for you!