
How do I navigate the rating and contracting only workflow of MenuMetric?
For the convenience of our dealers, we have created the ProviderLink workflow of MenuMetric. The intention is to give a simplified faster process to link our dealers to their providers. The functions of this process focus on only rating and contracting.
Note: Reporting can be included as an additional function to this workflow. Please contact us if you would like reporting added to your store.
This article will give you a step-by-step guide on how to use the ProviderLink workflow. If you have any questions beyond the answers here, please call our support line!
Step-by-Step Guide
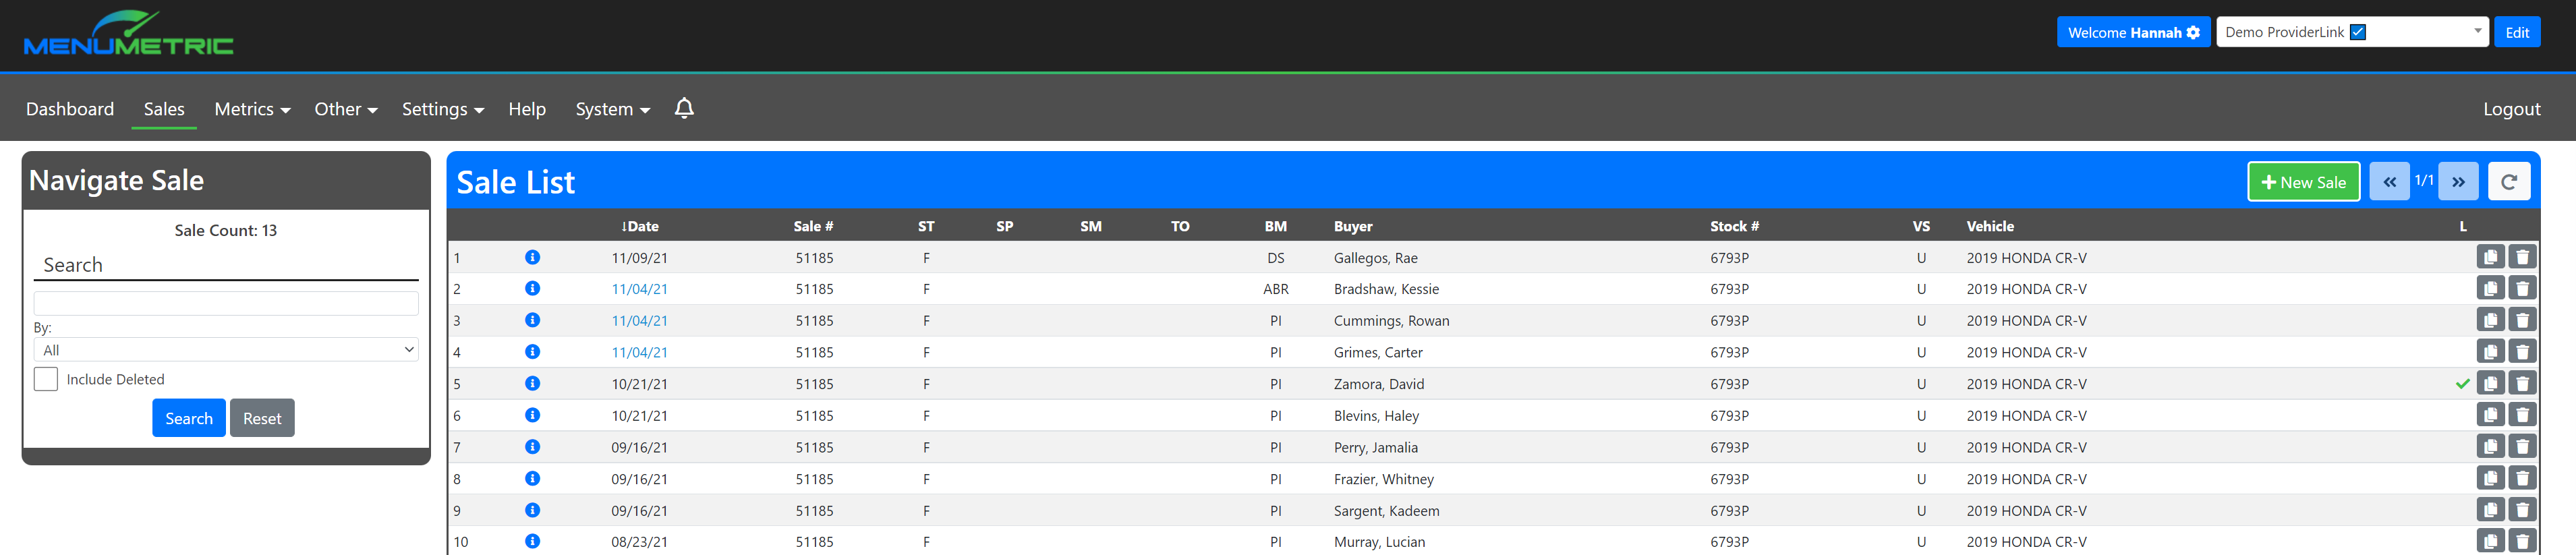
Step 1. Starting Your Deal
- Starting from the Sales Page, select the
 button.
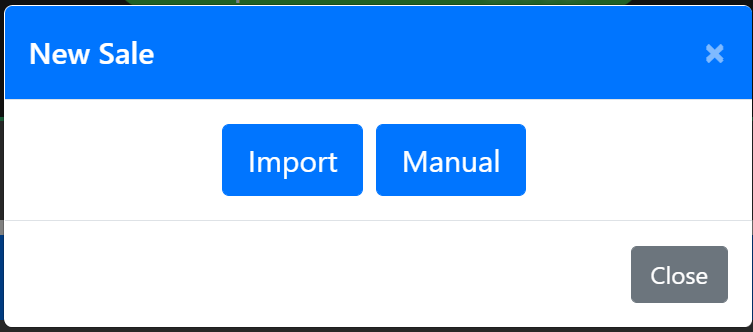
- A pop-up will appear where you can choose to import your deal from your DMS or build your deal manually. For this guide, we will be importing a deal.
If you are doing a Manual Deal, click Manual, then you can skip down to the Sale Information Page section of this article.
- Click

- Once you have selected the Import button, you will be taken to the Import Sale page.
- Check to ensure the Source is set to the correct DMS information.
- Enter the Deal Number from your DMS that you wish to pull over into MenuMetric.
- Select the Rate All Products check box.
- Click the Import button.

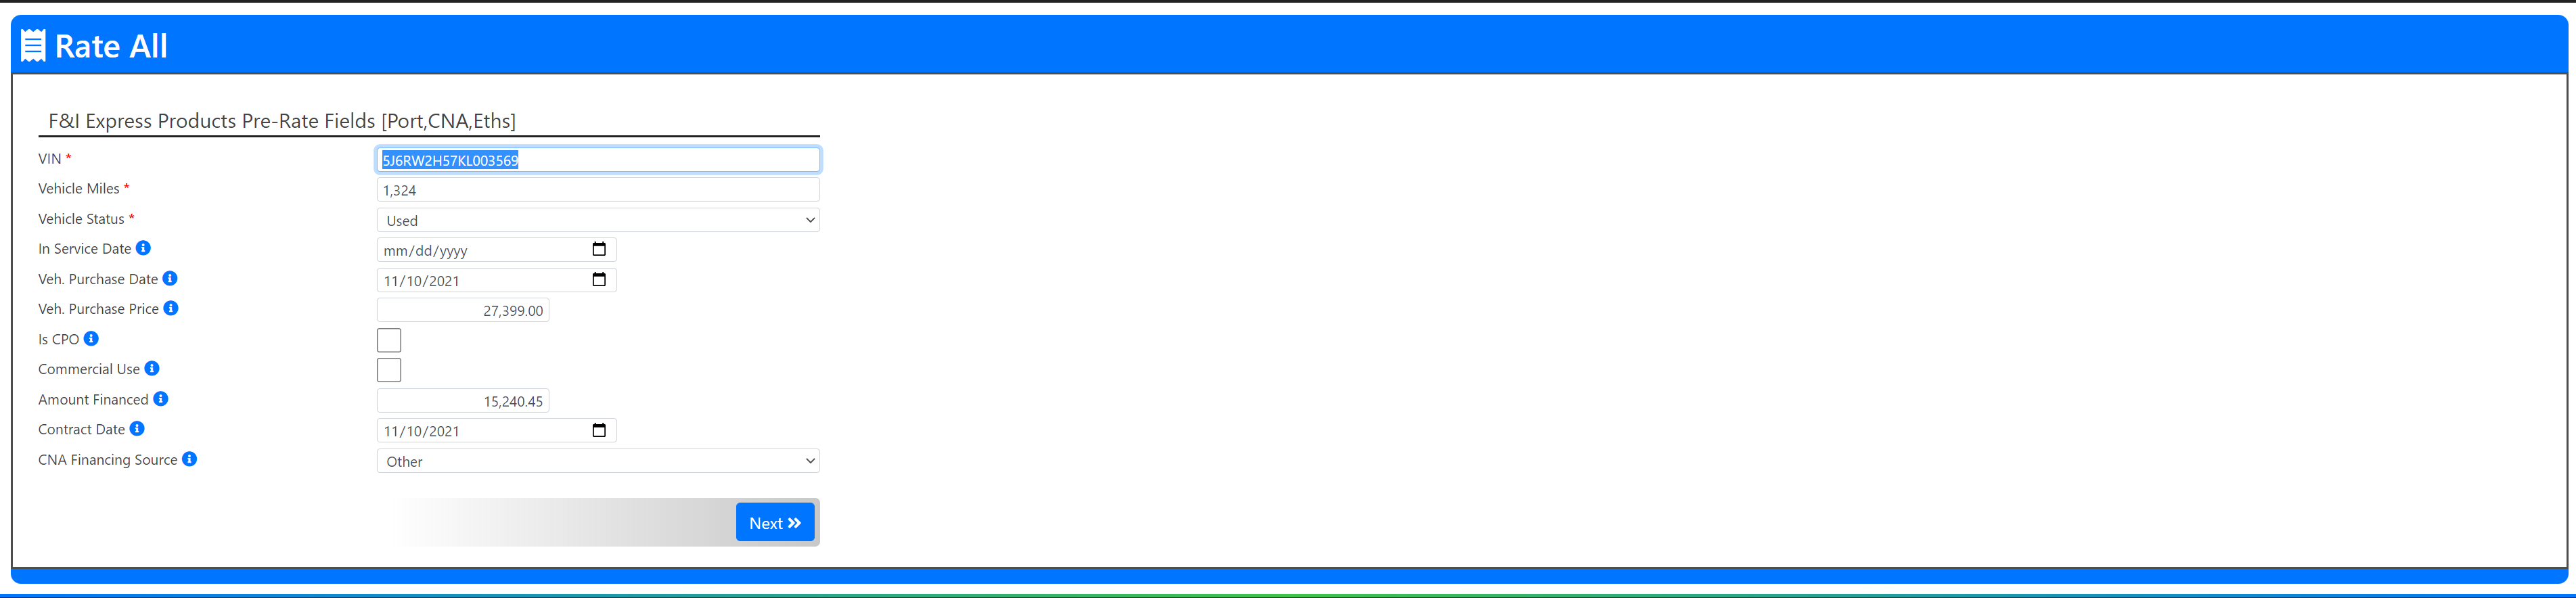
- Your Rate All page will appear. Here you can fill out the required information for rating that may not be included in your DMS deal structure.
- Once you have completed all of the missing information, click Next>>.

- You will be brought to the Rate All Progress Page. From here the MenuMetric system reaches out to your vendors with your deal information. The vendors return what rates your deal applies for. You will be able to choose which coverage is best for your deal from all of the rates returned later in the process.
- Click Next>> once all of the products have a green checkmark in the Status column.

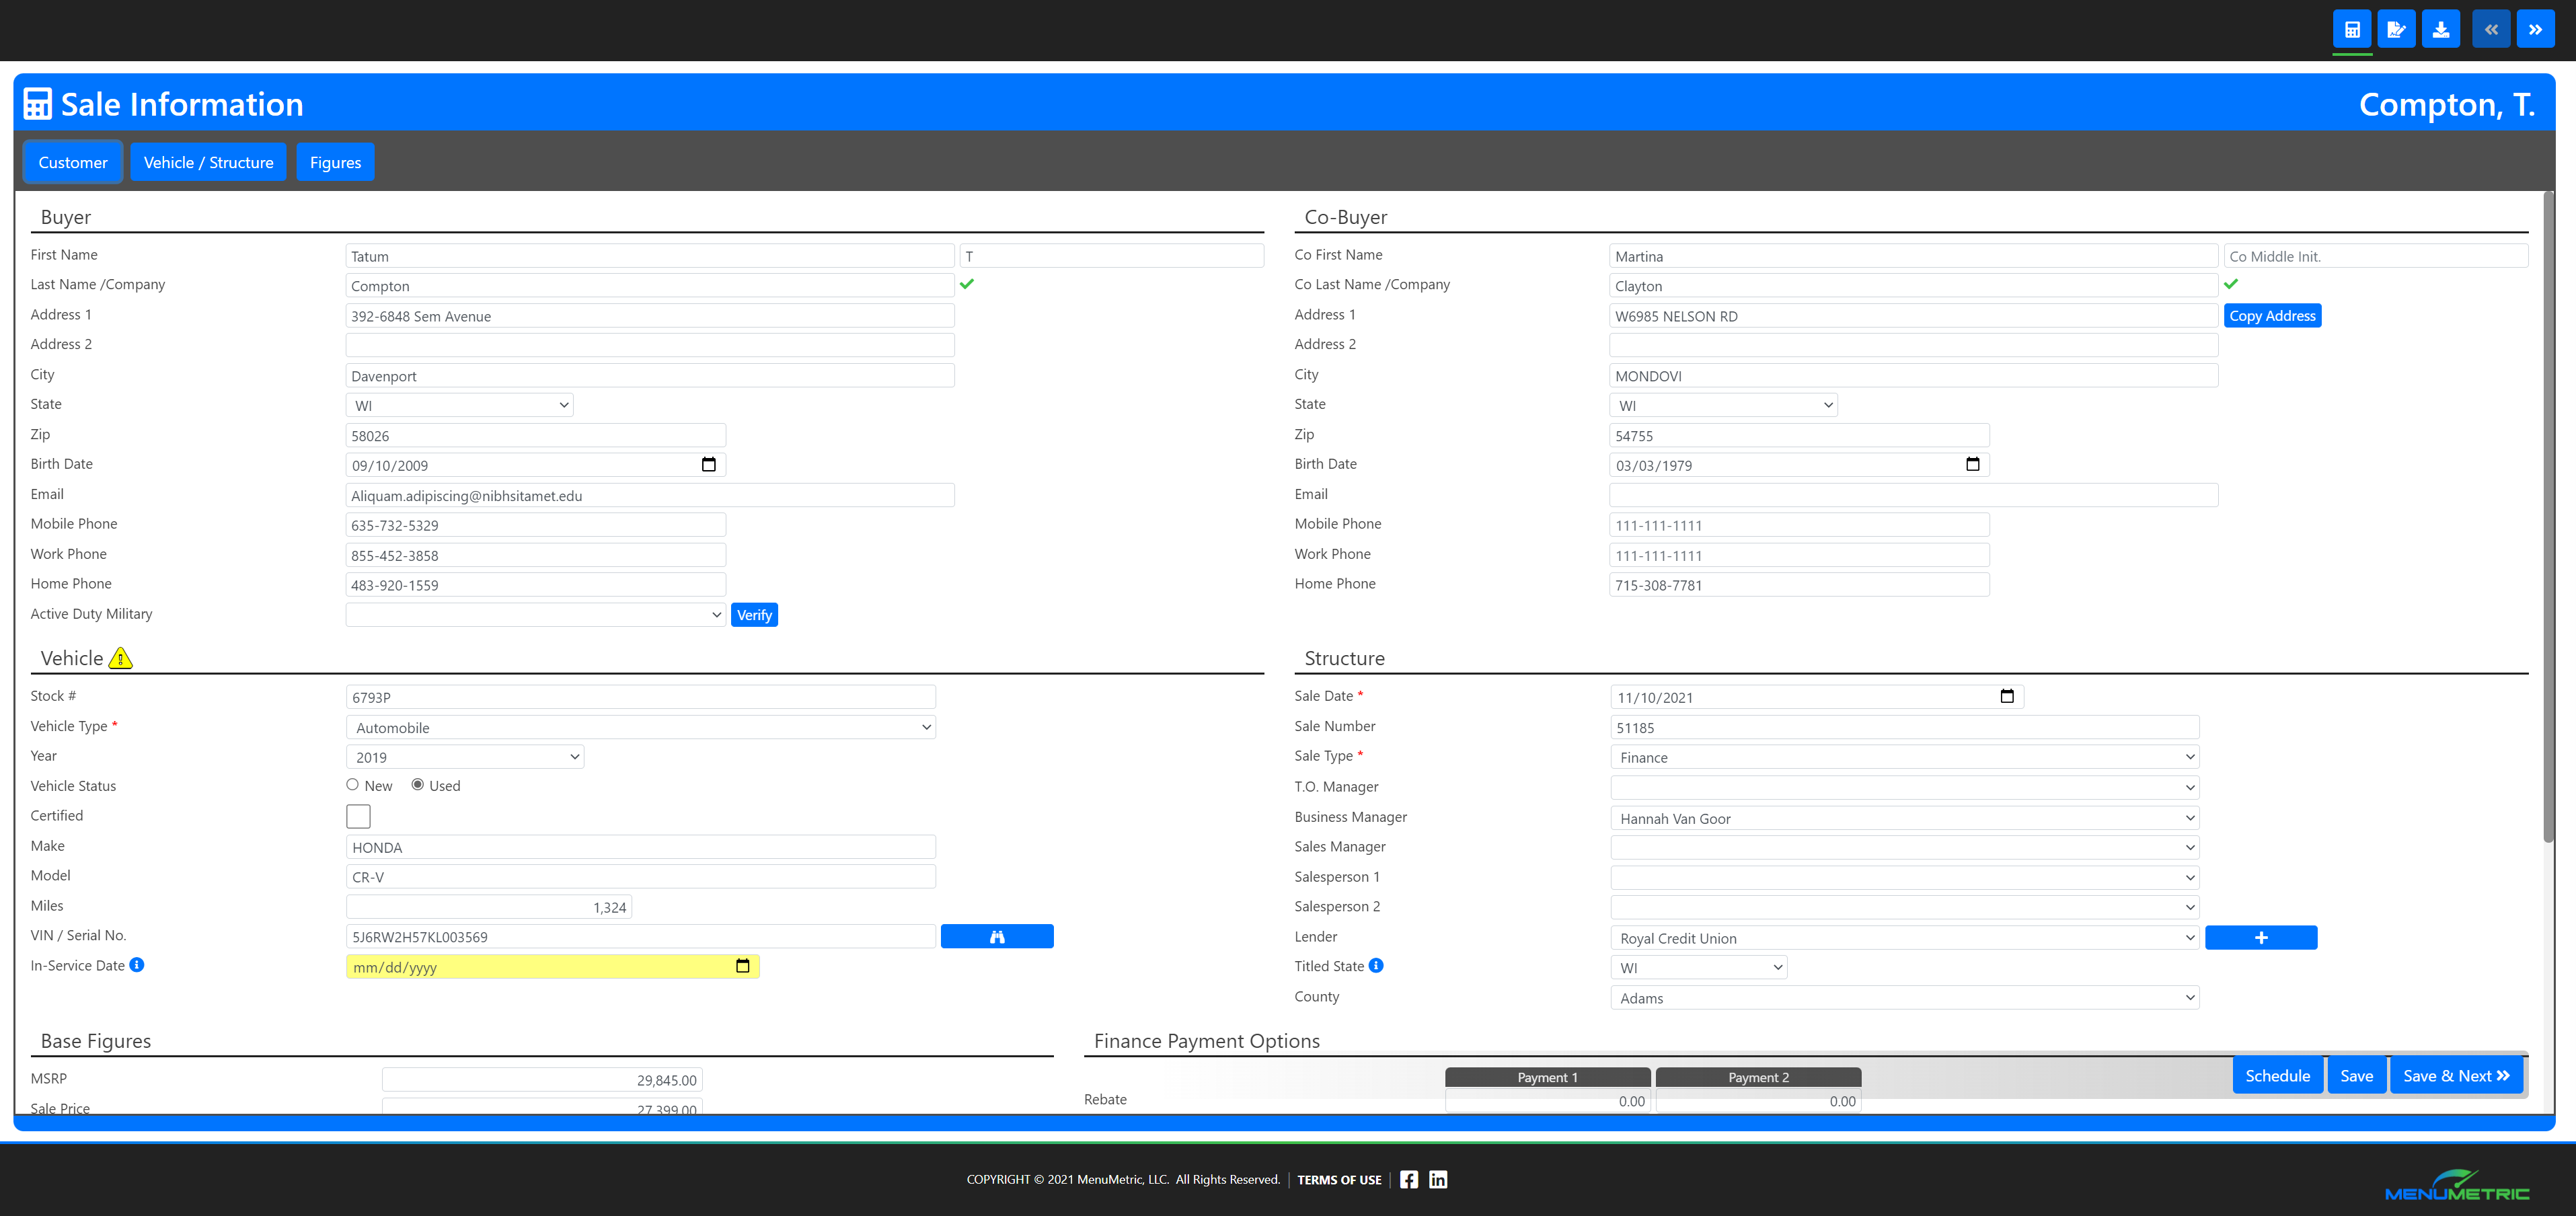
Sale Information Page
- You are now on the Sale Information page. Here you can change any remaining information that your deal may be missing or needs editing.
- When you are done making your changes select the
 button on the bottom right of the page.
Note: If you earlier chose to do a Manual Deal, you will start on the Sale Information page and can build your deal information out here from scratch.
Step 3. Forms Page: Selecting Payment Selection and Coverages
- You are now on the Forms page. In section 1. Payment Selection, add in the information that best applies to your deal, then click Save.

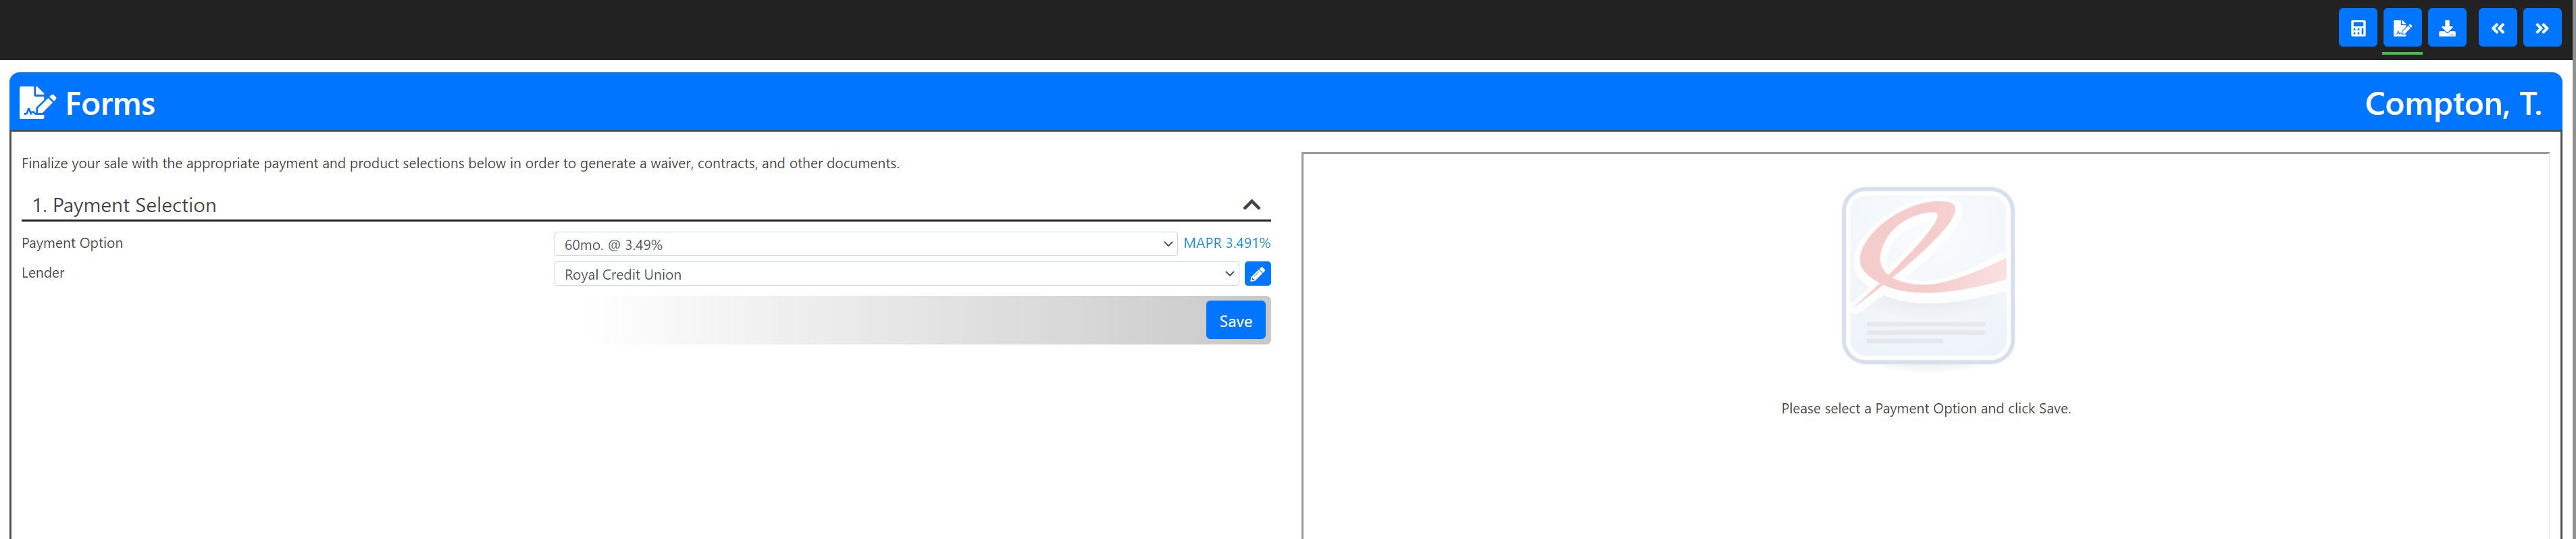
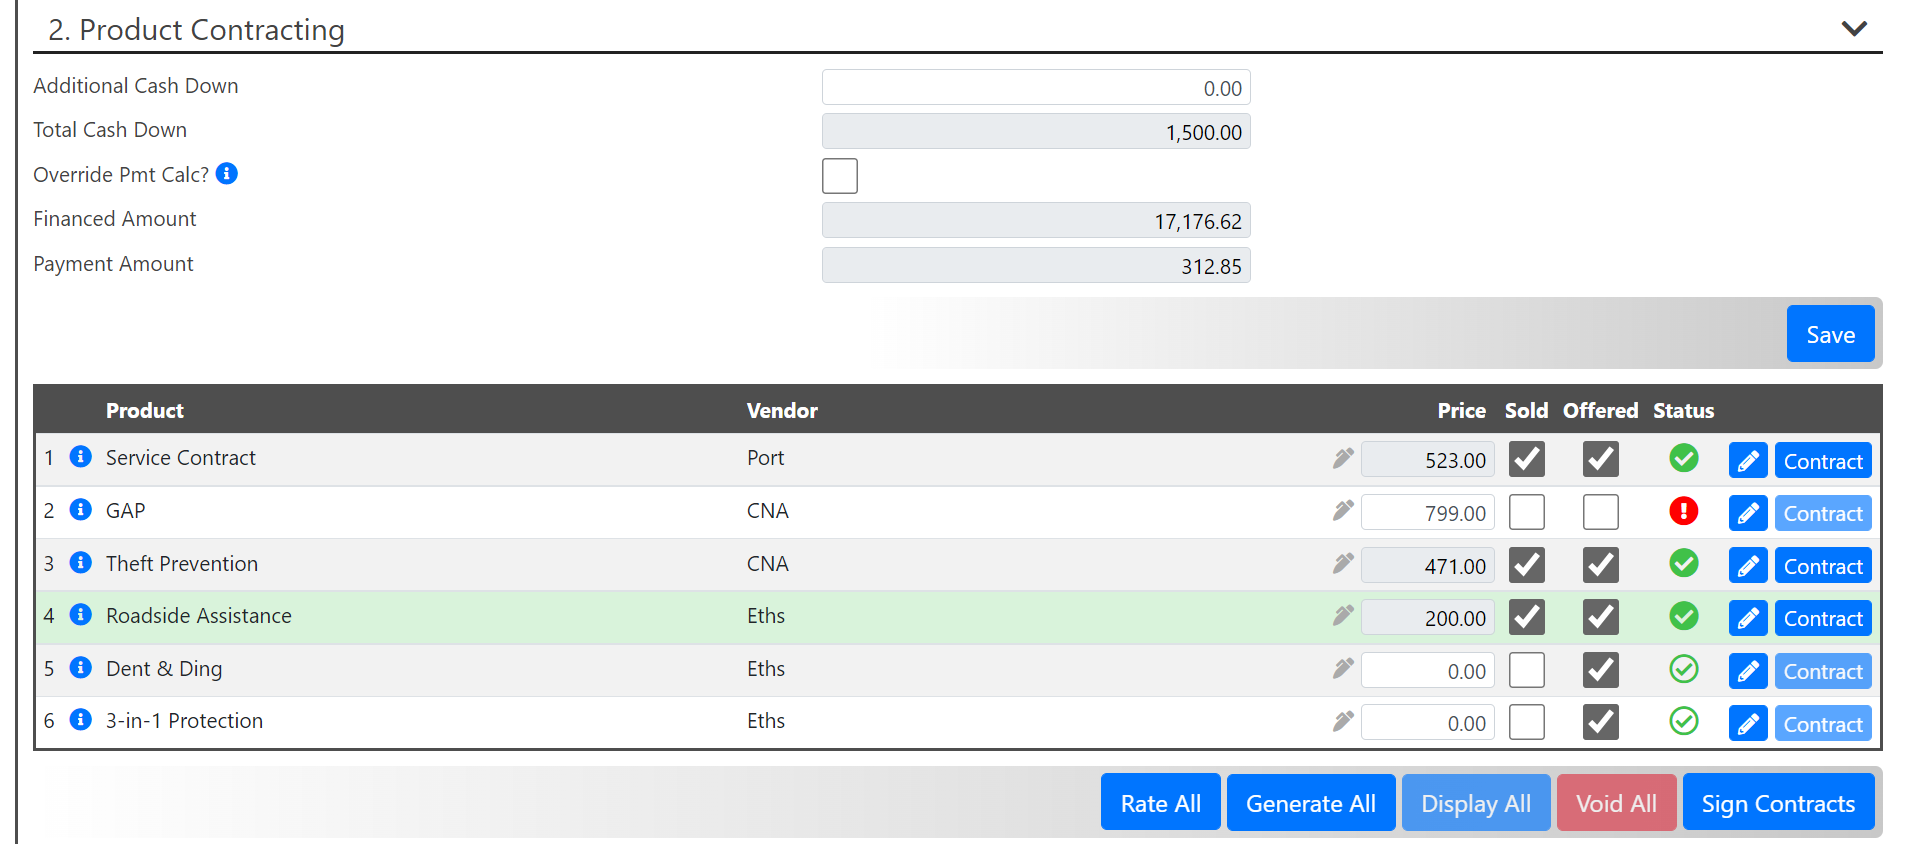
- 2. Product Contracting will scroll open. In this section, you can see the basic financing of the deal and manage your products.
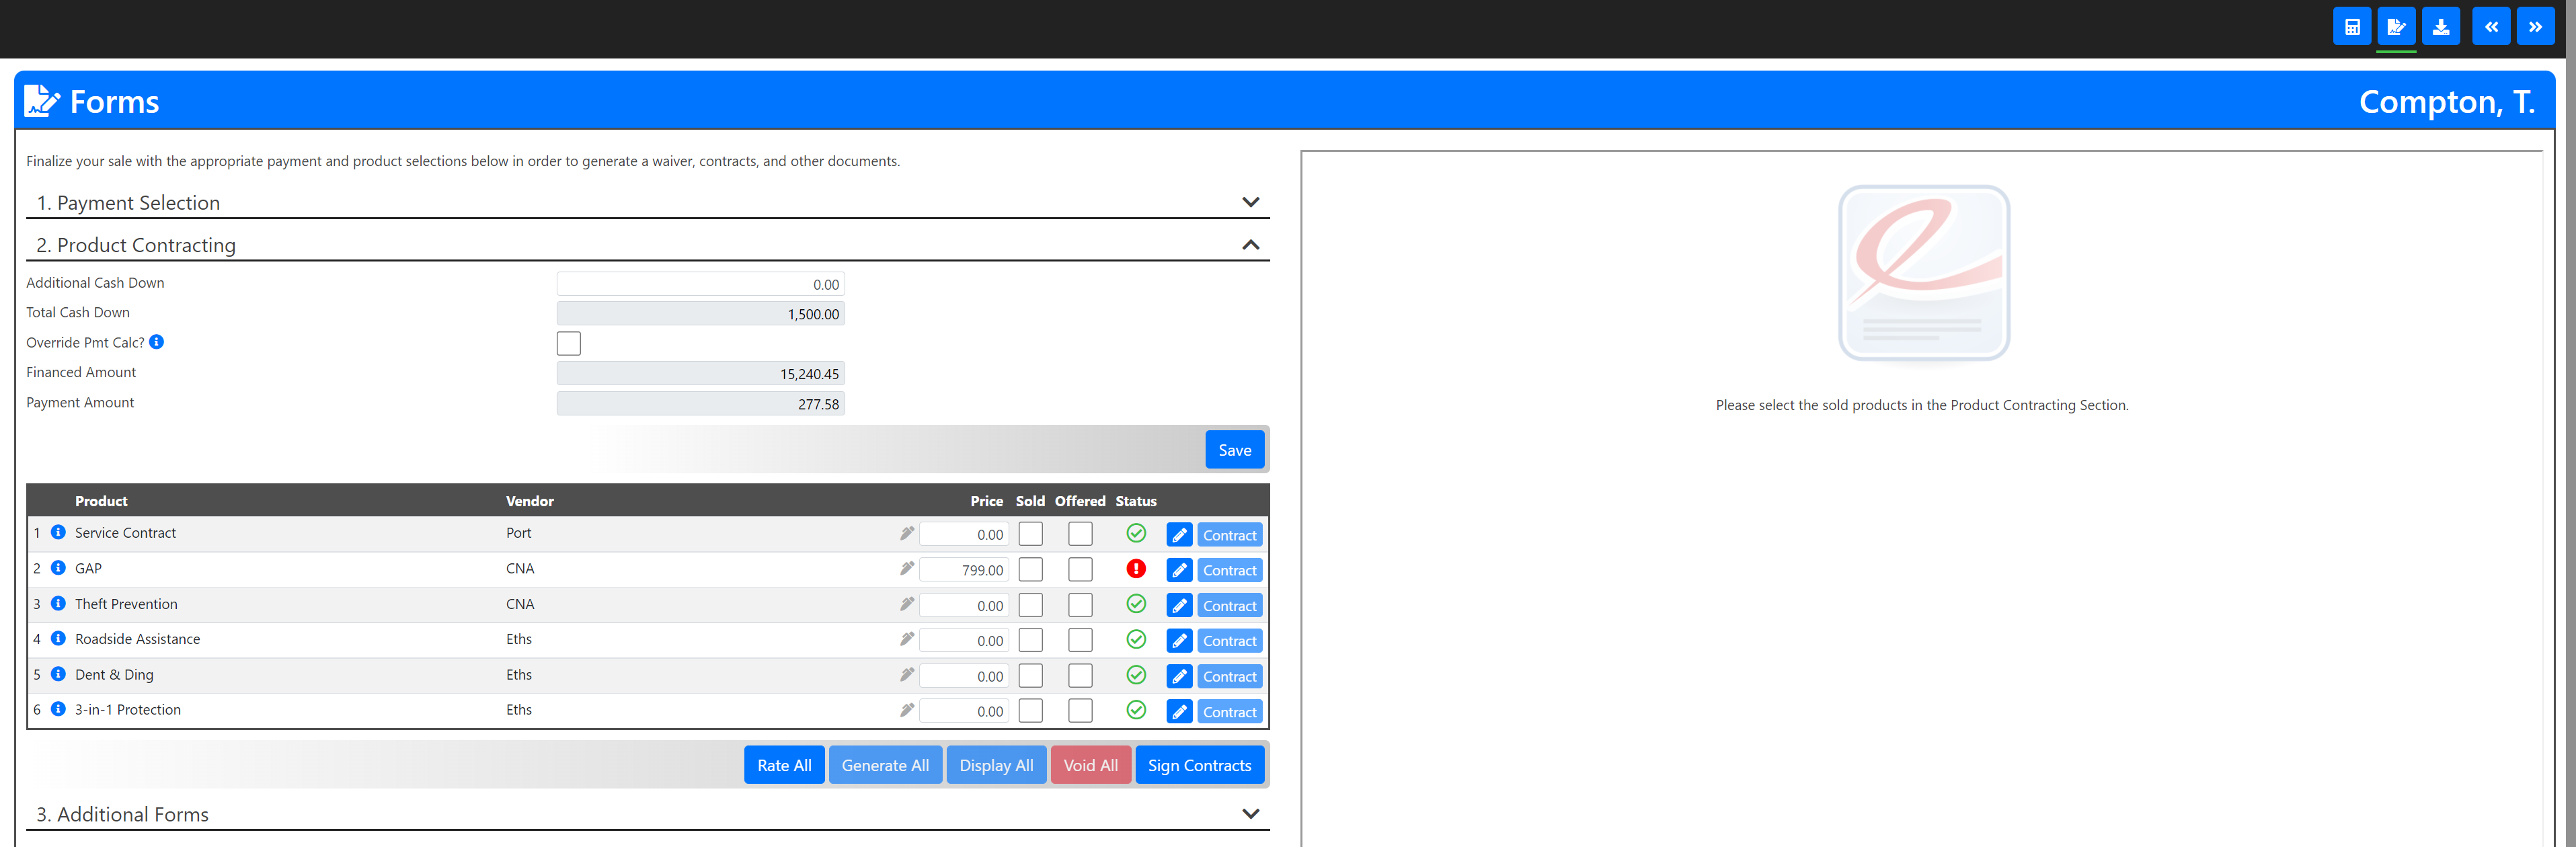
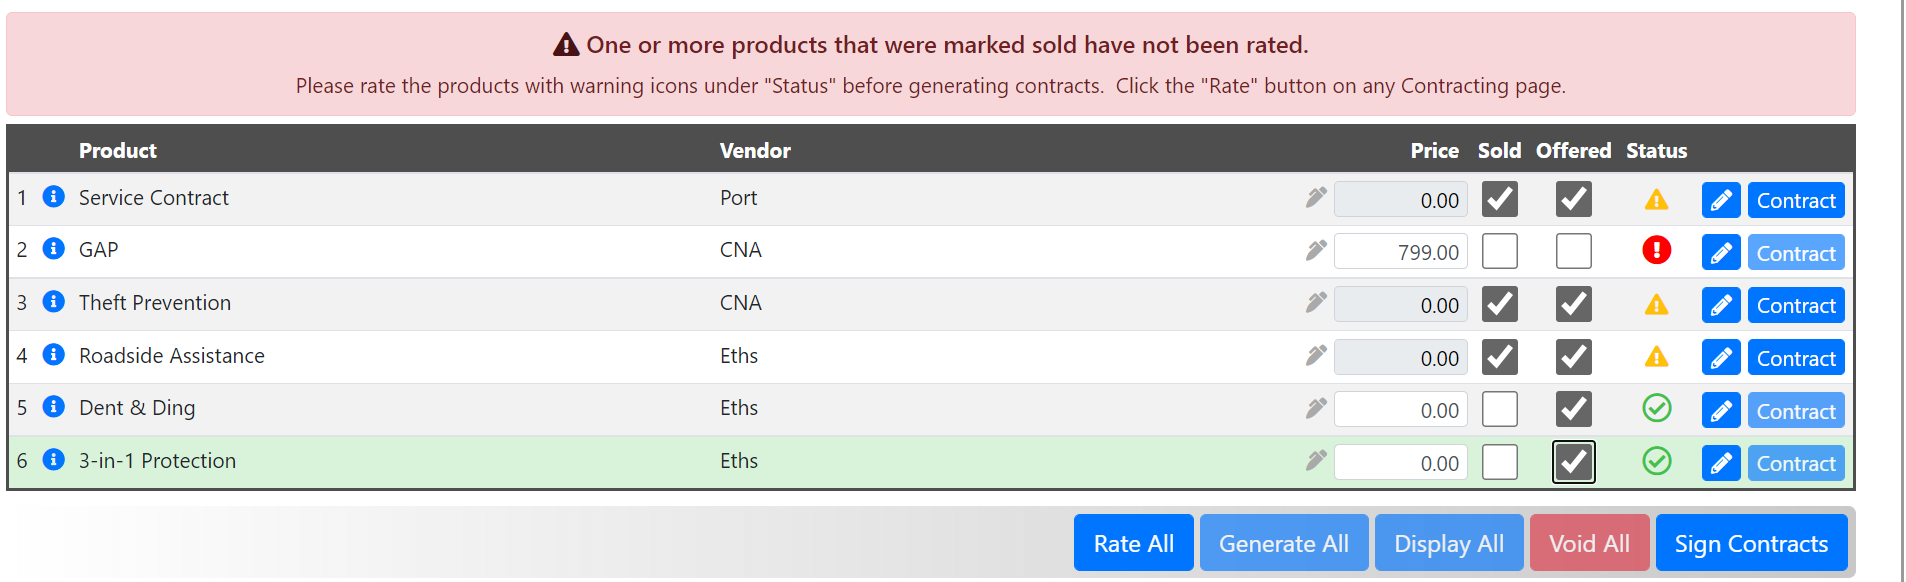
- Mark the checkboxes that apply for both Sold and Offered.
- The Status will change to a Yellow Triangle letting you know that the product is rated, but coverage has not yet been selected.
Selecting Coverages
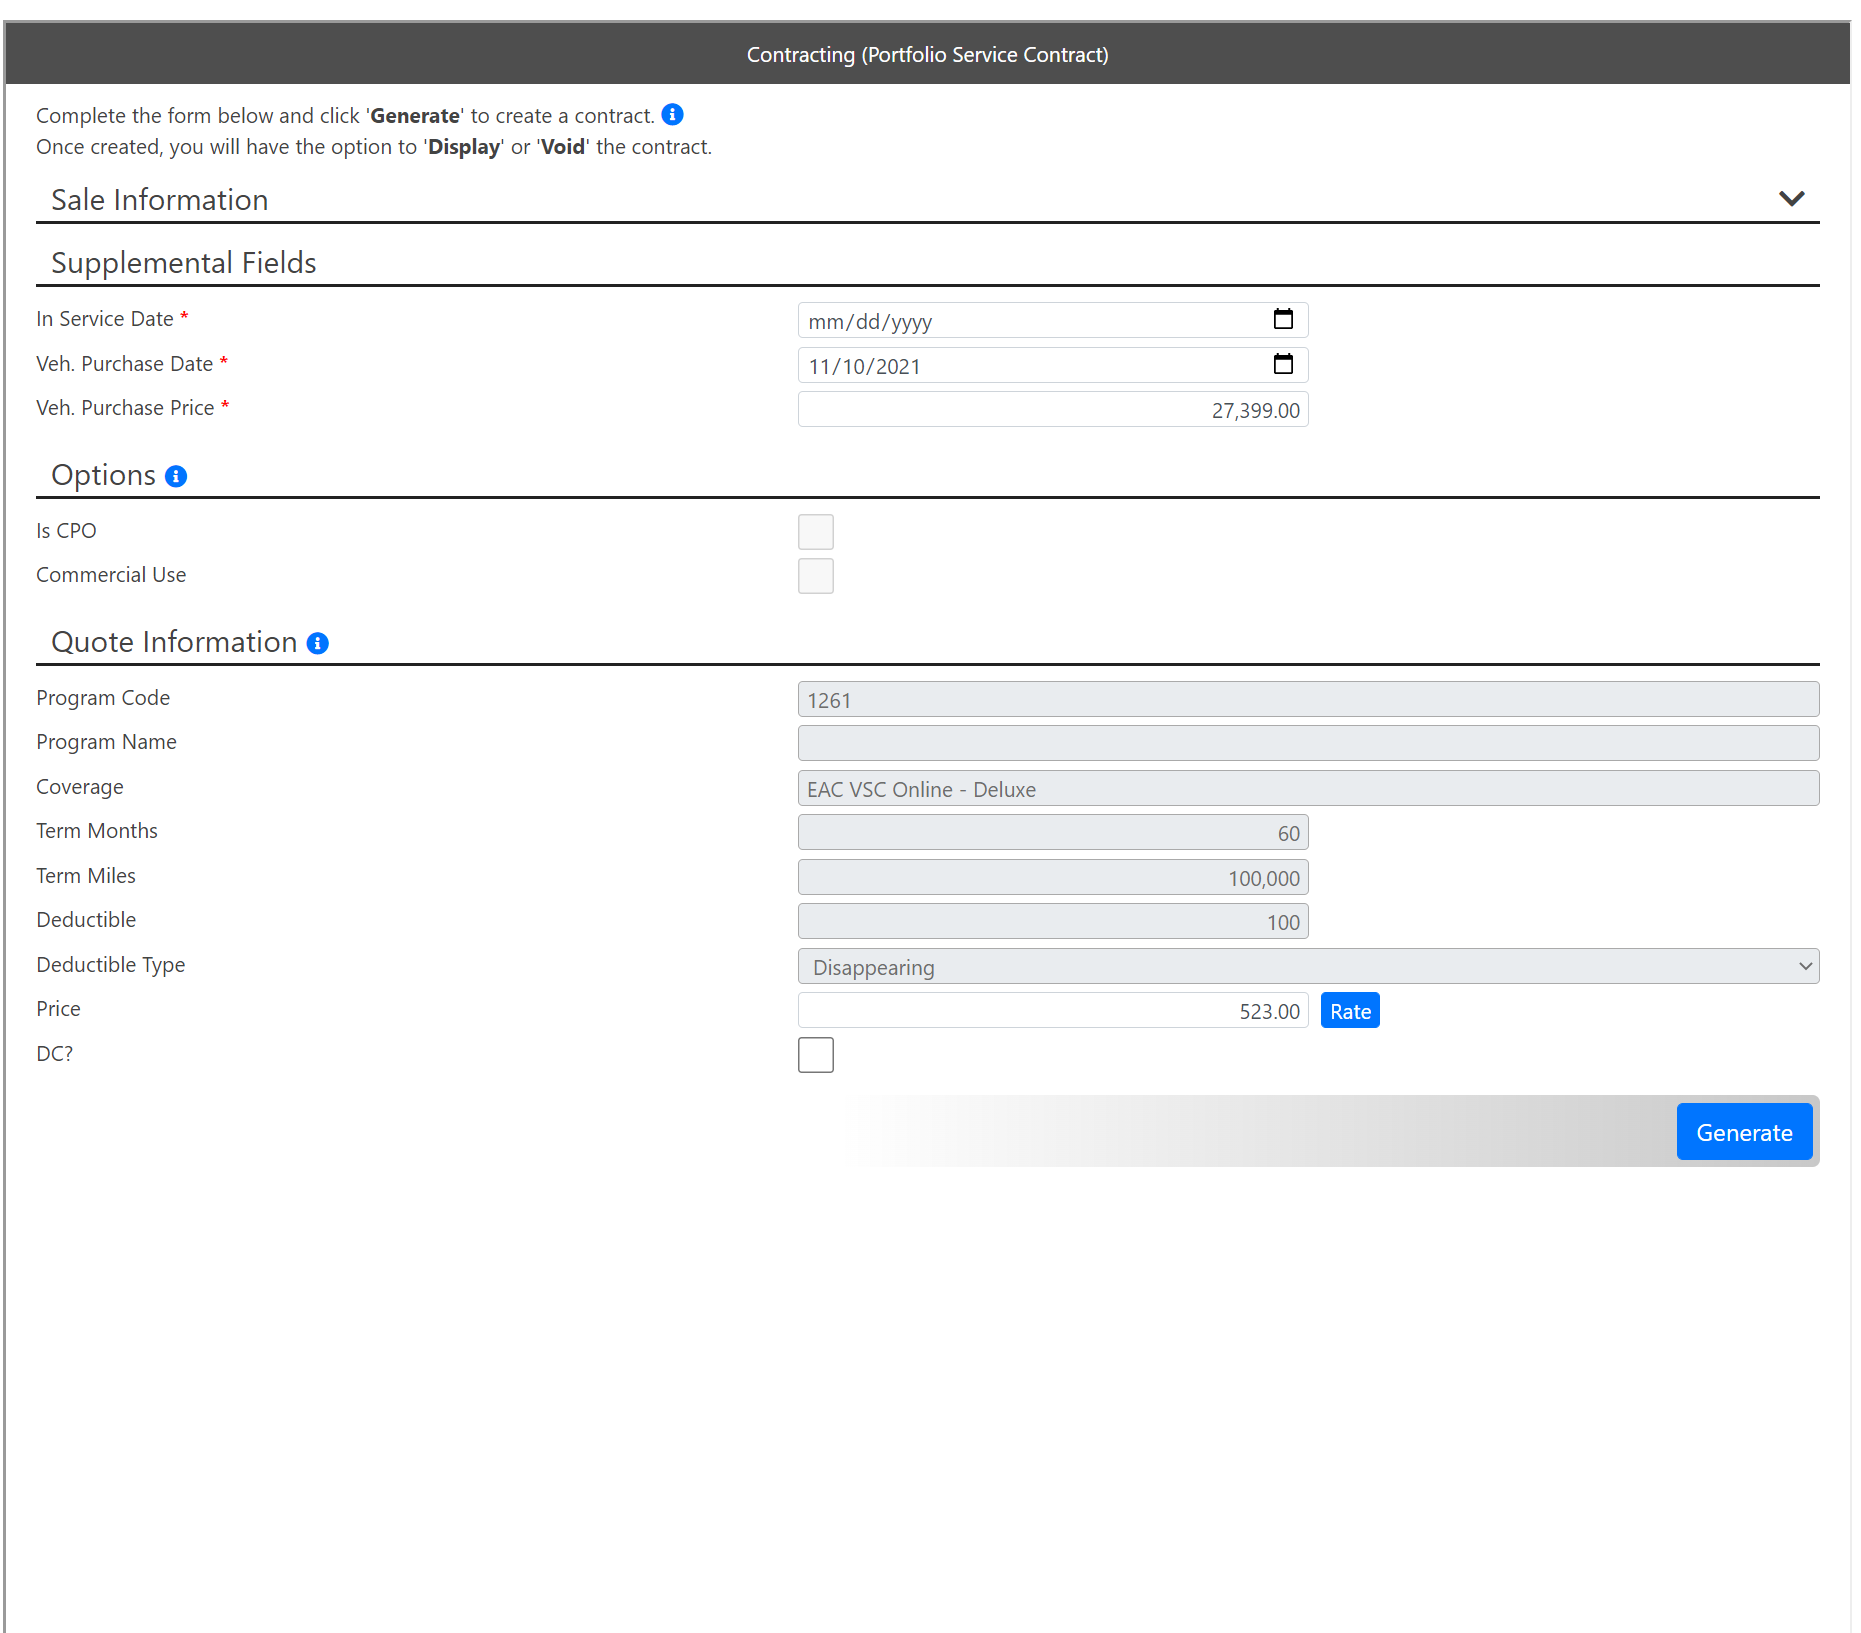
- Click contract in the product you wish to choose a coverage for.

- The right side of your screen will populate with the product information. Here you click Rate to view your rates that returned from earlier.

Note: If you did not use Rate All at import or you are doing a manual deal you will have these additional steps here.
- On the left, you can fill out any missing information needed to send rate calls to your vendor for this product.
- Once you have completed the needed information, select Get Rates. The MenuMetric system will send the information from your deal to your vendor. The Vendor then returns whatever coverages your deal applies for. In the next step, you select which coverage you think is best for your customer.

- Once you have clicked rate, your coverages list will appear. You can select which coverage is best for your deal by clicking the blue + button.

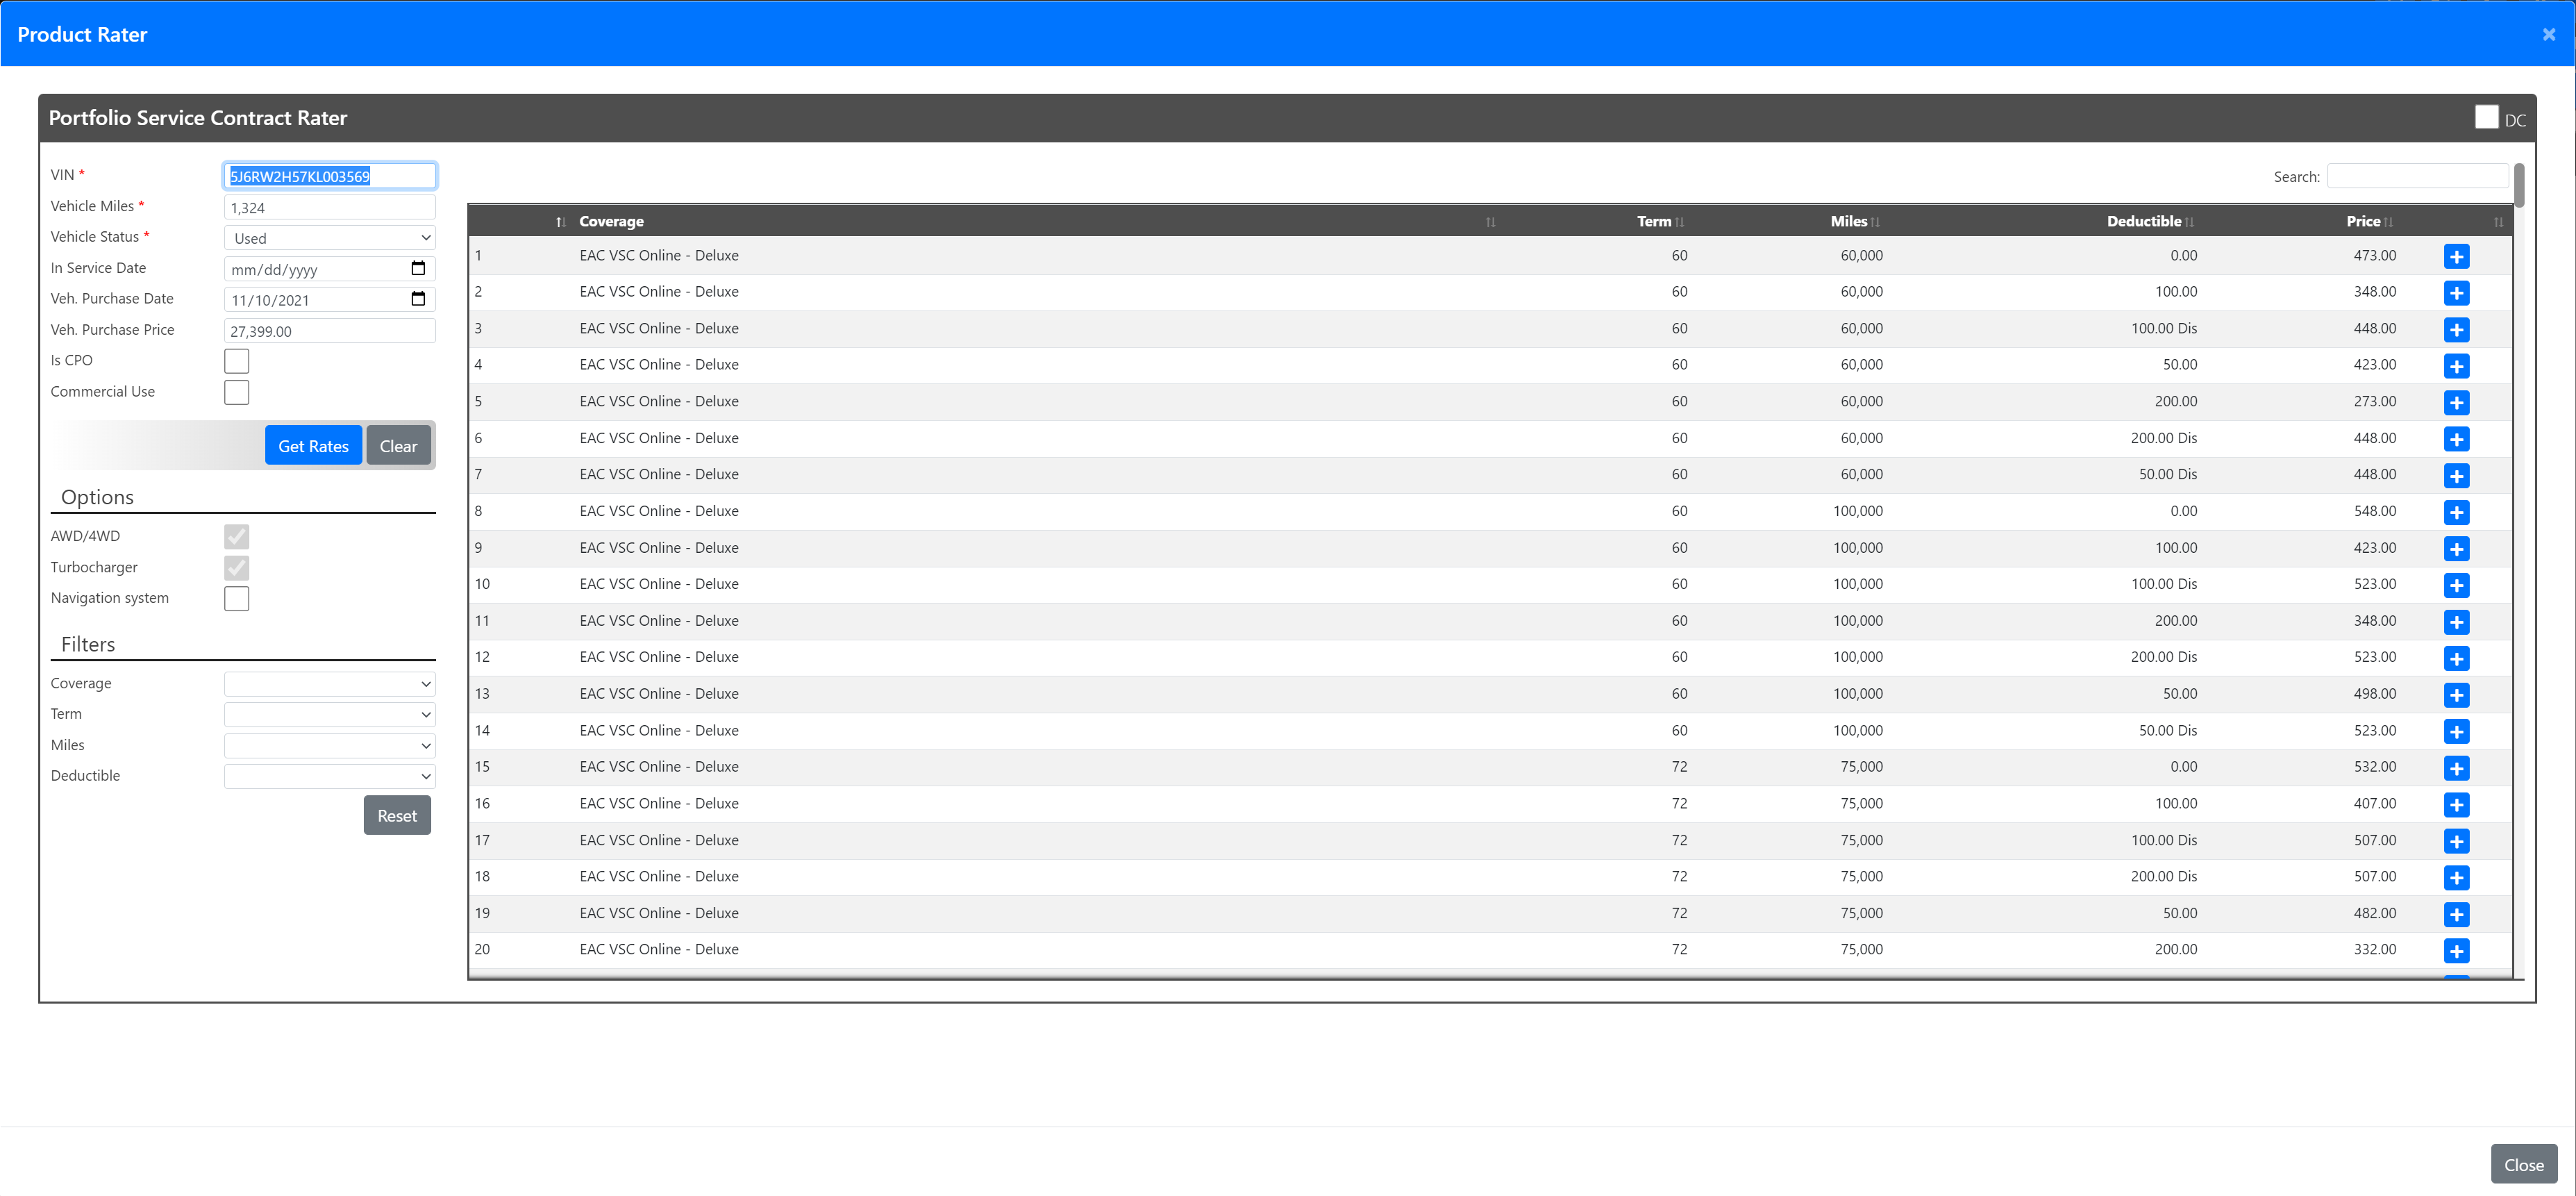
- The Status of your product will now be a solid green checked circle. Repeat the coverage selection process for each sold product.

Step 4. Contracting
- Once you have selected all of your coverages, you are ready to contract.
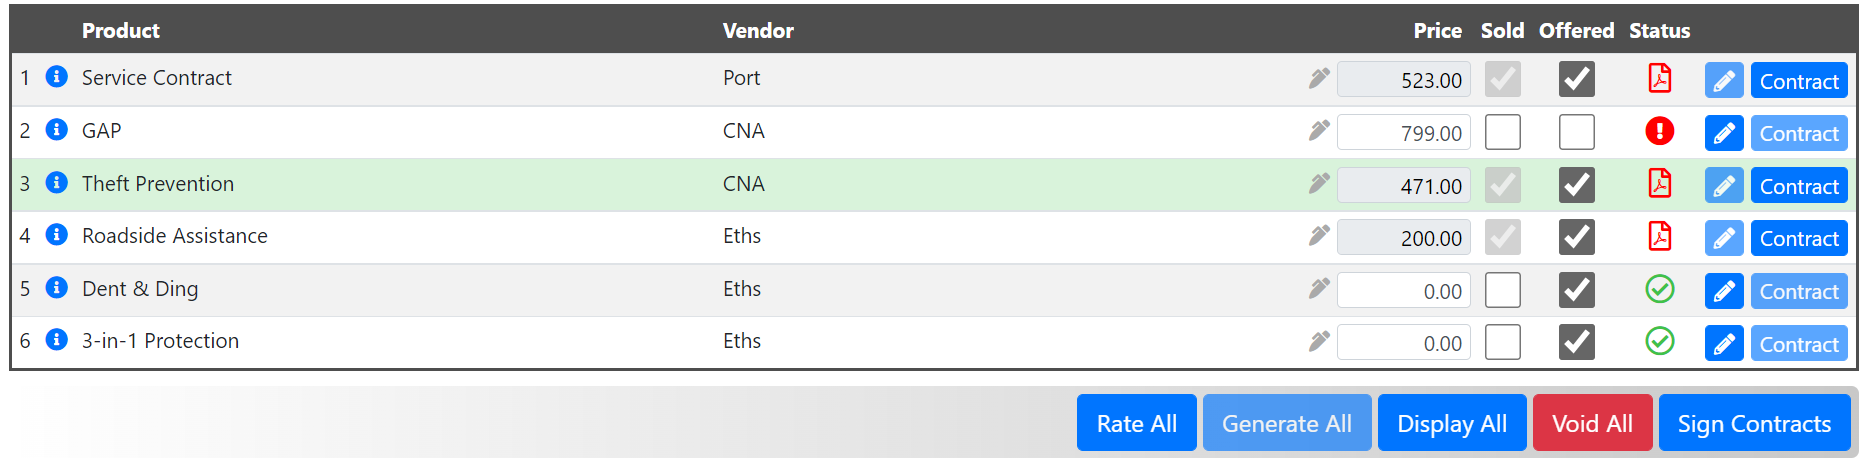
- Click Generate All to generate all of your sold products.
Note: You can generate individual products by opening the product information and then using the single Generate button. ![]() >
> ![]()
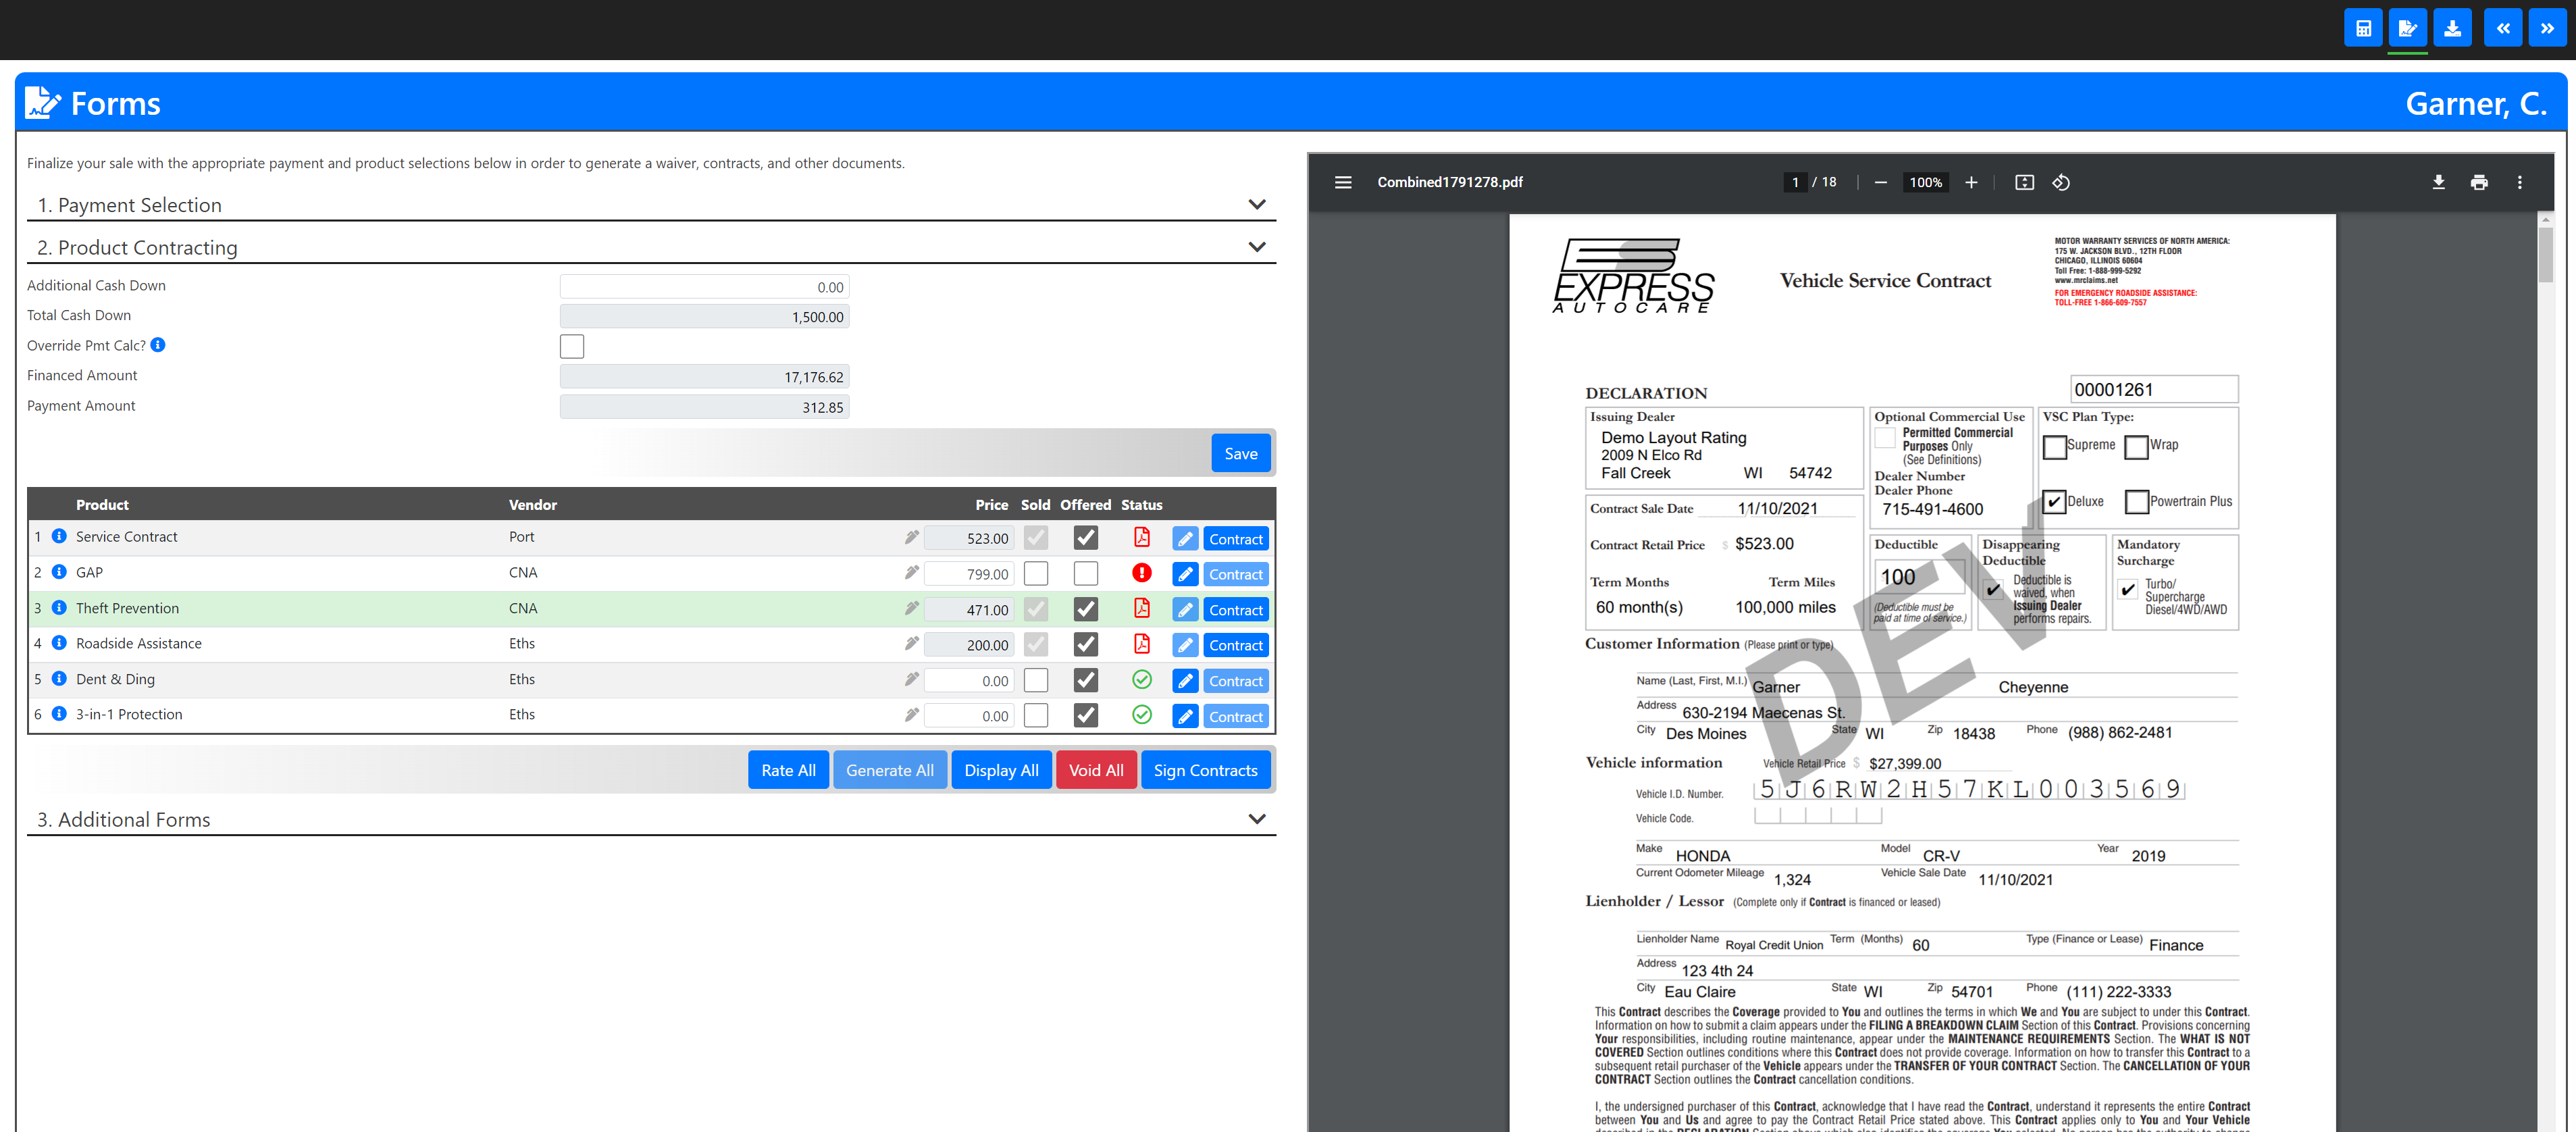
- Once you have contracted all of your sold products the Status will change to a Red PDF symbol letting you know the PDFs are there. You can view the contracts by clicking Display All.

- The contracts will appear on the right half of your screen.
- Once you have reviewed your contracts to ensure they are accurate, you can print them or use the eSignature function.
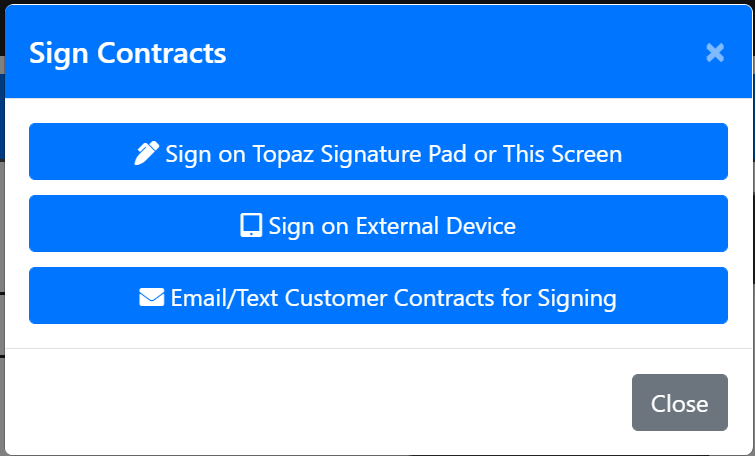
- For eSignatures click the Sign Contracts button in the middle of the page.

- The popup below will appear. You can choose which eSignature function you would like to use. From there the computer will prompt you and the customer through the signature process.
- Once you have gone through the signature process, the Status of your products will turn from that Red PDF symbol to a blue page with a signature.

- Section 3. Additional Forms is where you can select forms to help keep your dealership from being legally liable.

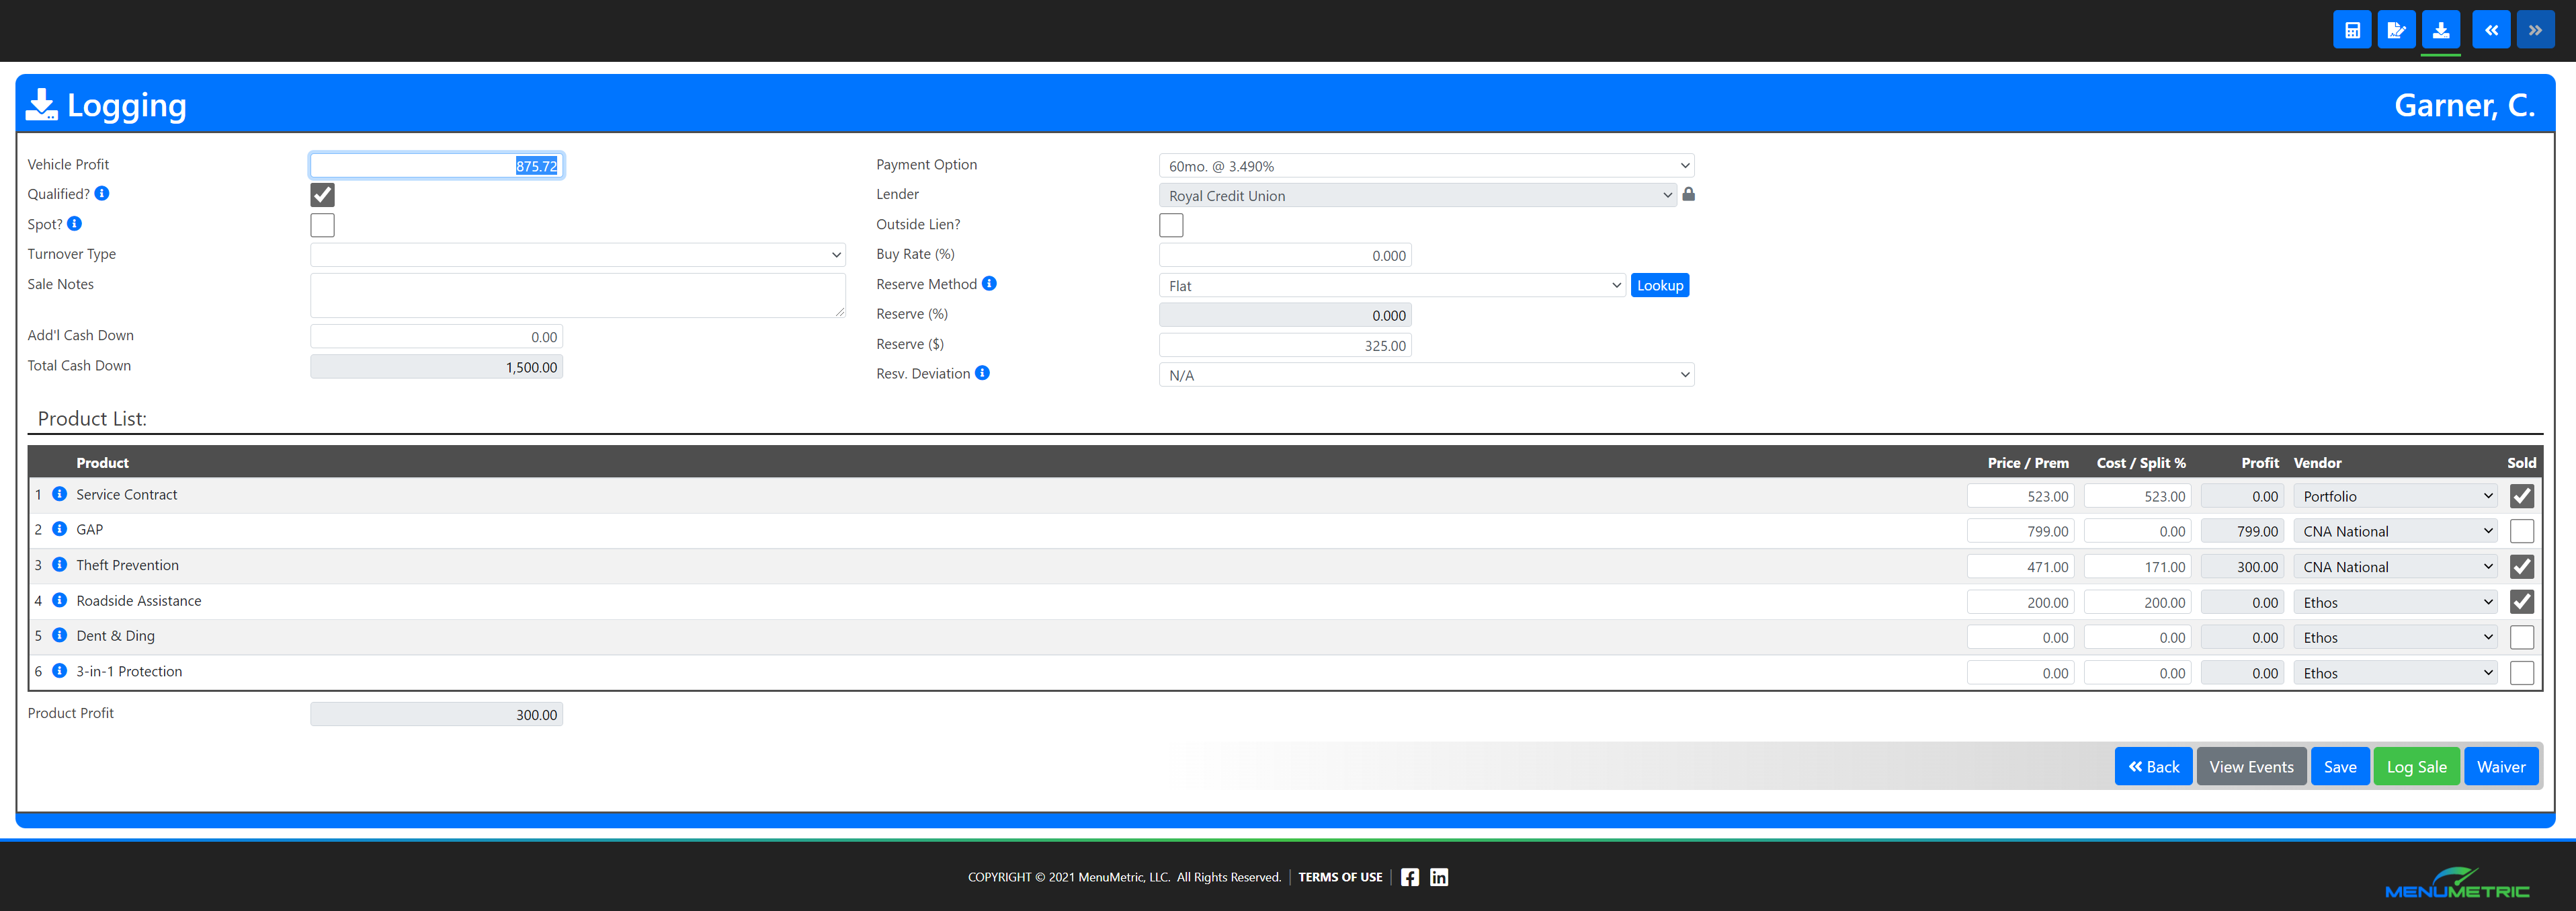
Step 5. Logging
- After you have finished on the Forms page you can select the blue Next>>
 button on the bottom right of the page to proceed to the Logging Page.
From the Logging Page, you can add any last information or notes that you want to include in your deal for record-keeping. - Once you have finished making your changes to the logging be sure to select the green Log Sale button.
 By logging your sale you are showing that your deal is finalized. It is the virtual way of putting all of the deal information into a file cabinet. You can take your deal out of logged status to make edits at any time by clicking the Unlog Sale button.
Note: Only logged deals will show on reports.
Congratulations you have completed your deal! You are ready to head off to your next sale!