![MenuMetric_500_130.png]](https://support.menumetric.com/hs-fs/hubfs/MenuMetric_500_130.png?height=50&name=MenuMetric_500_130.png)
To use SPP inside of a deal, choose the SPP Menu Style from Settings in the Layout Page and click Apply.
TIP: The quickest and easiest way to do this is to create a template for SPP sales that has only the qualified SPP products in it, and defaults to the SPP Menu Style. Click here to learn more about building templates.

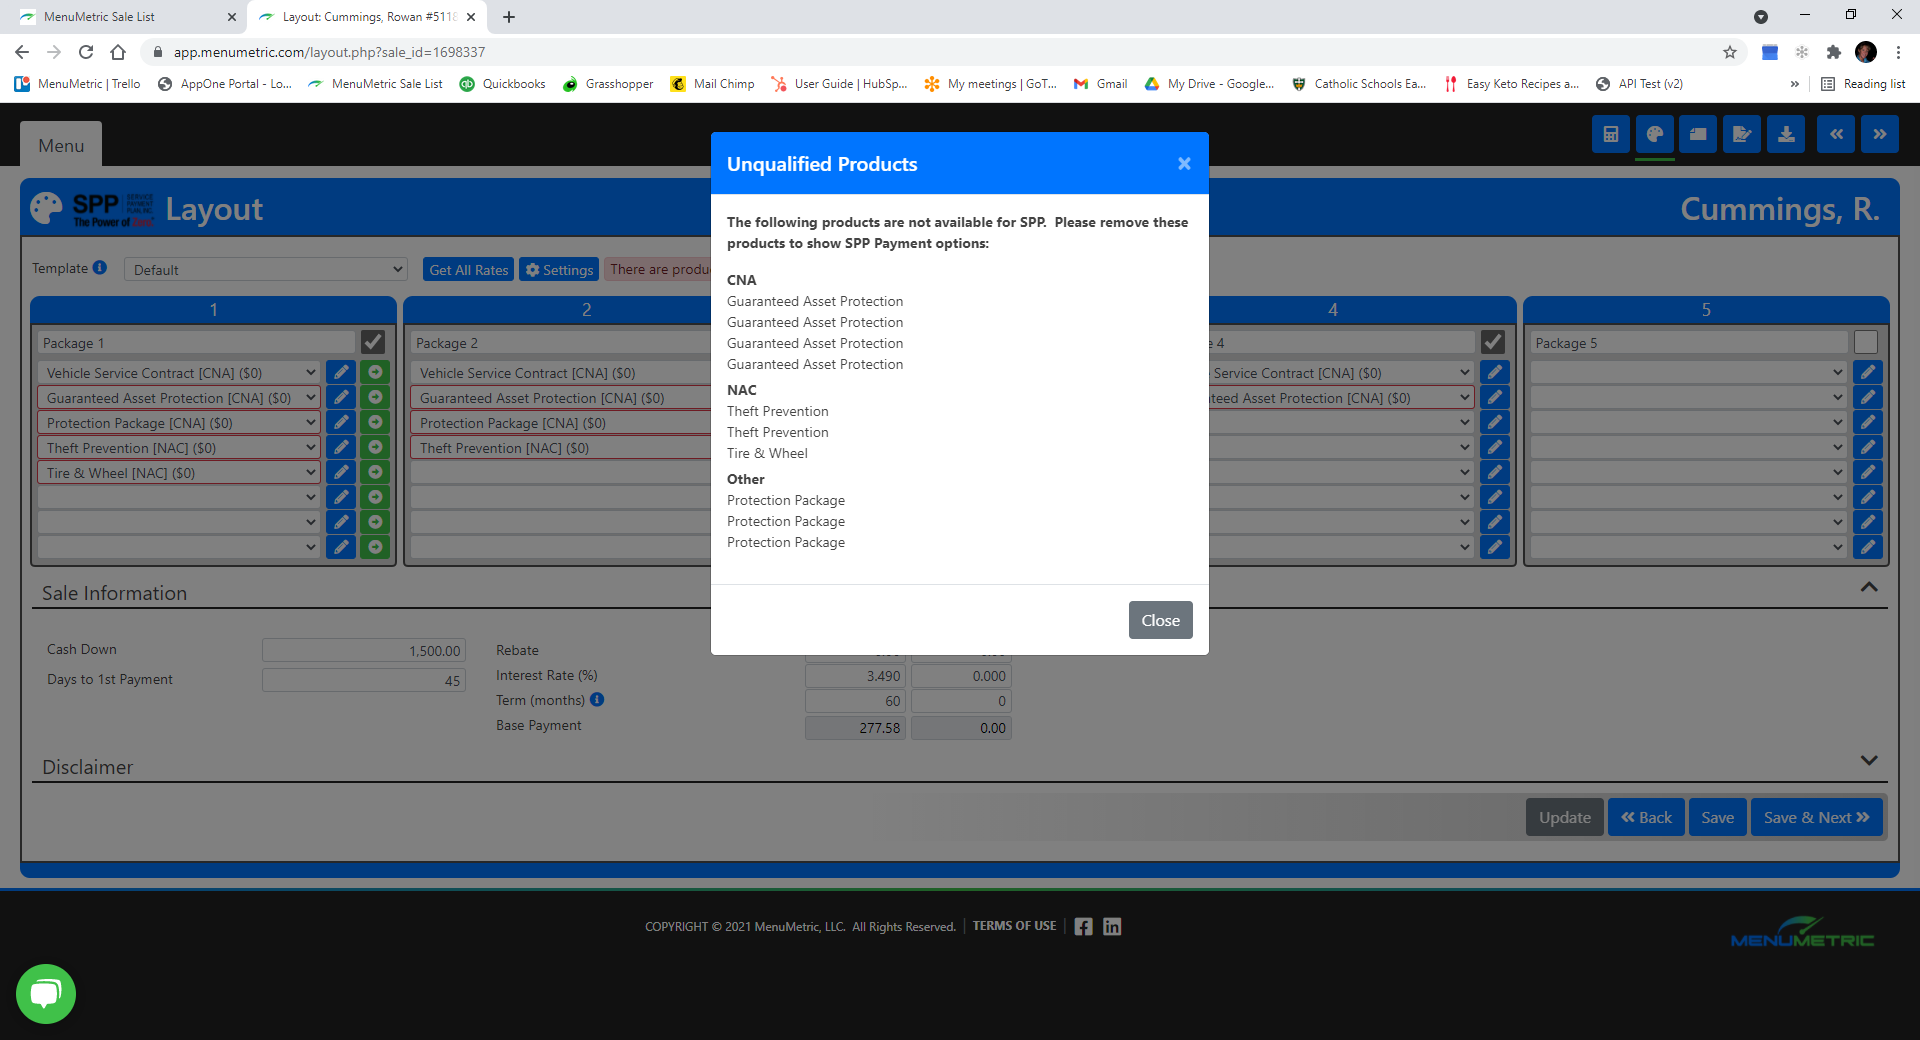
If you do have products in your columns that do not qualify for SPP, a red box will appear around them and an error message will appear letting you know that these products are unqualified. Simply remove these products and continue on.
Rate your qualified products, and select the desired coverage as you normally would. Click Save & Next >> to move on to the customized menu. Here you will see the available payment options for each provider at the bottom of your columns.

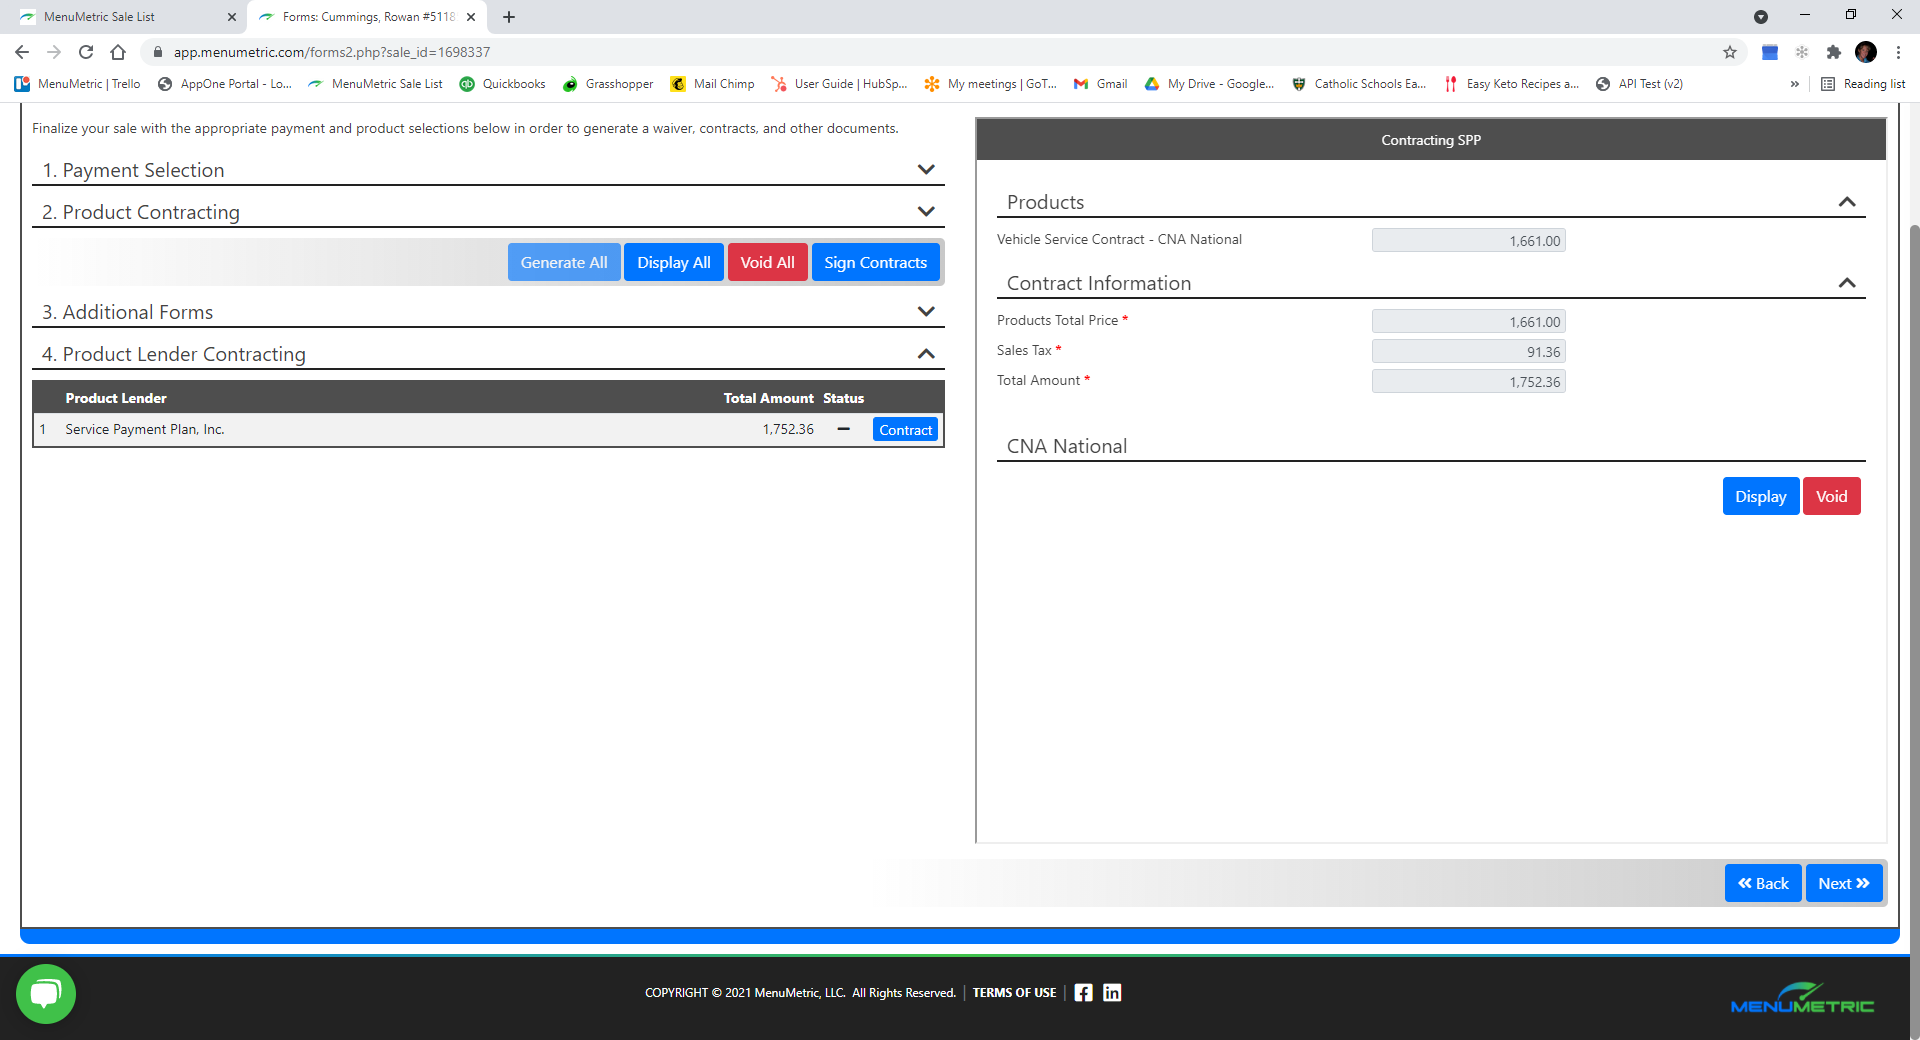
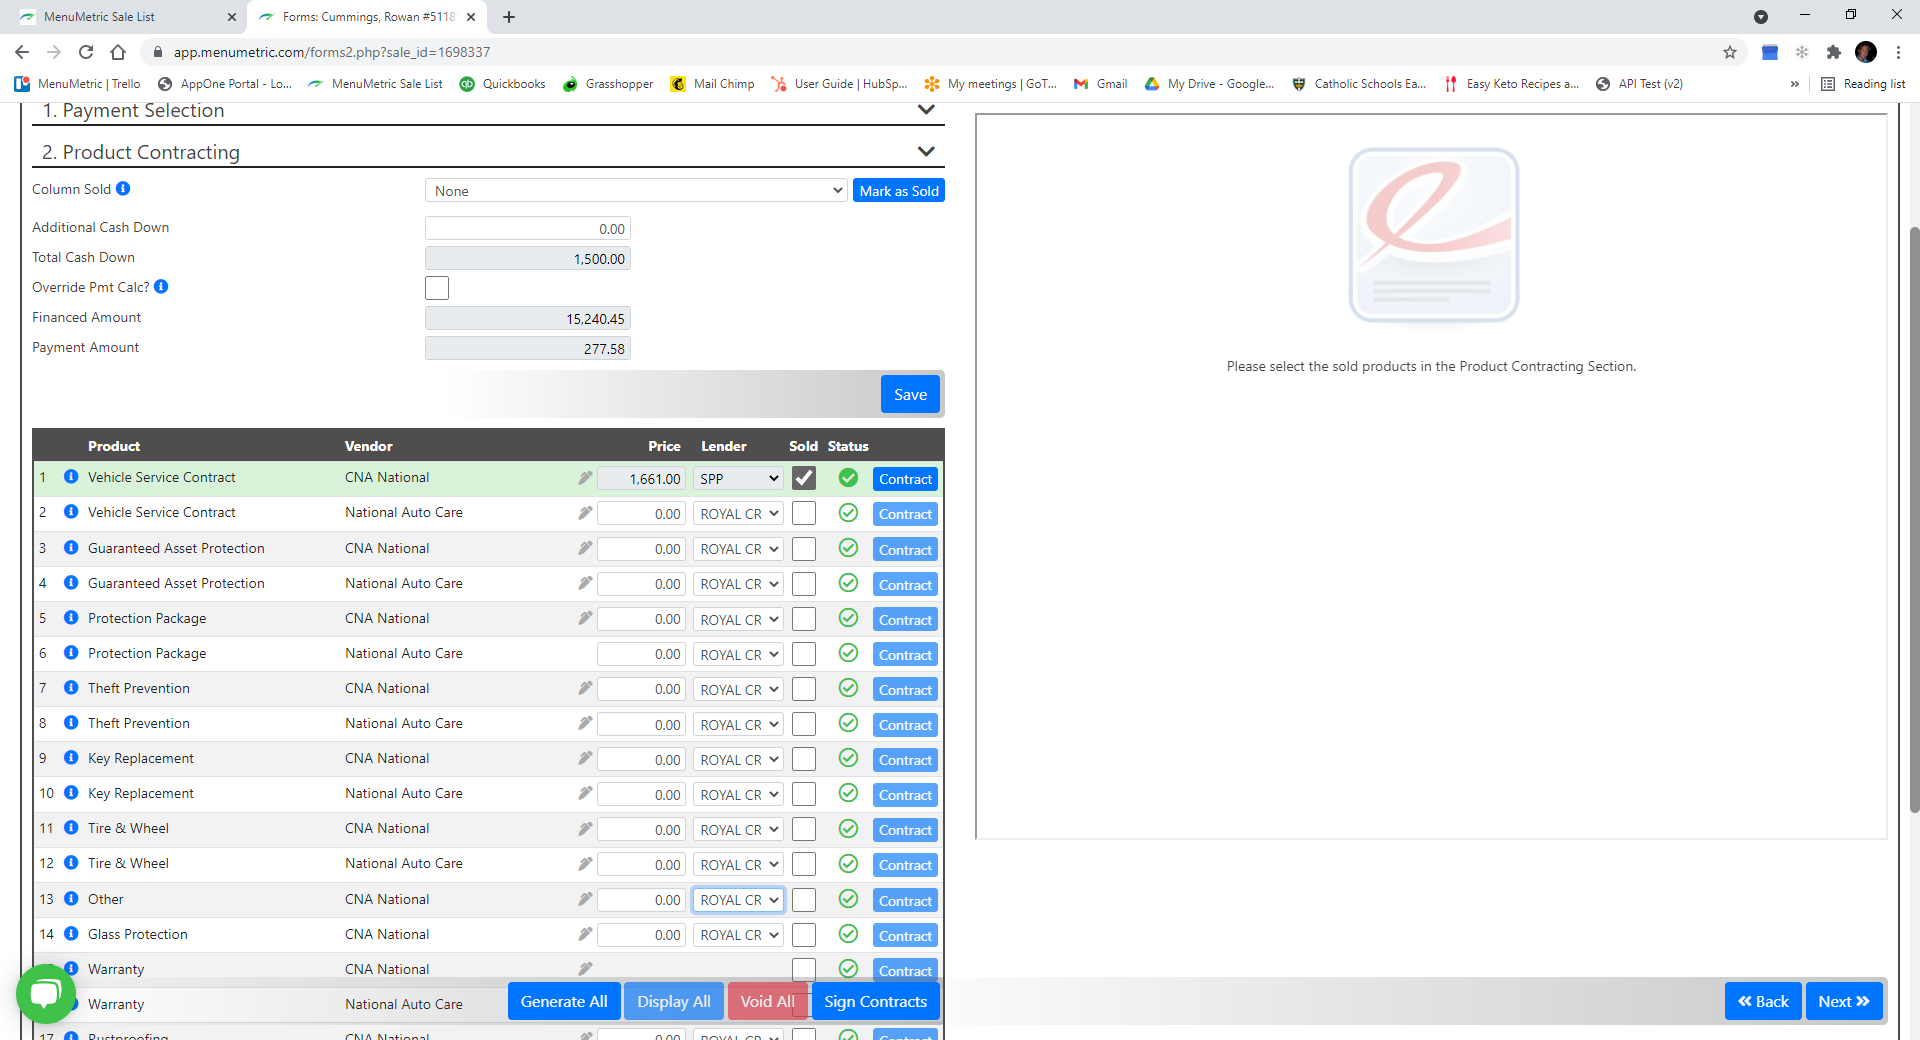
Continue with your normal process and move forward to the Forms (Contracting Page). Before marking the SPP products sold, change the Lender from the drop-down next to the product to 'SPP'. Marking the product as sold will lock down the lender field; if you forget this step, simply uncheck the sold box next to the product, select SPP as the lender, and recheck the sold box.
Generate your contract(s) as usual. Once you have live contracts generated, 4. Product Lender Contracting will appear at the bottom of the page. Click on this space to open it up and click the blue Contract button to show the blue Continue to SPP button on the right-hand side of the page.
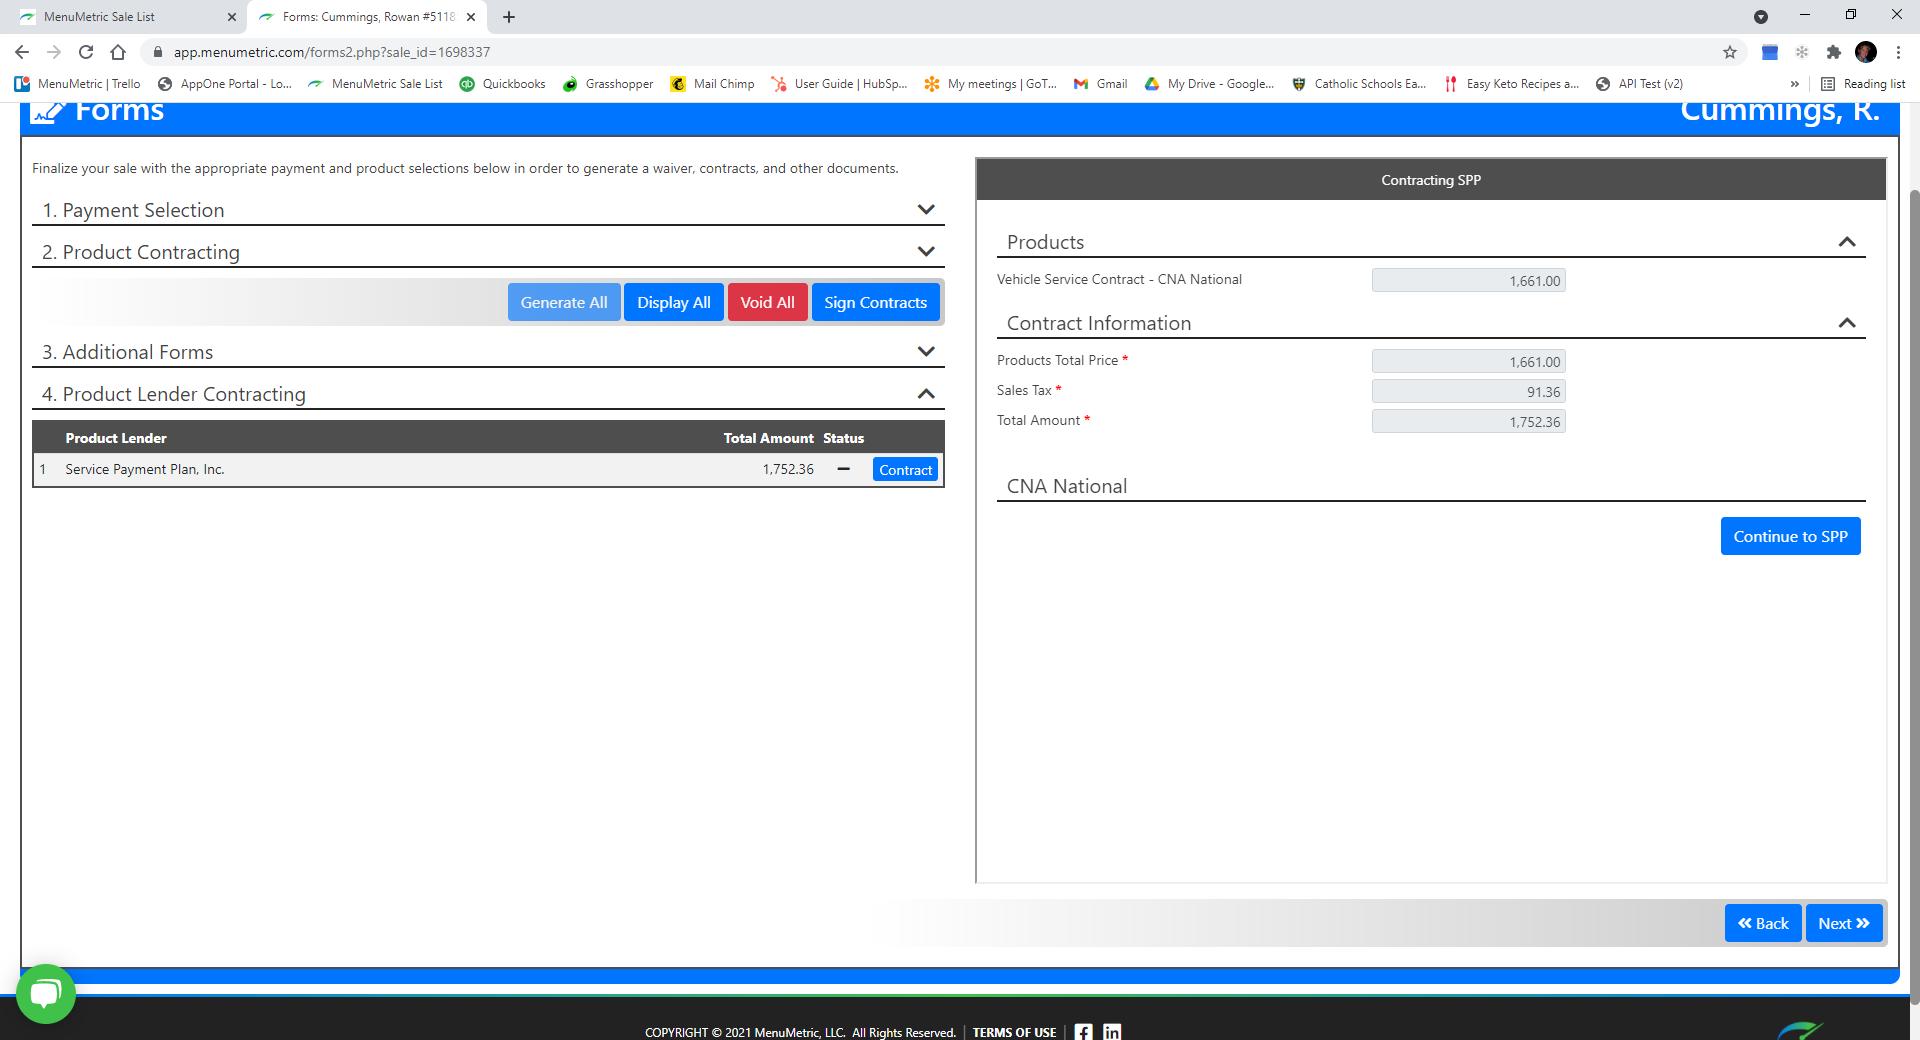
Clicking Continue to SPP will redirect you to SPP's website. Follow the process for SPP lending as you normally would. After clicking Purchase, you will be redirected back to MenuMetric's Forms Page. You will see a Display and Void button on the right-hand side of the screen that will allow you to void or print the SPP contract.