![MenuMetric_500_130.png]](https://support.menumetric.com/hs-fs/hubfs/MenuMetric_500_130.png?height=50&name=MenuMetric_500_130.png)
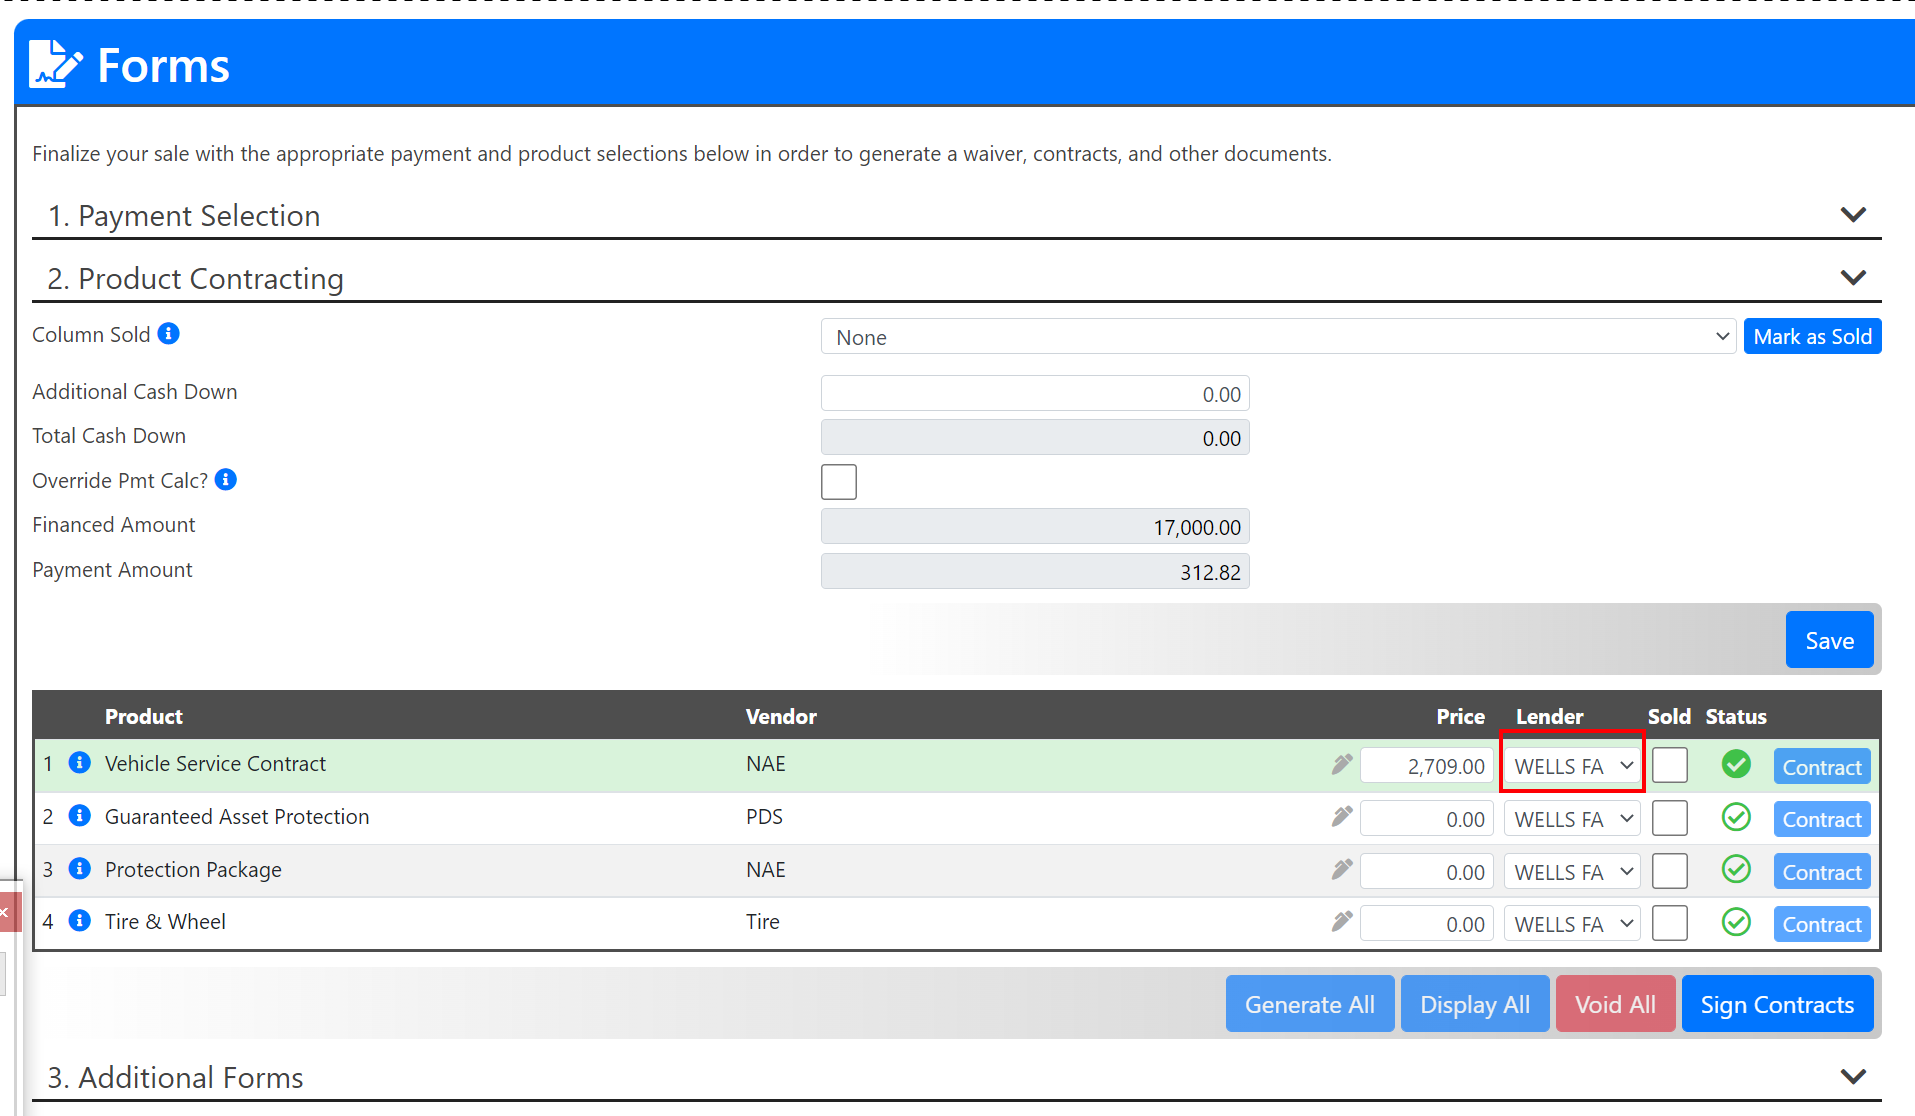
Initially, you go through your sale as usual until you get to the Forms Page. #2. Product Contracting.
- To change the lender for individual products you will navigate to the row of the product you wish to change.
- Drop open the Lender field. (See highlighted red below.)
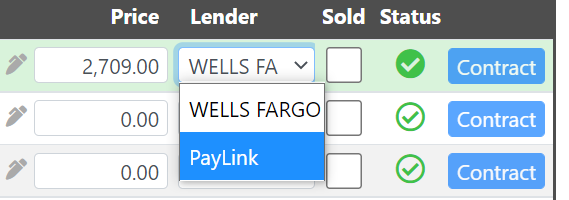
- When the dropdown opens, you can select PayLink.
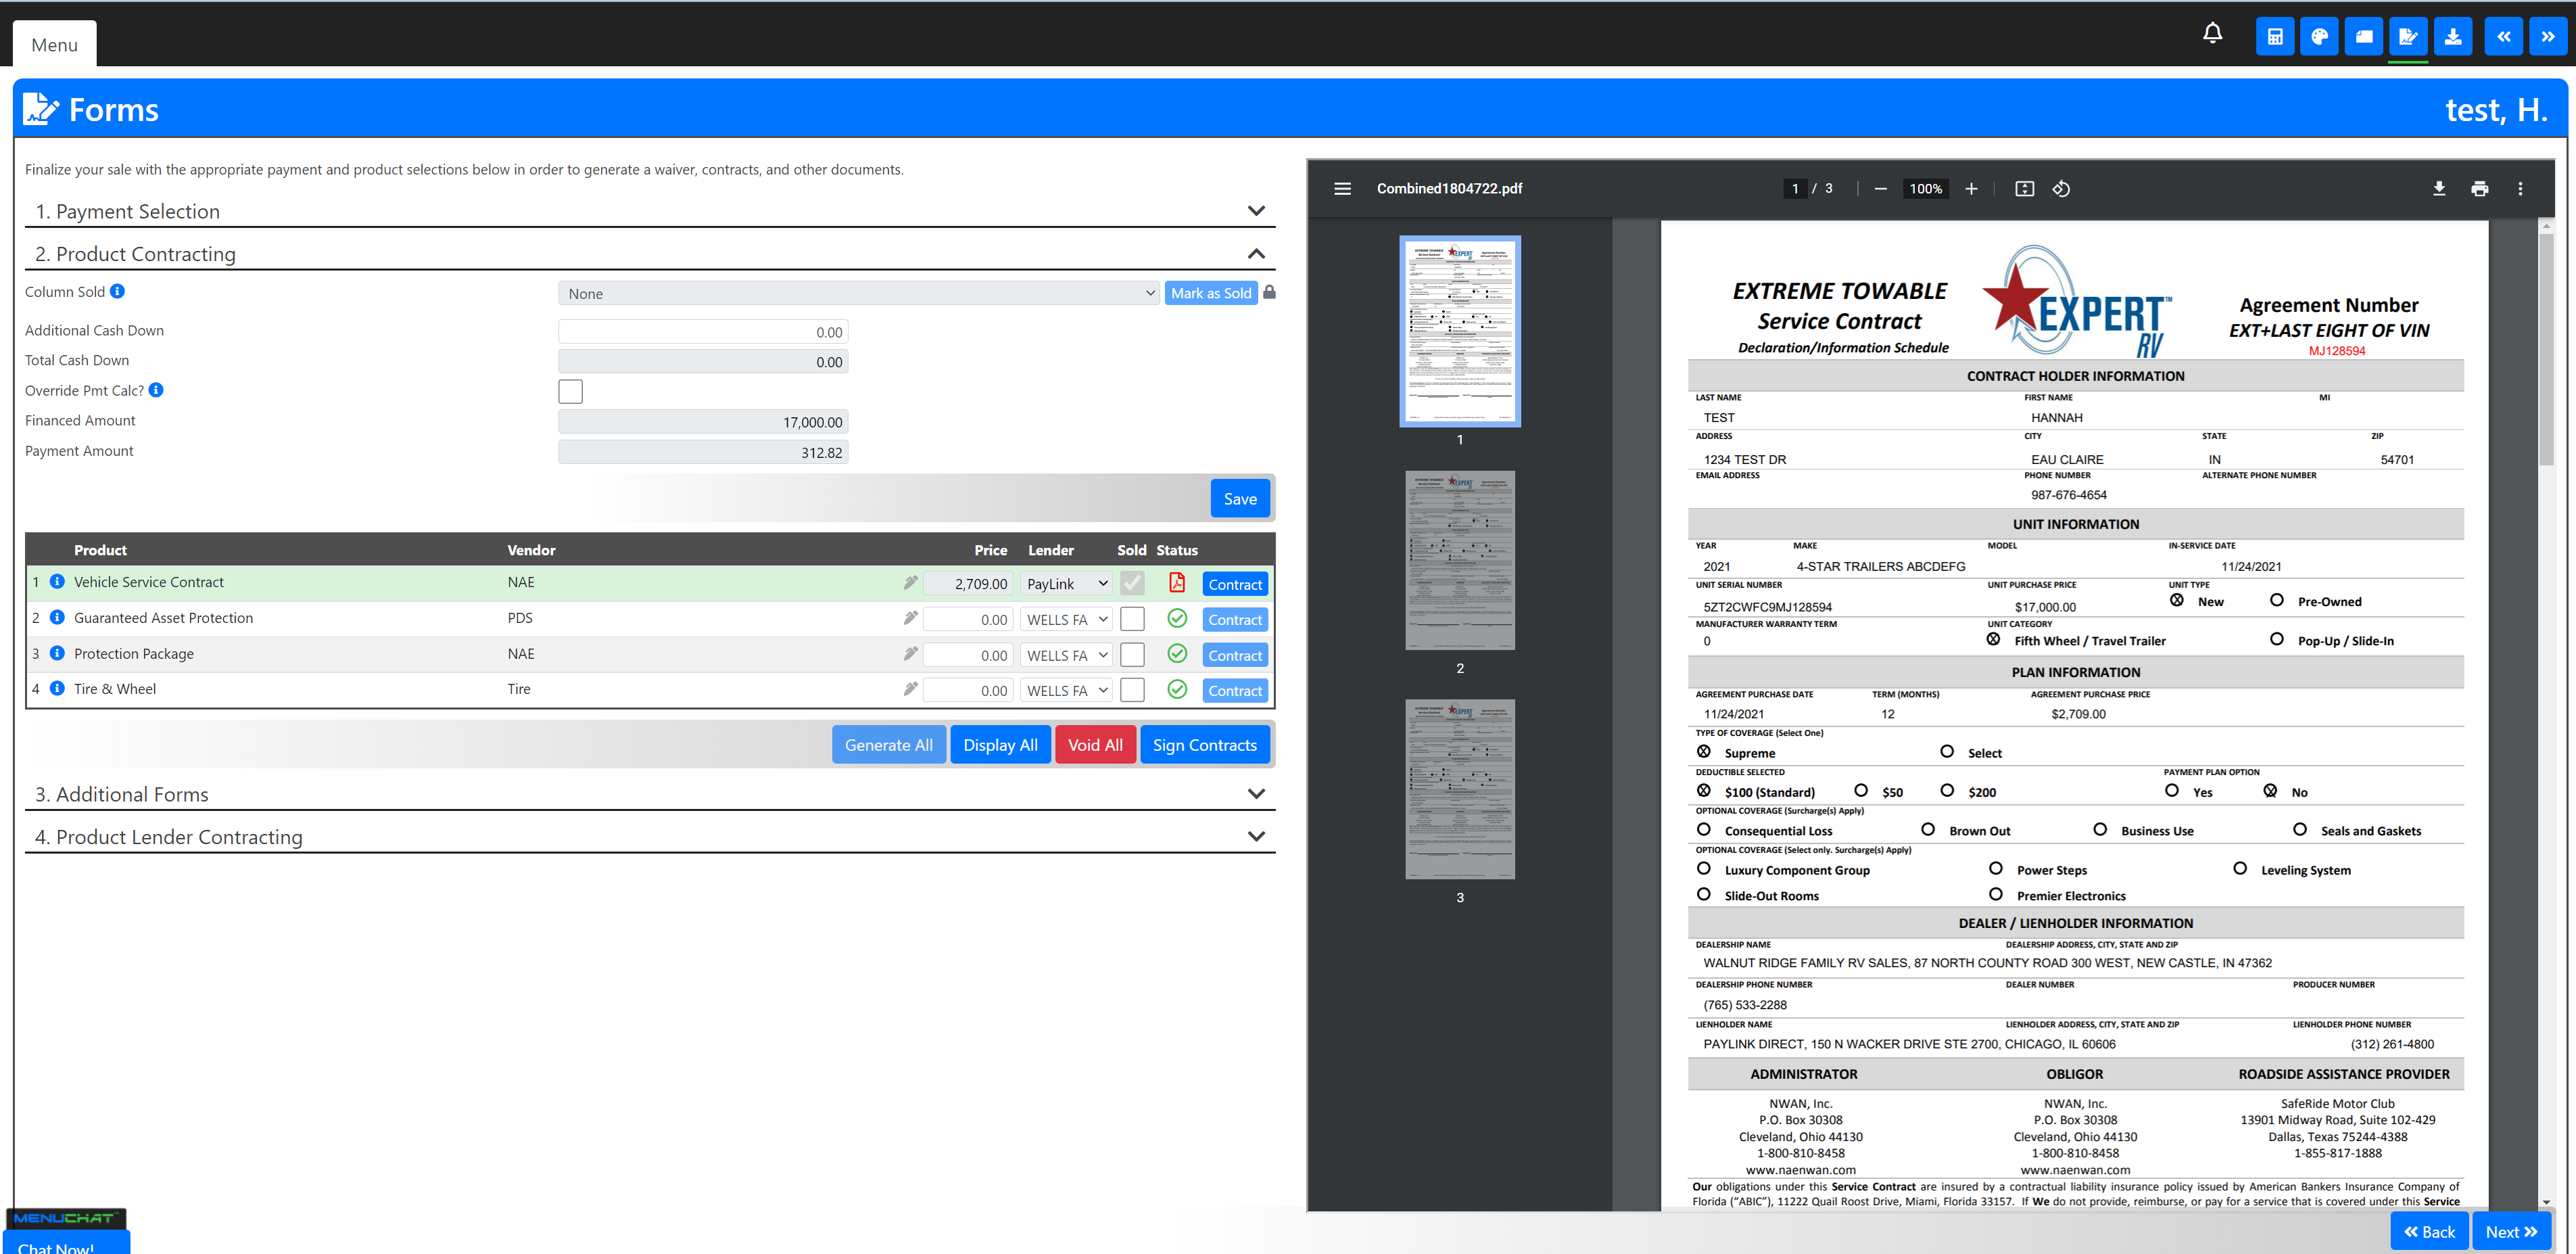
- Mark your product sold.

- Repeat the last 4 steps as needed for all of your PayLink products.
Note: Once your product is marked sold, your Product Lender is locked. To make edits to your Product Lender simply uncheck the Sold box. Make your edits. Re-check the Sold box when complete.
- Now that all of your products have the correct product lender you can generate your contracts. Select the Generate All button.

- Your product Status will change to a red PDF symbol when contracts have been successfully generated.

- To display and review your contract, use the Display All button.

- The right half of your screen will populate with the contracts where you may review them.
- To complete the PayLink process you will use the black arrow to open up #4. Product Lender Contracting.
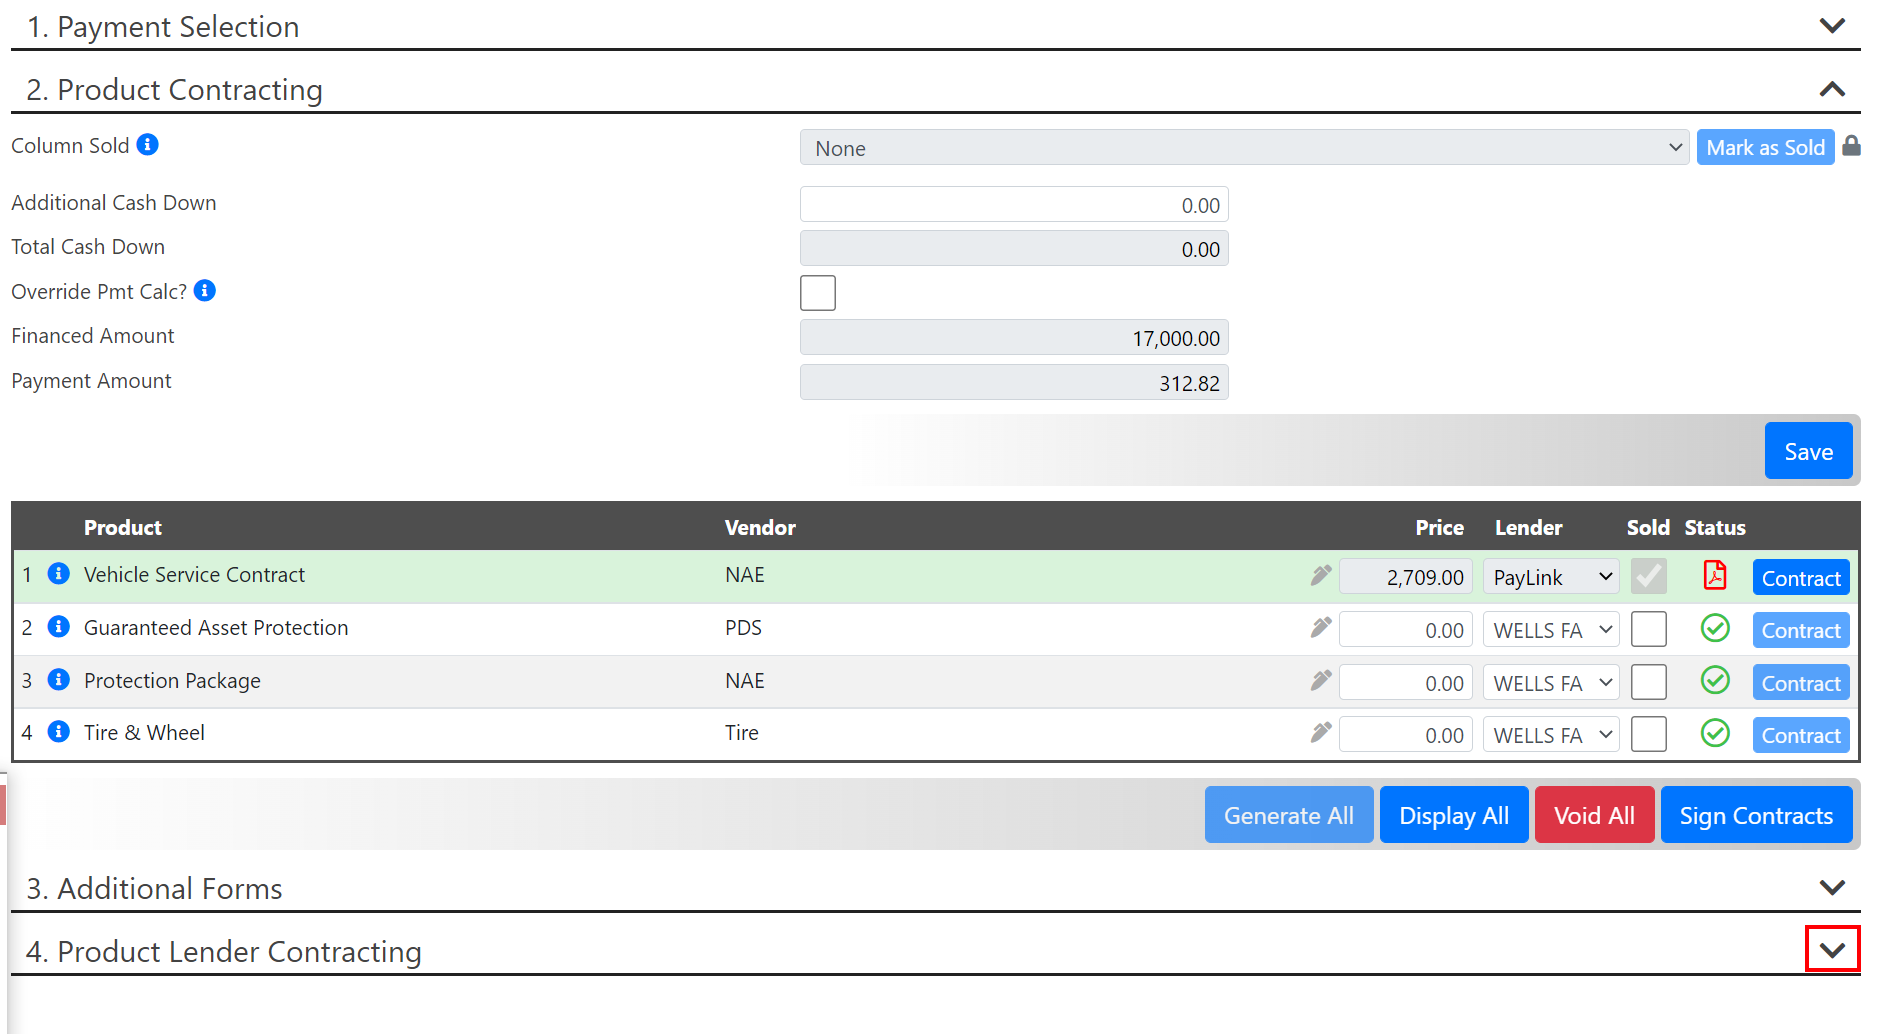
- From here you will select the blue Contract button.

- The right half of your screen will transform to the PayLink Direct - Payment Plan Infomation. From here you can fill in any of the needed information.
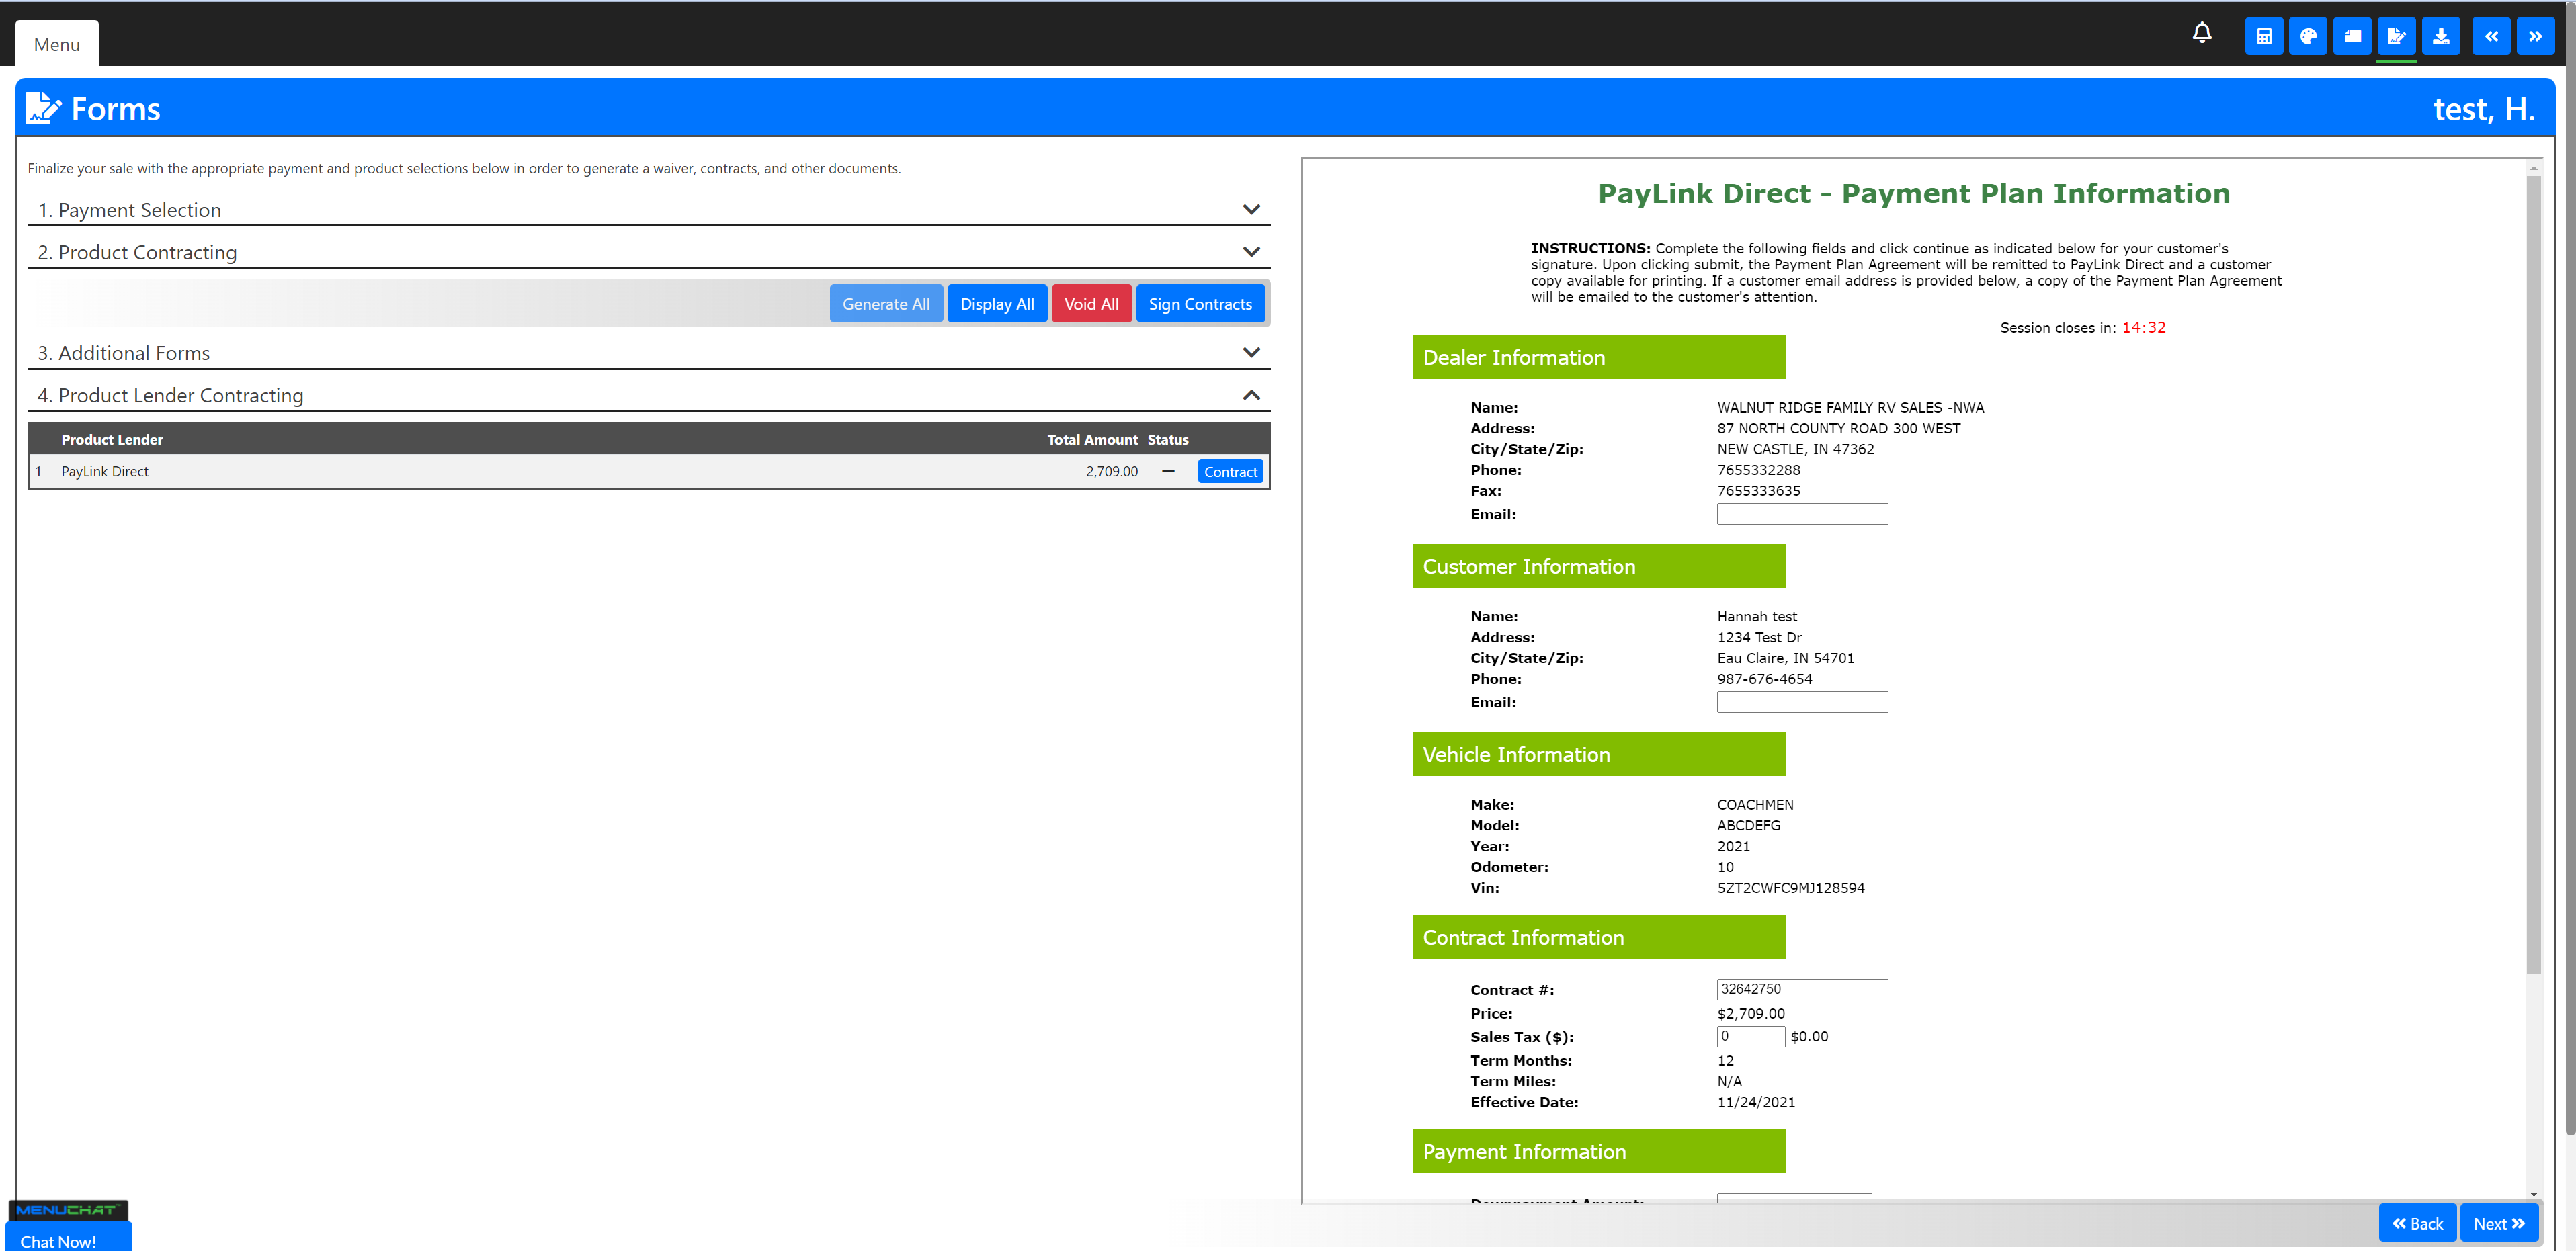
- Once you have filled in all of the remaining information, you can click the grey Continue To e-Signature Page button.
- When complete with your PayLink e-Signature page you may return to the MenuMetric system to log your deal.