![MenuMetric_500_130.png]](https://support.menumetric.com/hs-fs/hubfs/MenuMetric_500_130.png?height=50&name=MenuMetric_500_130.png)
Dealer Assisted eSigning is a functionality within the MenuMetric system that allows the Business Manager to be in the driver's seat of the customer's contract signing. You can now ensure that your customer takes their time to fully understand each form, before signing! Follow the information below to learn how to use this in your dealership!
- Process your deal as you typically would until you have contracted your products and additional forms.
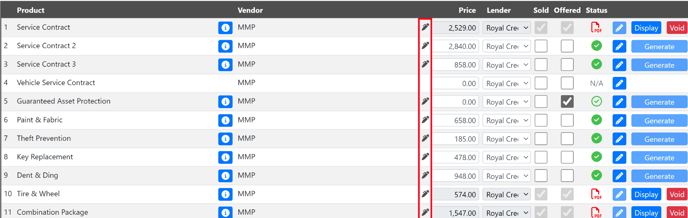
- Your additional forms are all eligible for eSigning. Check to see if your product contracts are eligible for eSigning under 2. Product Contracting on the Forms page. If your product contract is eligible for eSigning, it will have a pen icon. If there is no pen icon, esigning is not currently available for that product.
- Select the Sign Contracts button.
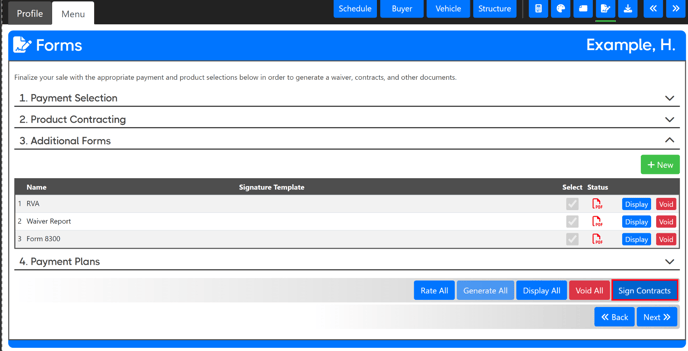
- Your Sign Contracts pop-up will appear. Use the Who's signing? drop down to determine who is signing at this time.
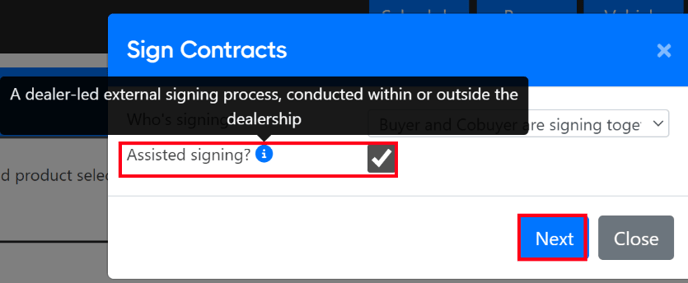
- Select the Assisted signing? check box. Click Next.
-
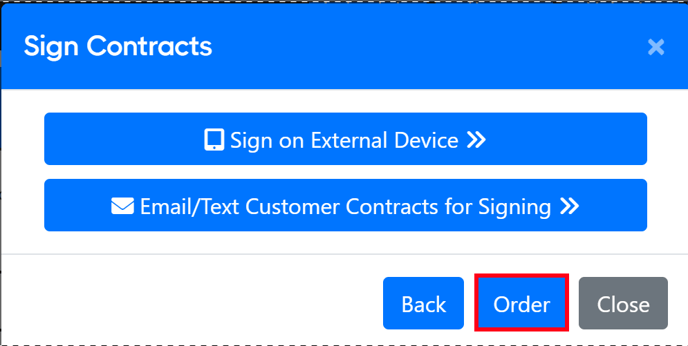
- Use the Order button to set the order in which you would like to present the forms to your customer.
-
- Your product contracts and additional forms that you had previously generated will appear in a list. Use the grip icons found on the left of each entry to drag and drop into a new order.
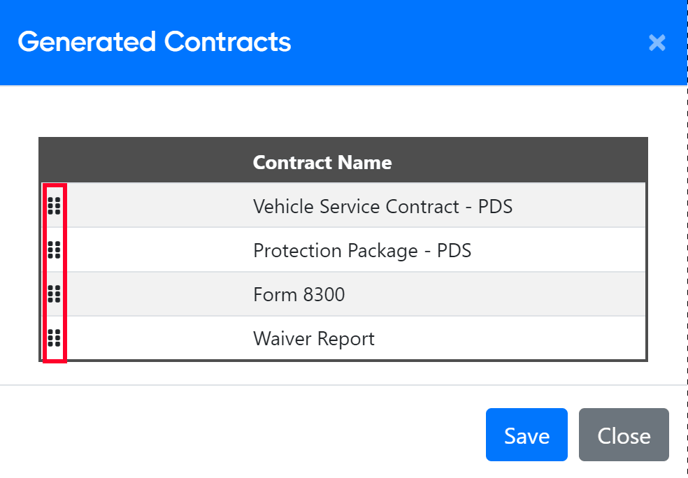
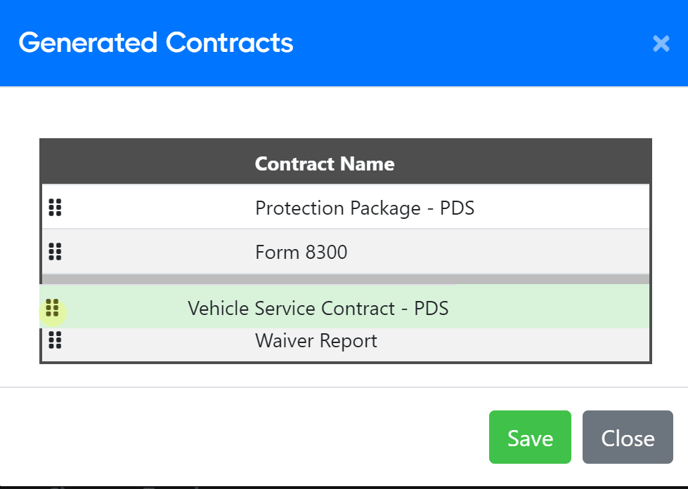
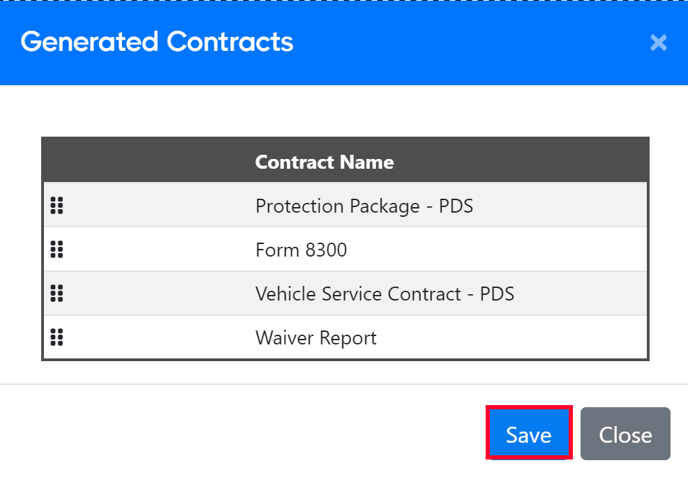
- Click Save when you are done rearranging your products and forms.
-
- Use the Order button to set the order in which you would like to present the forms to your customer.
- Sign on External Device: This method is used for iPads or Tablets within the dealership. Follow the instructions below in section Method A. External Device to use this method.
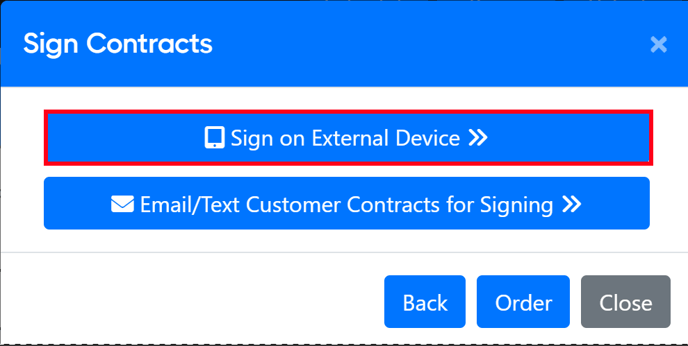
- Email/Text Customer Contracts for Signing: This method is used for sending the contracts to the customer's personal device within the dealership or remotely. Use the instructions found in section Method B. Email/Text Customer Contracts for Signing to use this method. Now that you have confirmed the order in which you would like to display your PDFs, you can move to choosing your signing method. You will want to choose which method works best for your sales scenario. Each method is described below.
Method A. External Device -
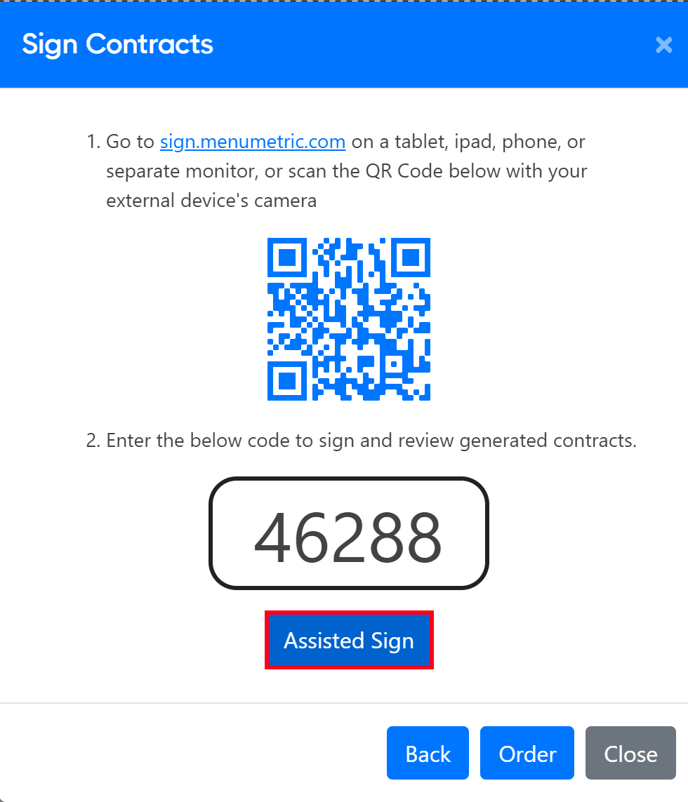
- When you select the Sign on External Device button, your pop-up will change to appear like the following.
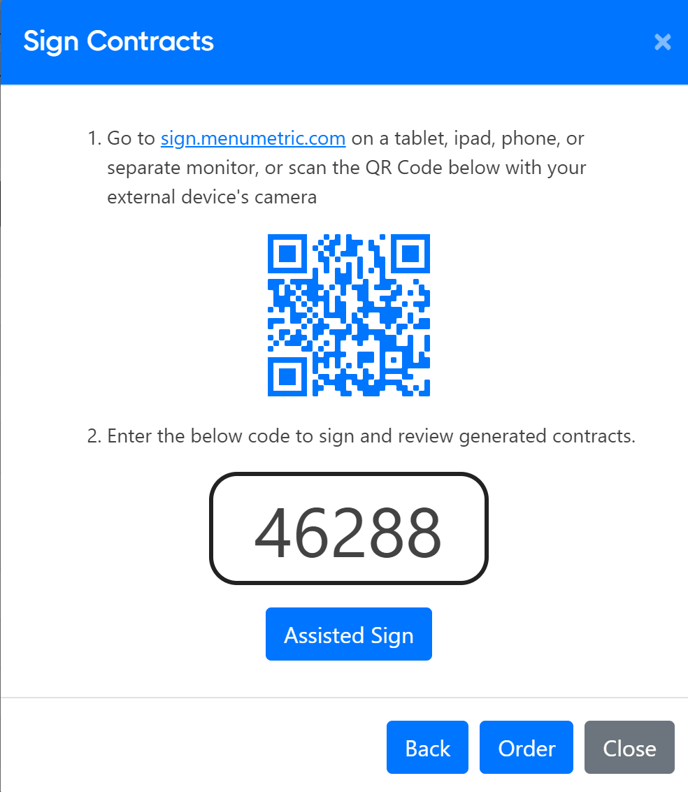
- Use the link of the QR code found in Step 1 to open the signing portal on your external device.
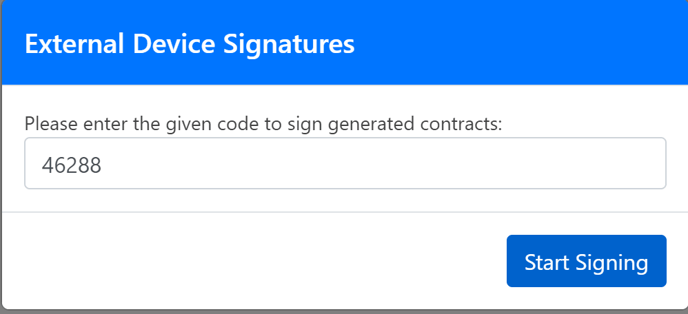
- Once you have the link open on your external device, enter the access code found in Step 2 and click Start Signing.
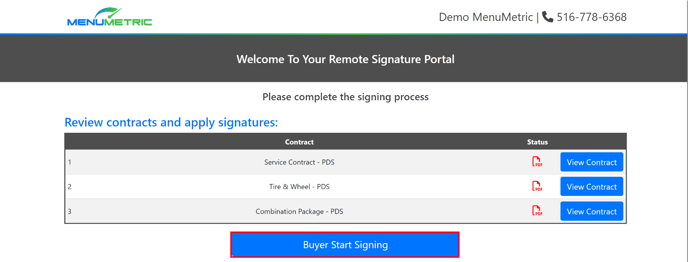
- The customer will see something like the following. When the customer is ready they will select the Buyer Start Signing button.
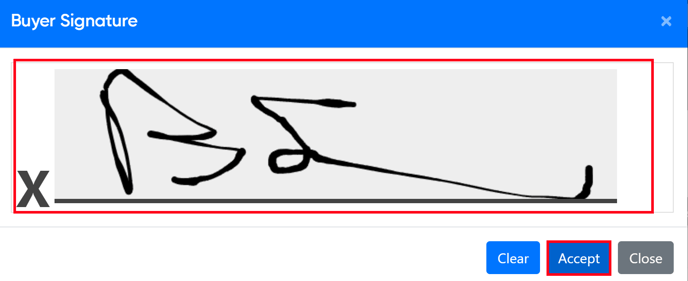
- The Buyer can input their signature and select the Accept button.
- The signature portal PDF viewer will open, but not fully activate until the Business Manager enters from their computer.
- You as the Business Manager will go back to your computer and use the Assisted Sign button found in Step 2. to enter the signature portal.
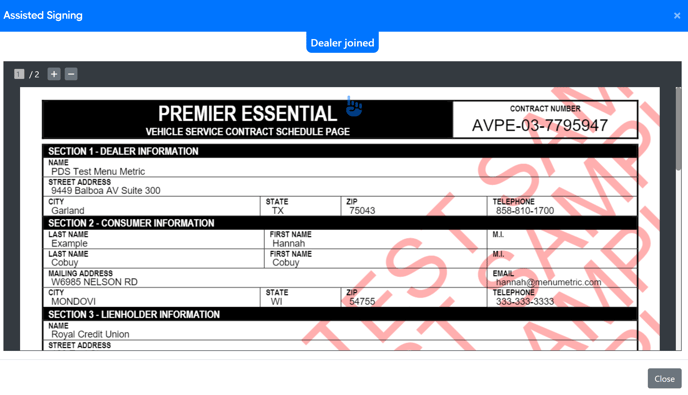
- The Assisted Signing Portal will open. The customer portal is controlled by the Business Manager from the Business Manager's computer. The customer's screen will look something like the following. The blue hand curser is the business manager's curser on the customer's screen.
- The dealer's screen will look something like the following. You the dealer are controlling what the customer will see and when. Use your mouse as a pointer for the customer. The customer can not see the next page of the PDF until you select the Next button.
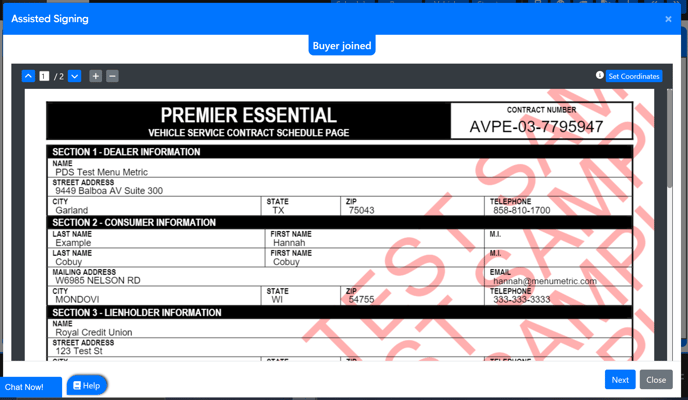
- If the first page of your contract does not have a signature section, you may select the Next button after reviewing it with the customer.
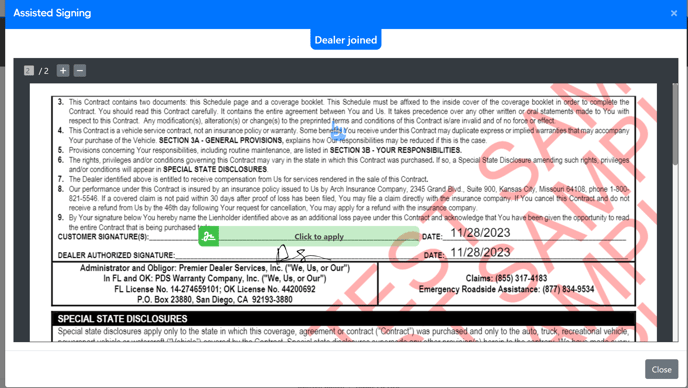
- To allow the Business Manager the full opportunity to cover the information on the contract, the customer can not apply their signature when the signature section is greyed out. The Business Manager will need to click on the signature box to make it activated for the customer to apply their signature.

- Once the signature box has turned green, the customer can tap/click the signature box to apply their signature.
- Once the customer has applied their signature to all of the appropriate places, you may select the Finalize button to move on to the next form.

- Repeat the previous steps until the customer(s) have signed all of the forms.
NOTE: See the Setting Coordinates section below the Method B Email/Text Customer Contracts for Signing section to continue your instructions on using the Assisted Signing Portal.
Method B. Email/Text Customer Contracts for Signing
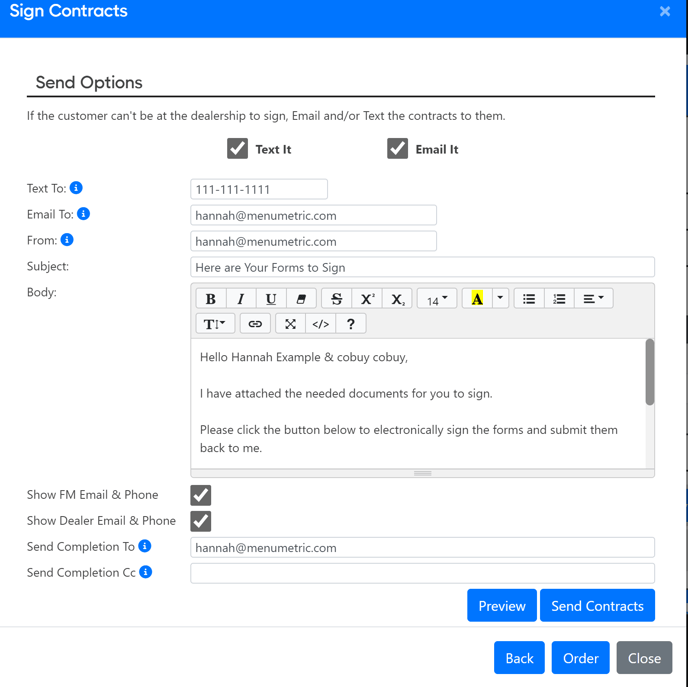
- When you select this method, your pop-up will change to appear something like the below image. Review the fields to ensure everything is set to your preferences.
-
- Text It: Decide if you would like to text the signing portal to your customer. Check the box to have texting activated. Uncheck the box to remove texting.
- Email It: Decide if you would like to email the signing portal to your customer. Check the box to have emailing activated. Uncheck the box to remove emailing.
-
- Text To: Buyer's cell phone number.
- Email to: Buyer's email address.
- From: Business manager's email address.
- Subject: This will be the subject line of the email sent to the customer. We have a pre-written default set for your convenience, but you can make customizations here as needed.
- Body: We have a defaulted prewritten email implemented for your convenience. You can change the email body of text on the fly within this field.
- Show FM Email & Phone: If you would like to have the Business Manager's email address and phone number displayed to the customer, check this box. View Settings: Employees to see what information you have on record.
- Show Dealer Email & Phone: If you would like to have the dealership's email address and phone number displayed to the customer, check this box. View Settings: Dealer to see what information you have on record.
- Send Completion To: When the customer has completed their remote signing process an email including a time log summary and notification is sent to any email addresses listed in this field. If you need to have multiple email addresses receive the completion email, enter the email addresses separating them using a comma. See below.
-
- Example: Businessmanager@email.com, groupfinance@email.com, GSM@email.com.
-
- Send Completion CC: This field is the same the the one immediately above, but instead, the address is simply copied on the email instead of sent directly.
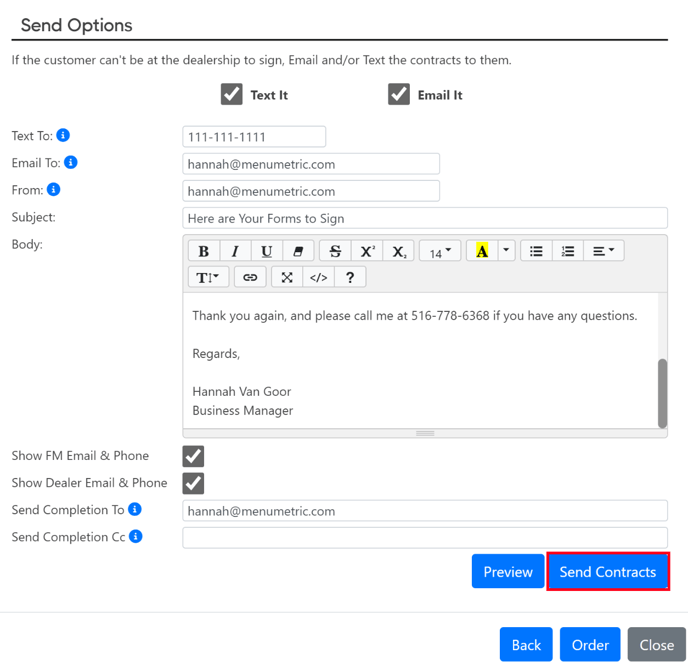
- Once you have set all of the fields to your specifications, select Send Contracts.
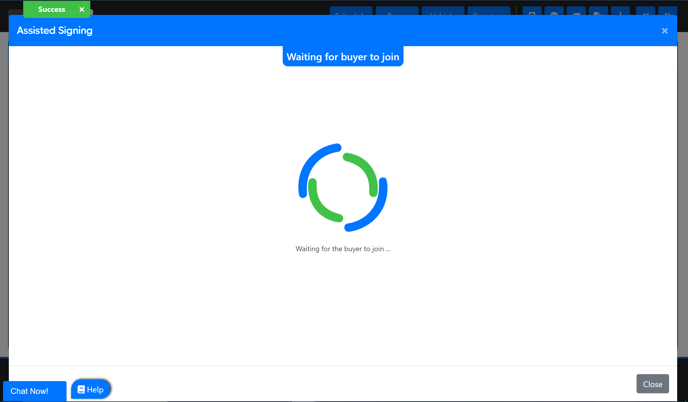
- Your screen will look something like the following as you wait for the customer to join the signing portal.
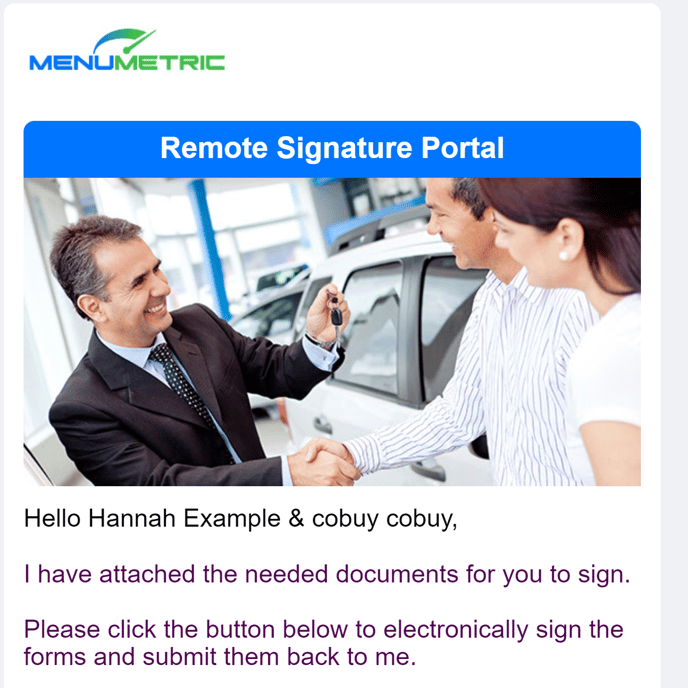
- The customer will receive an email or a text with a link that looks like the following.
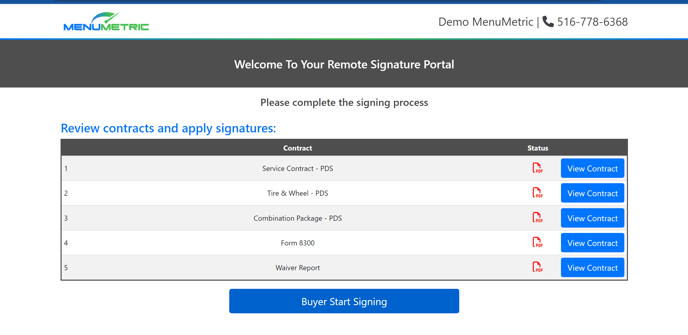
- The customer will select the Sign Contracts button. The screen will open to the following page.
- The buyer will select the Buyer Start Signing button.

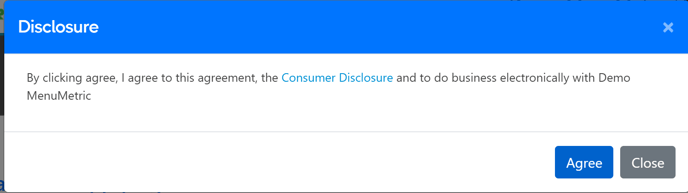
- A pop-up will appear which includes the Customer Discloser and agreement to do business electronically with your dealership for compliance. The customer will select the Agree button to continue.
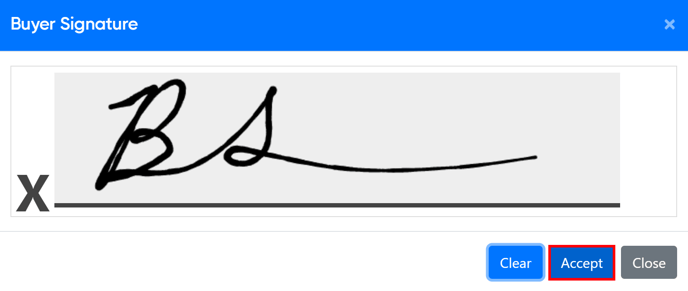
- The pop-up will change so that the customer can sign and click Accept.
- The Assisted Signing Portal will open. The customer portal is controlled by the Business Manager from the Business Manager's computer. The customer's screen will look something like the following. The blue hand curser is the business manager's curser on the customer's screen.
- The dealer's screen will look something like the following. You the dealer are controlling what the customer will see and when. Use your mouse as a pointer for the customer. The customer can not see the next page of the PDF until you select the Next button.
- If the first page of your contract does not have a signature section, you may select the Next button after reviewing it with the customer.
- To allow the Business Manager the full opportunity to cover the information on the contract, the customer can not apply their signature when the signature section is greyed out. The Business Manager will need to click on the signature box to make it activated for the customer to apply their signature.
- Once the signature box has turned green, the customer can tap/click the signature box to apply their signature.
- Once the customer has applied their signature to all of the appropriate places, you may select the Finalize button to move on to the next form.
- Repeat the previous steps until the customer(s) have signed all of the forms.
At the top right of your Assisted Signing portal within the dealer's screen, you will notice a button labeled Set Coordinates. You can use the listed options to stamp additional information onto your contracts as needed. Follow the steps below for examples of using this function.
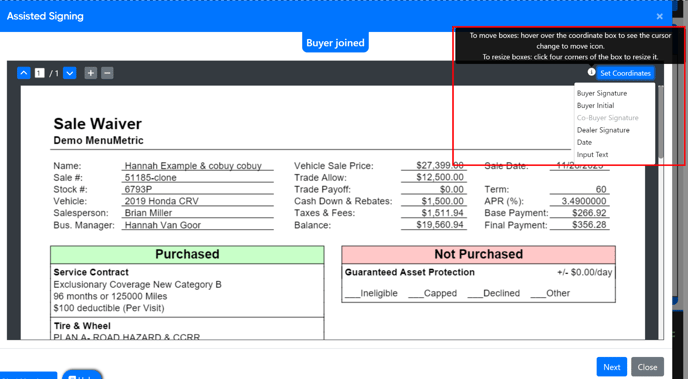
- Select the Set Coordinates button. You will see the following options.
- Buyer Signature
- Buyer Initial
- Co-Buyer Signature (This option will only be available at the time of the Co-Buyer signing.)
- Dealer SignatureThe business manager will type in the information needed.
- Date: Fillable free written field. The business manager will type in the information needed.
- Input Text: Fillable free written field. The business manager will type in the information needed.
- Select the information box type that you would like to apply to your form. For this example, we will use the Buyer Initial option.
- Your information box will appear at the top left of your screen. You may click, hold, and drag the box to the appropriate place on the contract. (Use the red X in the top right corner to delete the information box if made by mistake.)
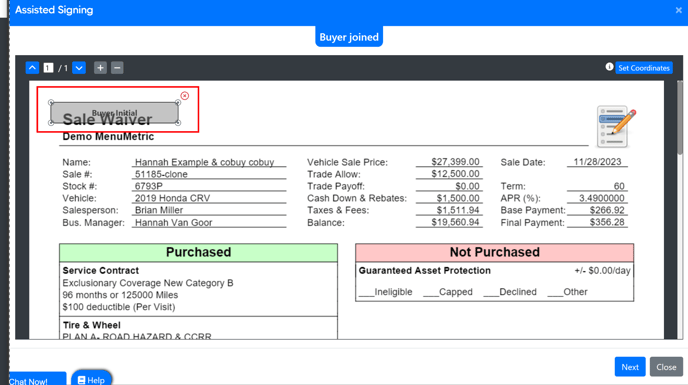
- You can use the dots on the corners of the information box to resize the text box as needed.
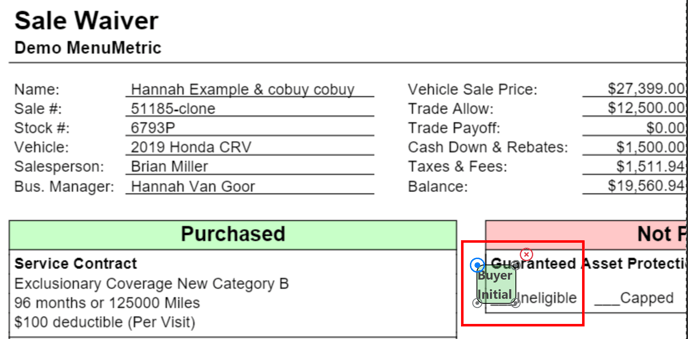
- If the buyer's Initials had not been previously requested, the customer will see a signature line for them to give their initials when they go to Click to Apply on the form. The customer can write their initials and then click Accept.
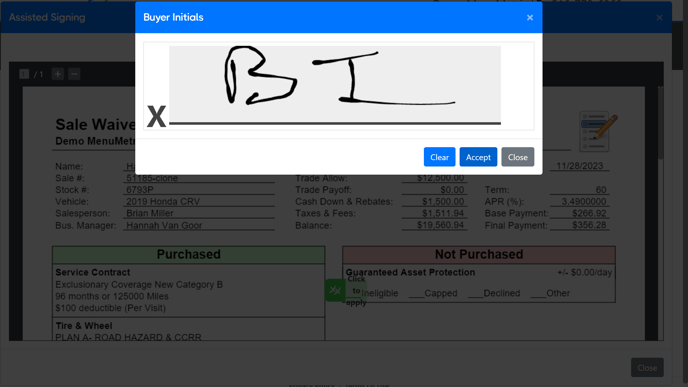
- They will tap the Click to Apply box again once they have signed.
- Once the signing process has been completed the customer will see a page that looks like the following.
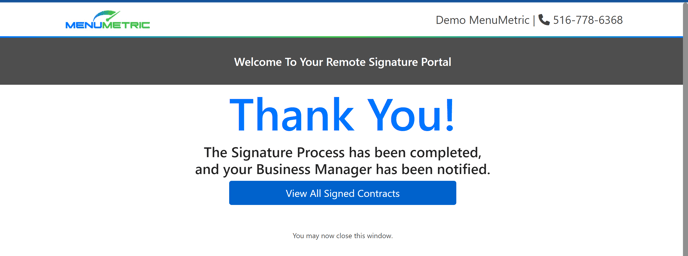
- They may select the View All Signed Contracts button to review, download, and print the signed contracts.
- The Business Manager will see that the status icons for the forms will have changed to a blue PDF, indicating that the contracts have successfully been electronically signed. The contract signatures can be viewed by the dealer by selecting the Display or Display All button.
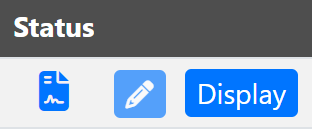

Note: If the status icon is yellow, the contract is only partially signed. If you have 2 buyers listed on a deal, only one of them has signed and the other buyer's signatures are still needed.